
Add printer
Search for the receipt printer in the POS app, select the printer type, assign receipts and save.
Prerequisite: You need the employee right Access to printer settings. Without this right, the Printer entry will be missing from the settings.
You only need to set up a network printer once; after that, it's available at all cash registers in your restaurant. Bluetooth and USB printers only work on the device where you set them up. If your restaurant prints via the print hub, the message "Hub mode active" will appear next to Printer; in that case, you add the printers to the Servire Hub.
Search for printer
Step 1 of 2
Open printer list
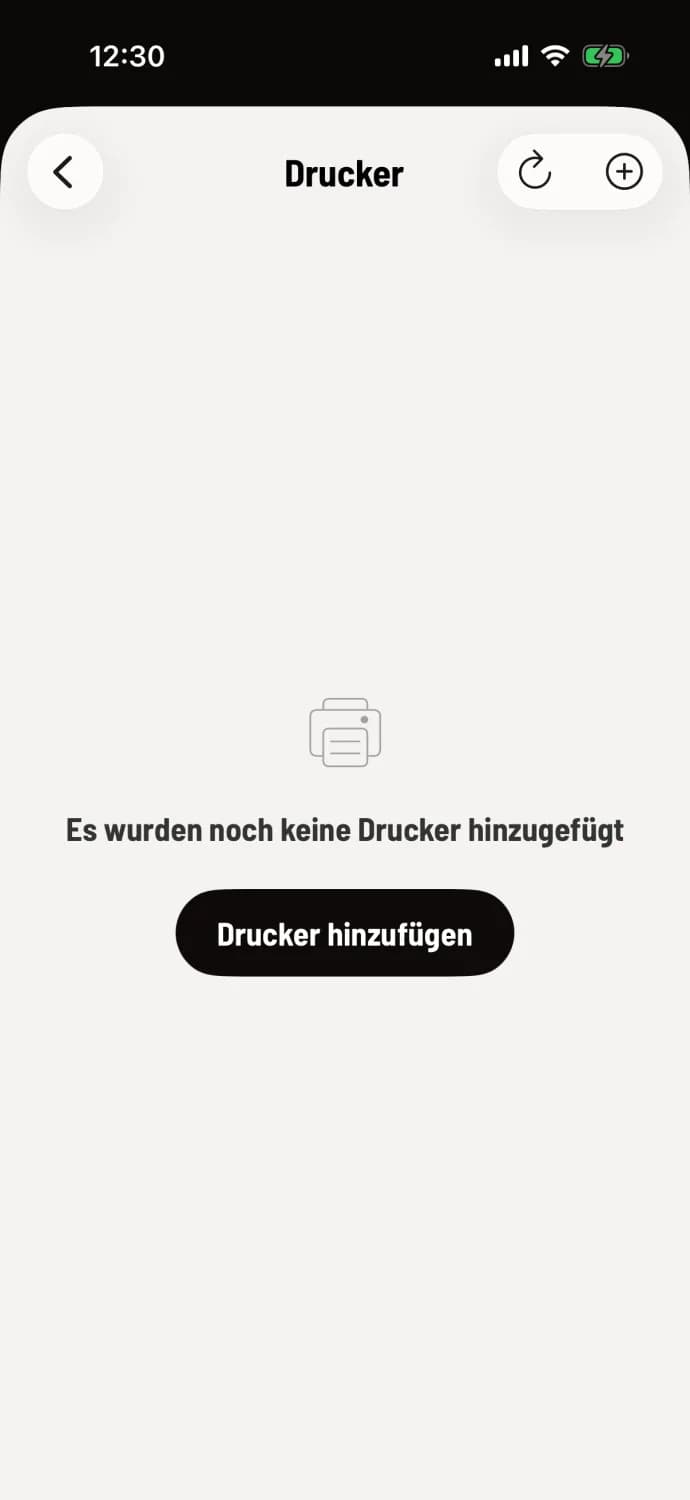
Open Overview (house icon in the top left) → Settings → Printers. If no printer is added, it will say "No printers have been added yet".
Step 2 of 2
Start search
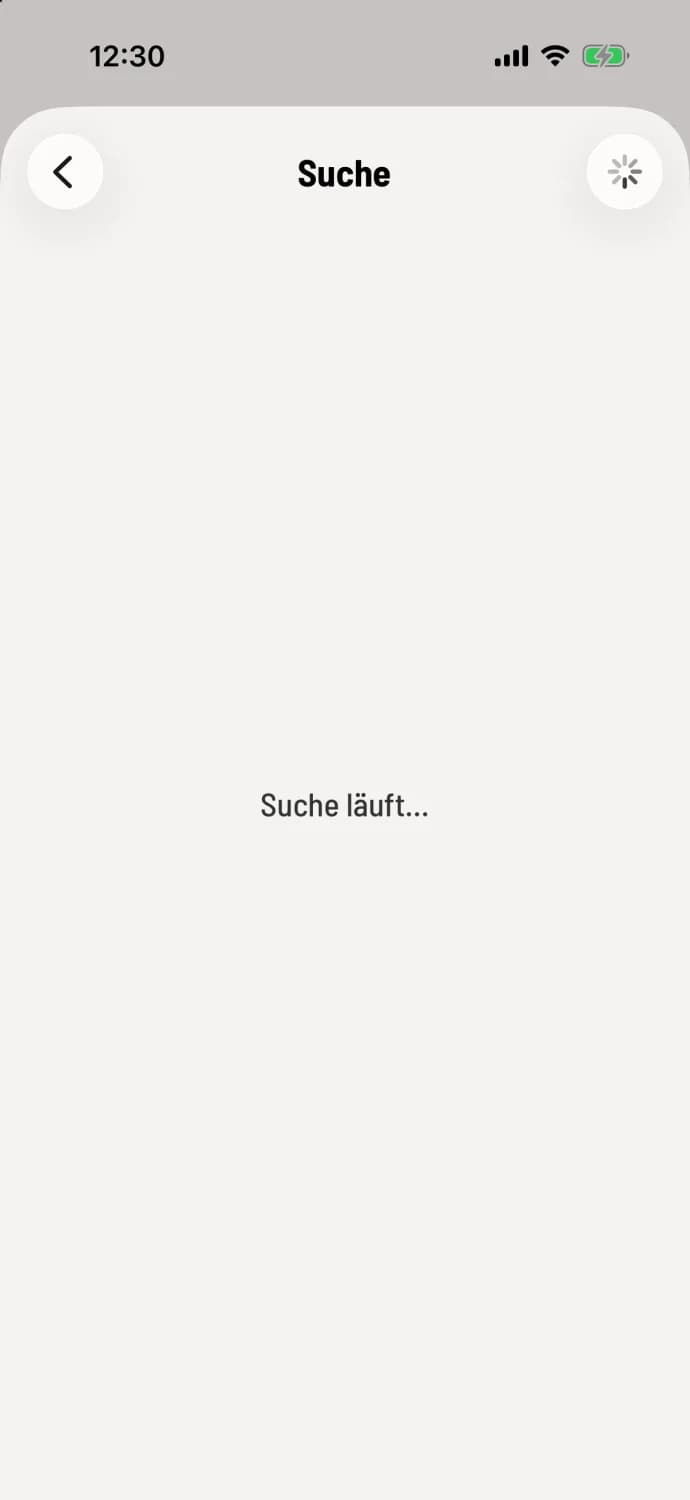
Tap + or Add Printer in the top right corner. The Search page will display Searching..., with a spinning wheel in the top right corner. Found printers will appear one by one, along with their address and how they were found. Printers that are already set up will be marked "(already added)". Tap your printer.
Allow access: The first time you use this feature, the cash register will request access to your local network (Android: to nearby devices). Tap Next and allow access.
Setting up the printer
Step 1 of 2
Check name and type
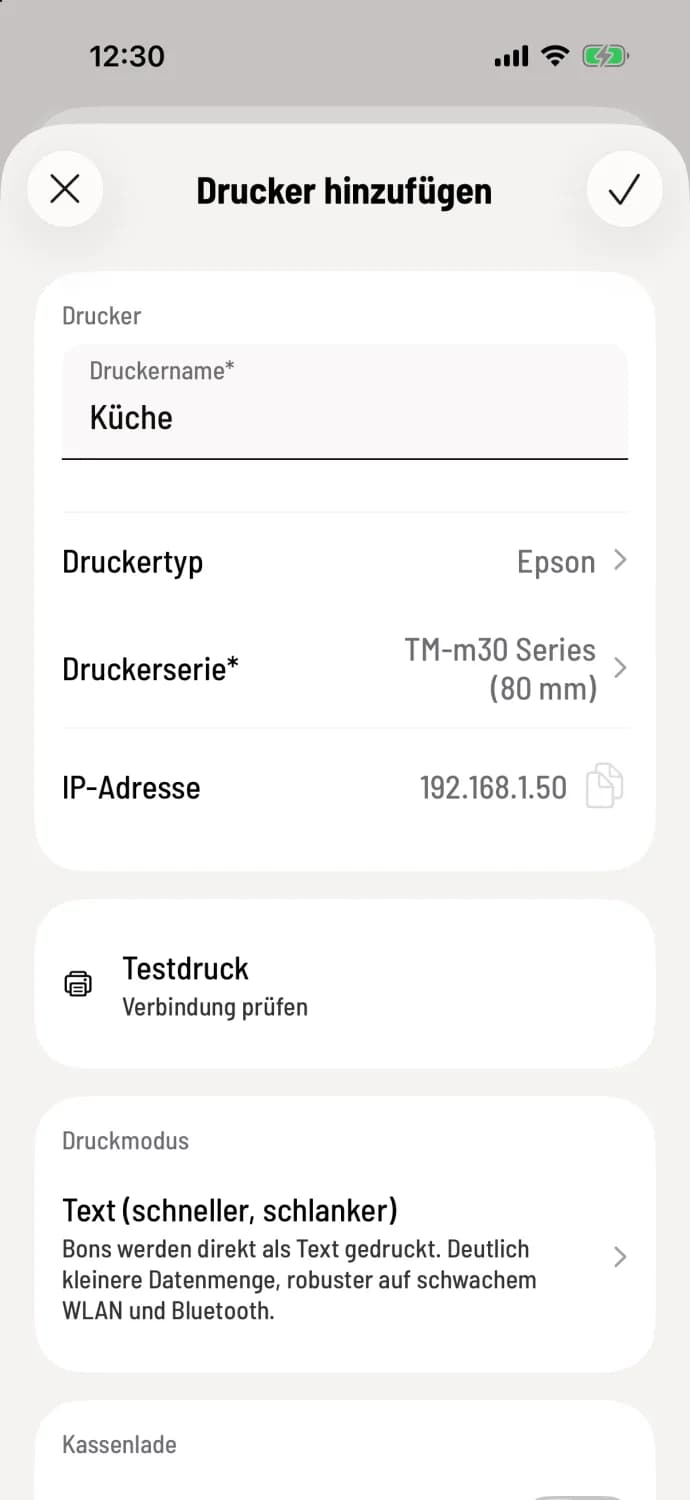
Under Printer Name, replace the name from the search with something unique like "Kitchen" or "counter". The POS system suggests the Printer Type based on the search result: Epson for Epson receipt printers, Network Printer (ESC/POS) for other manufacturers. Android also offers Star, and on Sunmi devices, Built-in Printer (Sunmi). If you change the type on an iPhone or iPad, the POS system clears the name field; then enter it again. Below that are IP Address, Test Print, Print Mode, and Cash Drawer.
Step 2 of 2
Assign and save receipts
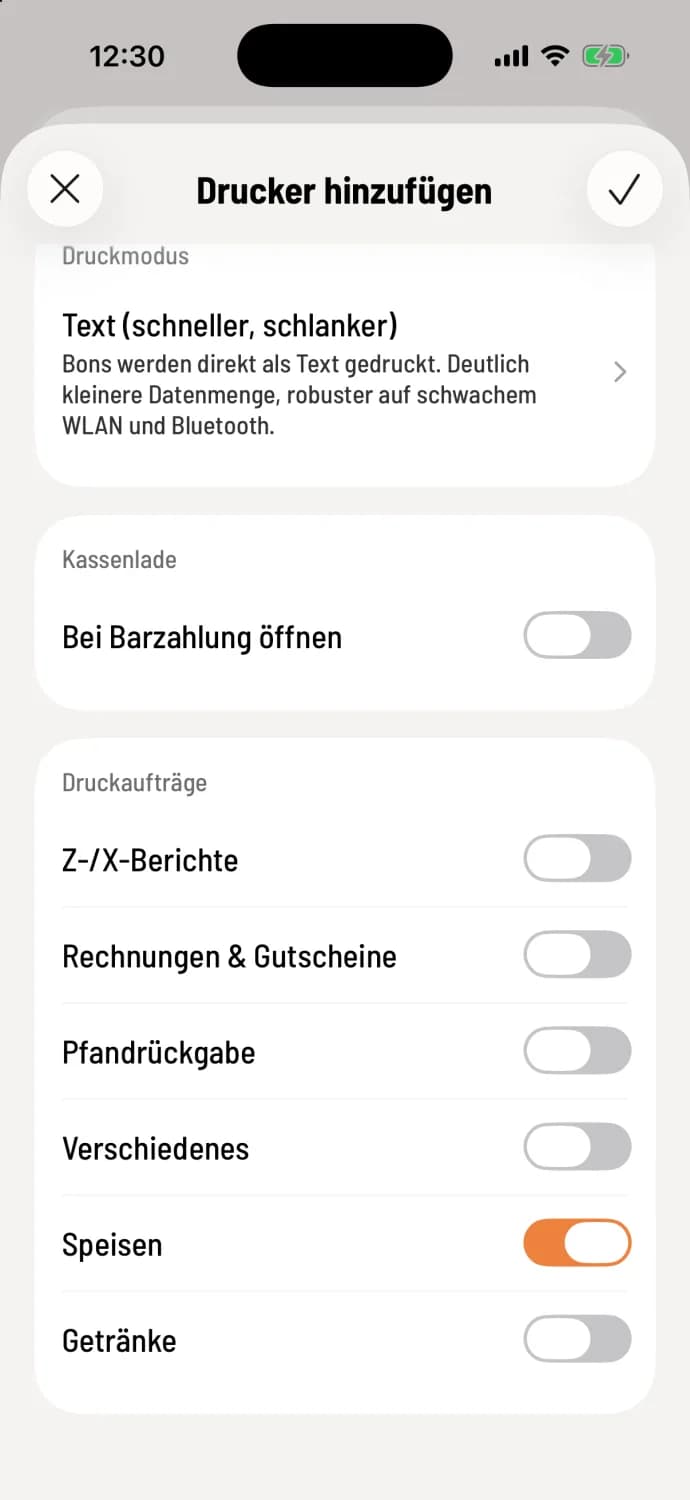
Depending on the printer type, select Printer Series or Paper Width. Under Print Jobs, select what the printer should print: Z/X Reports, Invoices & Vouchers, Deposit Returns, and then one line per item group, for example, Food for the kitchen. Save on iPhone or iPad by tapping the checkmark in the upper right corner, or on Android by tapping Save.
Good to know: On Android, saving only becomes active when at least one print job is enabled. You can only select the printer type when creating a print job.
Before saving, check if the printer responds with a test print: Test print. If the search finds nothing: Printer not found. Details about the fields: Printer series and paper width, character set.