
Filter prints and orders
Refine order lists and print jobs by department, employee, or receipt type.
The filter hides from the order list and print jobs what does not currently concern you, such as areas you are not using.
Open filter
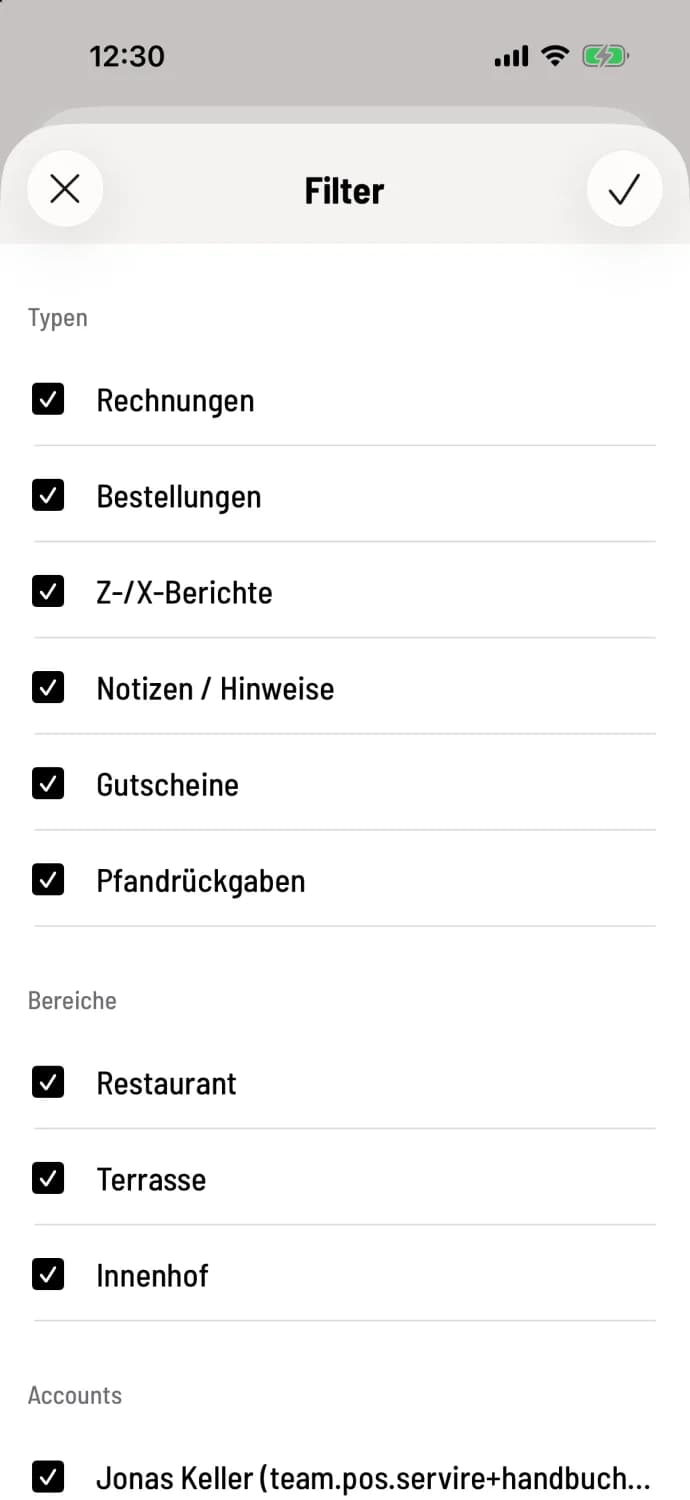
Tap the funnel icon in the top right of the list. At the top are the types: invoices, orders, Z/X reports, notes/advice, vouchers, and deposit returns. These only affect print jobs. Below are the areas, such as Restaurant, Terrace, and Courtyard, and the accounts, i.e., the employees.
Uncheck everything you don't want to see and save using the checkmark in the upper right corner. The X closes without making any changes. A colored dot on the funnel indicates that a filter is active.
The selection will be saved on this device for your account and the restaurant. Areas and employees apply to both lists, types only to print jobs. The Addressed and Transferred sections are not filtered. To reset, simply re-enable the checkboxes.
If you are looking for an invoice, leave only Invoices under Types.