
Switch view: Tables, express checkout or reservations
Specify for each device whether the cash register works with the table plan, the express checkout, or the reservation book.
The POS app has three views. You select them individually for each device: The iPad at reception shows the reservation book, the mobile phone in the service area the table plan, and the tablet at the counter the express checkout – all using the same account.
Table view – the table plan with areas. For restaurants, cafes and bars.
Express Checkout – menu and receipt on one screen. For counter, snack bar, bakeries, and food trucks.
Reservations – Reservation book with timeline and floor plan. For reception, see Reservations at the ticket counter.
Prerequisite: Reservations is only available if your restaurant has the Max plan and the Reservations module is enabled in Web desk . If either condition is no longer met, the device will automatically revert to the Table View.
Here's how to change the view
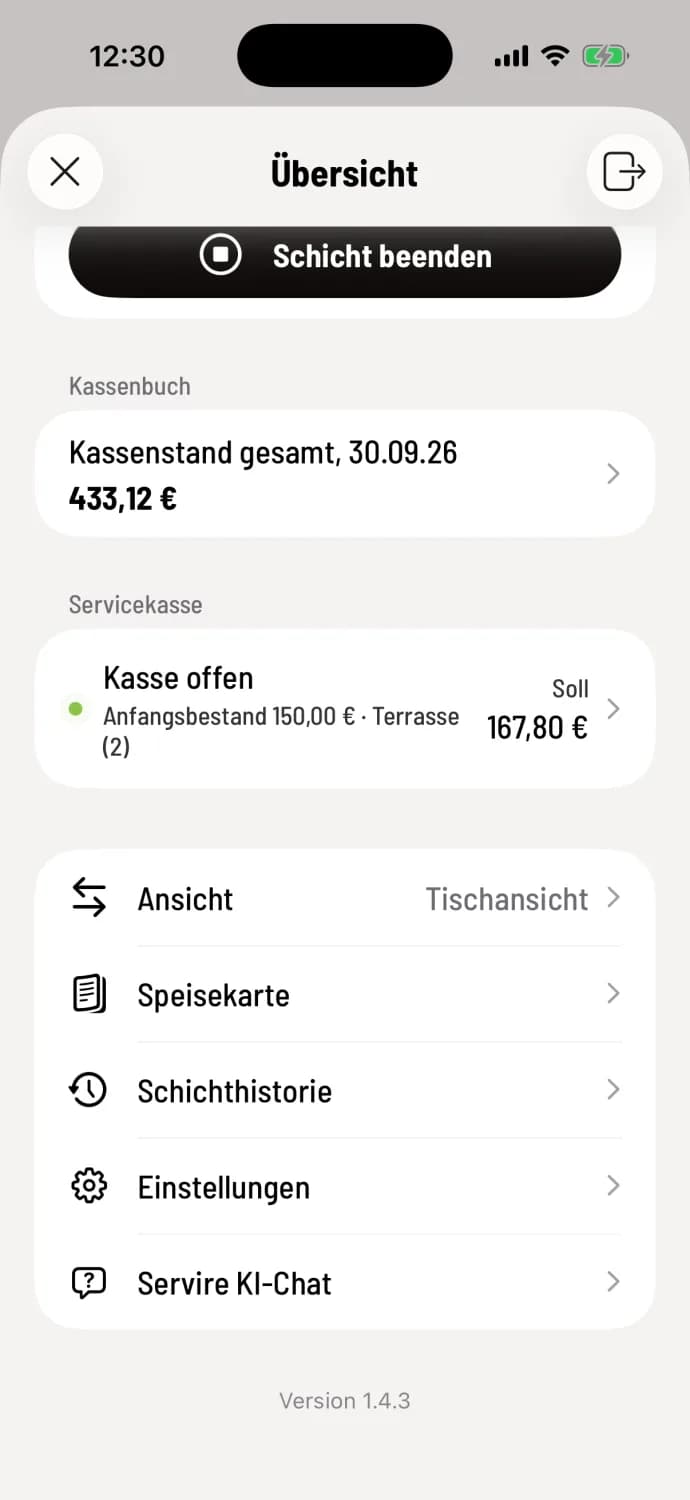
Step 1 of 2
Open overview
Tap the house icon in the top left corner. The View row with the current selection will then appear in the overview.
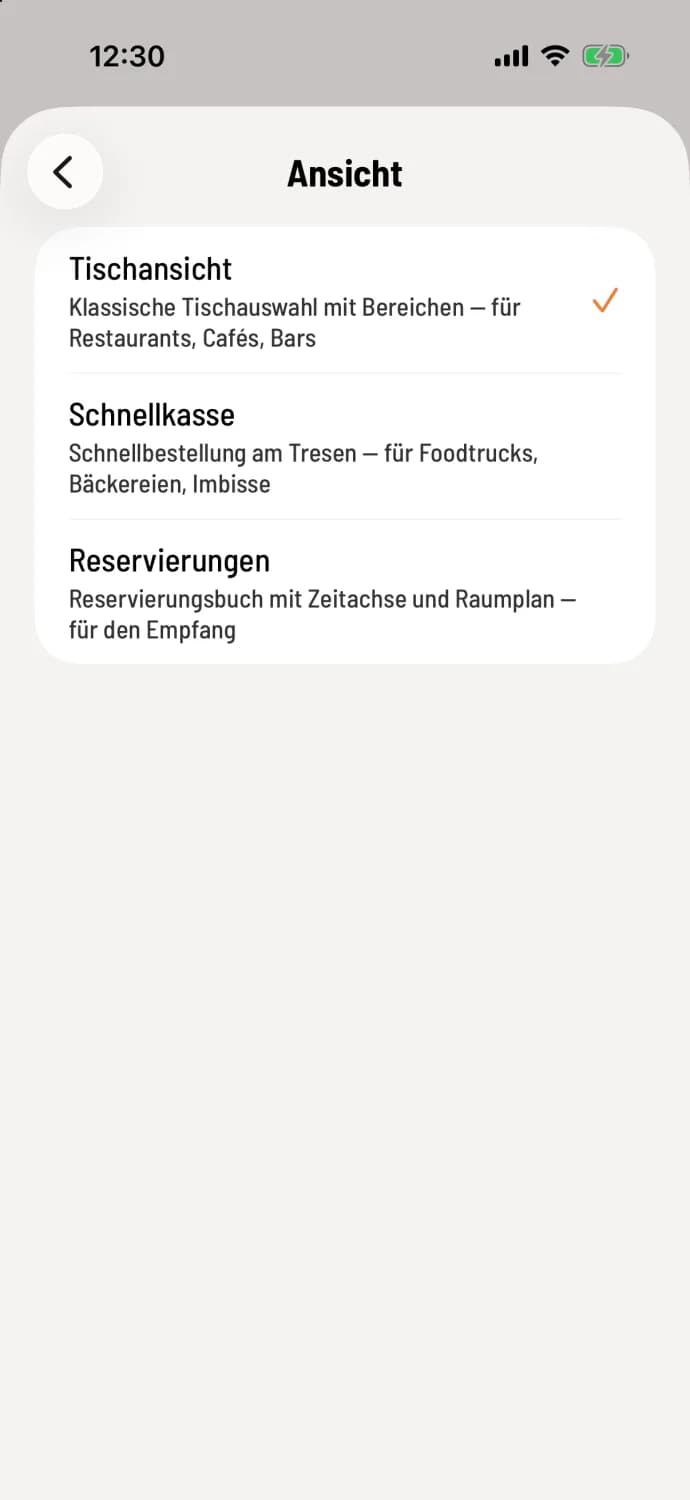
Step 2 of 2
Select view
Tap on View and select Table View, Express Checkout, or Reservations. The checkout will switch immediately and will start in this view from now on.
For a single order without a table, you don't need to switch: In the table plan , you start it via the round … button with To-Go order, see The round action button.