
Create, edit, and delete menus
This is how you create menus such as drinks, food or a lunch menu in the Web desk .
Menus are the top level of your offerings. They contain categories, and within those categories are the item. You create them in the Web desk under Menu, for example, Drinks, Food, or a Summer Menu. Each menu is its own tab above the item list.
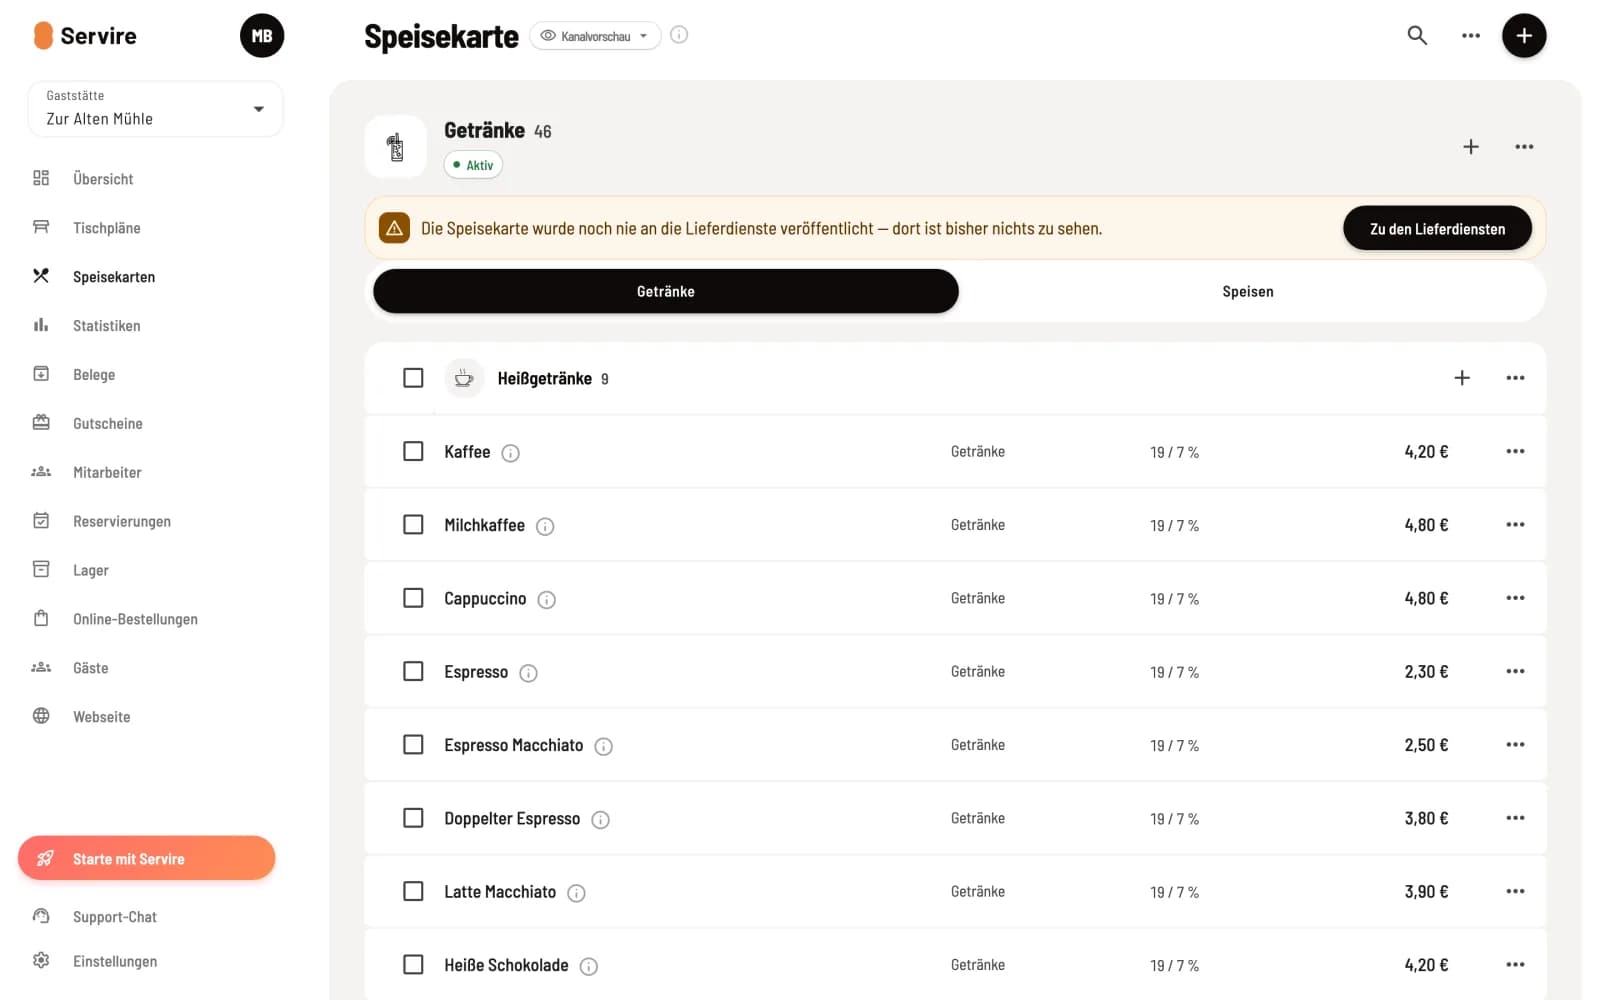
Create a new menu
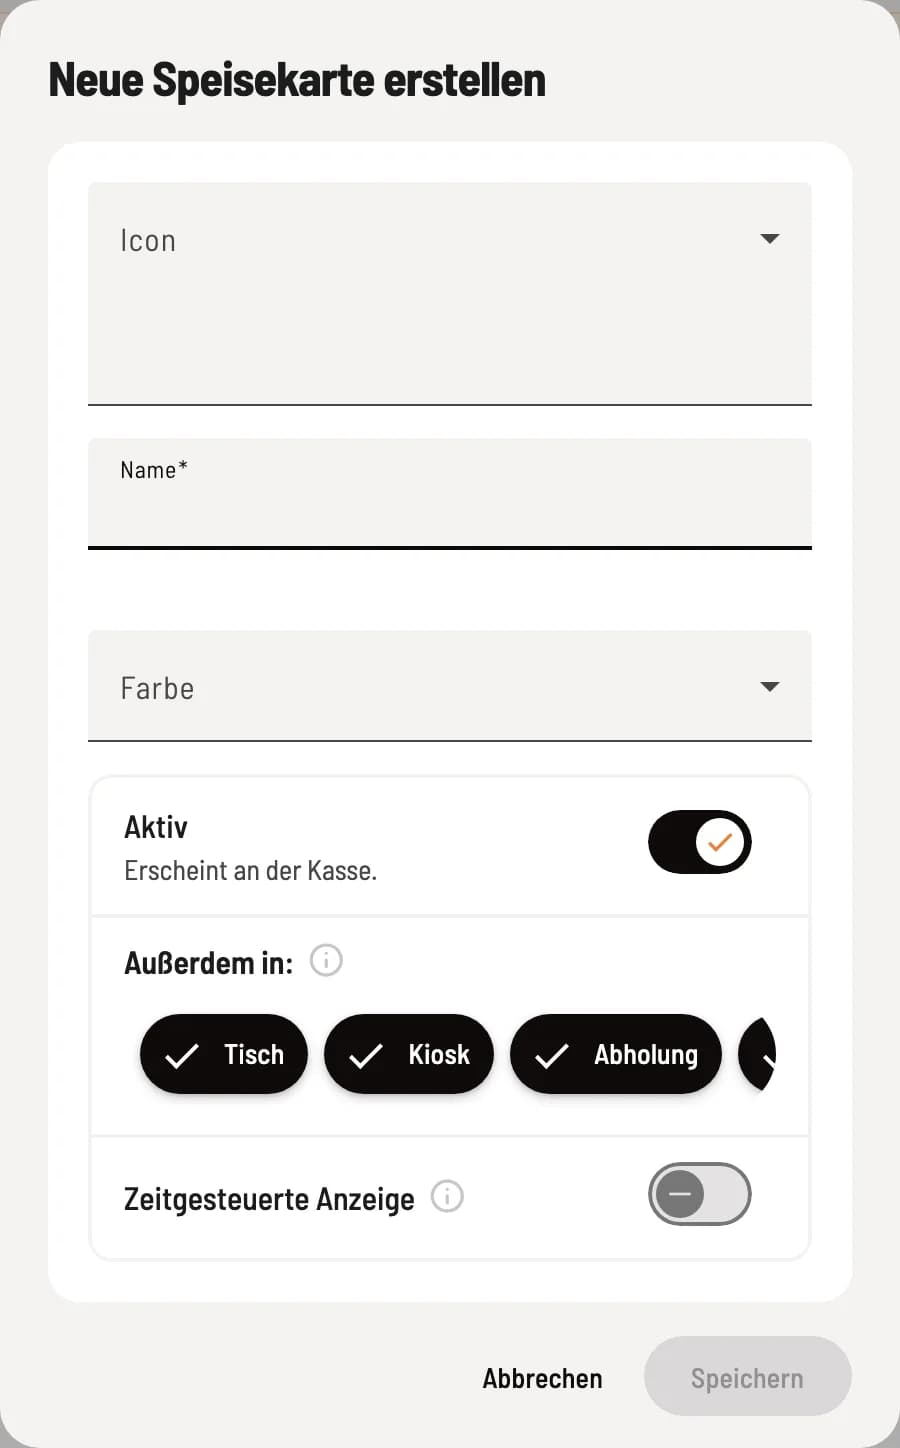
Create a menu
Click the round + button in the upper right corner (**Create menu **). Select an icon, enter a name (maximum 25 characters), and optionally a color. Categories and item tiles in the POS app will inherit this color unless they have their own. Save creates the menu as a new tab.
The lower section contains the Active switch. If it's off, the menu won't appear anywhere, not even at the cash register. Below that, you specify which channels the menu will appear on for guests and whether it's only visible at certain times. Both are explained under "Where an item appears" and "Display menu at a specific time."
Edit, duplicate, sort, delete menu
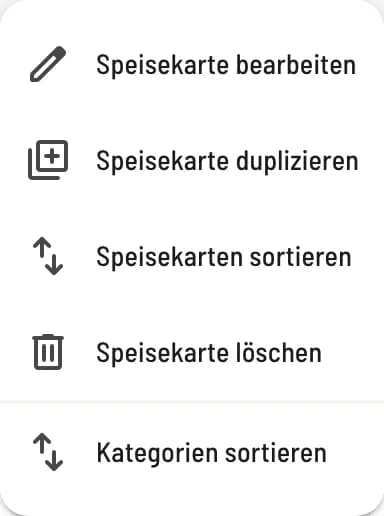
menu
Click on ⋯ in the top right corner of the menu . There you will find **Edit menu **, **Duplicate menu **, Sort Menus, **Delete menu **, and Sort Categories. The + next to it creates a new category on this menu.
**Duplicate menu ** copies the menu with all categories and items, see Duplicate.
Sort Menus changes the order of the tabs, see Sorting.
**Delete menu ** removes the menu along with all categories and items. This action cannot be undone.
Turn off instead of deleting
You can deactivate a summer map in winter using Activate instead of deleting it. All categories and item will remain.
Next, you create categories: Manage menu categories.