
Specify what a printer prints
Each printer must be switched on to specify which receipts it receives: reports, receipts, deposits, online orders and individual product groups.
With multiple printers, you can distribute the orders: food to the kitchen, drinks to the bar, receipts to the counter. You configure this for each printer under Print Jobs. With Print Hub, you select the same option in the Servire Hub: Set up Print Hub.
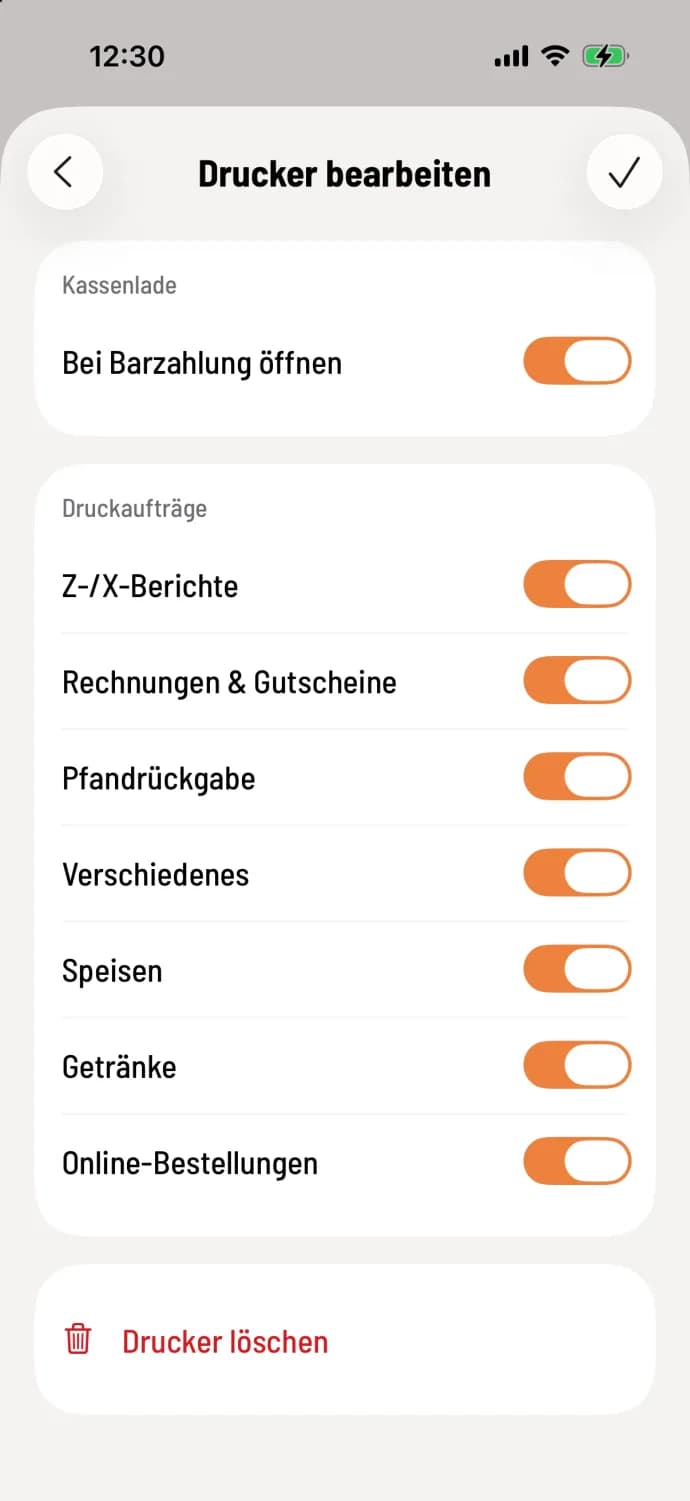
Enable print jobs
Open the printer settings under Overview (house icon in the top left) → Settings → Printers, scroll to Print Jobs and select what you want it to print. Save with the checkmark (Android: Save).
What the switches mean
Z/X Reports – shift and employee reports.
Invoices & Vouchers – Receipts, interim invoices, cancellation receipts, incoming invoices and payments, sold vouchers and also the return of deposits upon payout.
Deposit Return – only for reprinting a deposit return from the shift history.
Online Orders – a total voucher for the service with each new online order and with its cancellation, see below.
One line per item group, such as Miscellaneous, Food or Drinks – the order slips with the items in this group.
You manage the article groups in the Web desk: Manage article groups. A new group will appear here automatically, but will be deactivated.
A receipt is sent to every printer where the appropriate switch is activated. If drinks are dispensed from two printers, the receipt is sent twice.
Don't forget anything: Assign at least one printer to each receipt type and product group. Otherwise, this receipt won't print anywhere. If you delete a printer, check the remaining ones afterward.
You can set whether a group receives a receipt per item, per group or per piece under Print settings: Split, Prices, Copy.
Total receipt for online orders
With online orders, the printer prints a single receipt with all items, prices, and total for every new online order, including those from the order terminal and delivery services. This applies regardless of the item category or the time of printing. The receipt displays PAID or PAYMENT ON COLLECTION at the top. For delivery services, it shows the customer's name and order number, followed by the pickup number or table, pickup time, and the customer's name. If the order has not yet been accepted, it displays WAIT FOR ACCEPTANCE. If the order is rejected or canceled, a second receipt is printed with CANCELLED.
Good to know: The total receipt is not a receipt for the customer. Without a print center, the POS system prints it using the Print Online Orders function: Print online orders at the POS. Older versions of the POS app on iPhone and iPad do not recognize this option and will disable it again when saving the printer settings. Therefore, please update all devices.