
Take out a subscription for a restaurant
Enter your billing information, select your plan and pay for your subscription via Stripe.
Requirement: Only the owner of a restaurant can take out a subscription. It applies to that specific restaurant; if you own multiple establishments, you must choose a separate plan for each one.
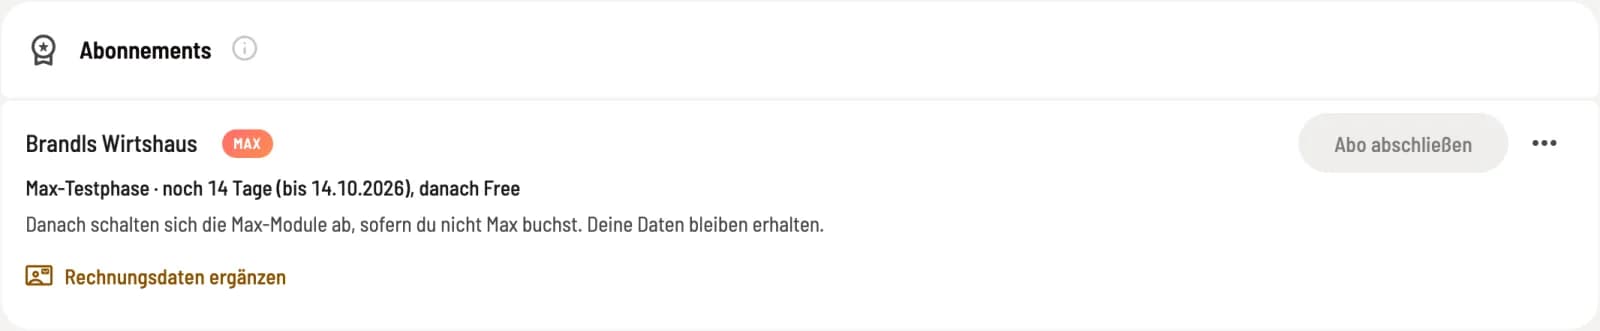
In the Web desk , open Settings → Subscription or click on Start Servire at the bottom of the sidebar. Under Subscriptions, you will find every restaurant you have created.
Step 1 of 3
Find a restaurant
If billing information is missing, Subscribe will be grayed out. Then click on Add billing information in the row.
Step 2 of 3
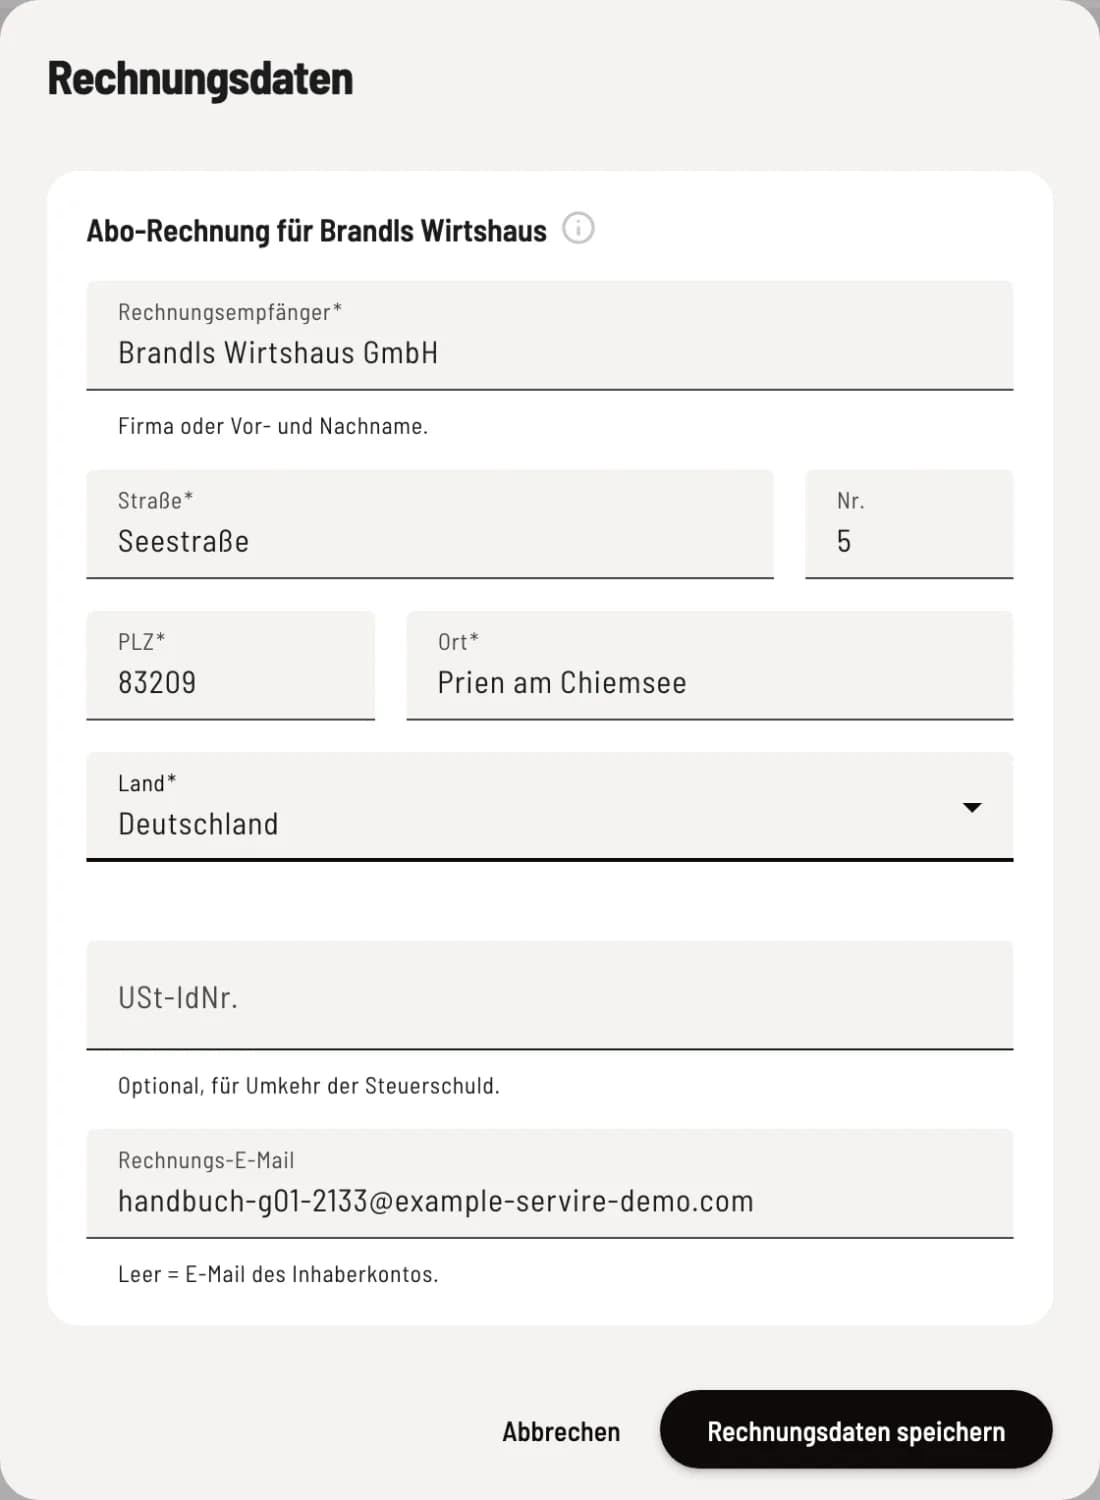
Enter invoice details
Enter the invoice recipient, street, number, postal code, city, and country; the restaurant's master data will be suggested. VAT ID number and invoice email address are optional. A subscription is currently only possible with a German address. Click on Save invoice details.
Step 3 of 3
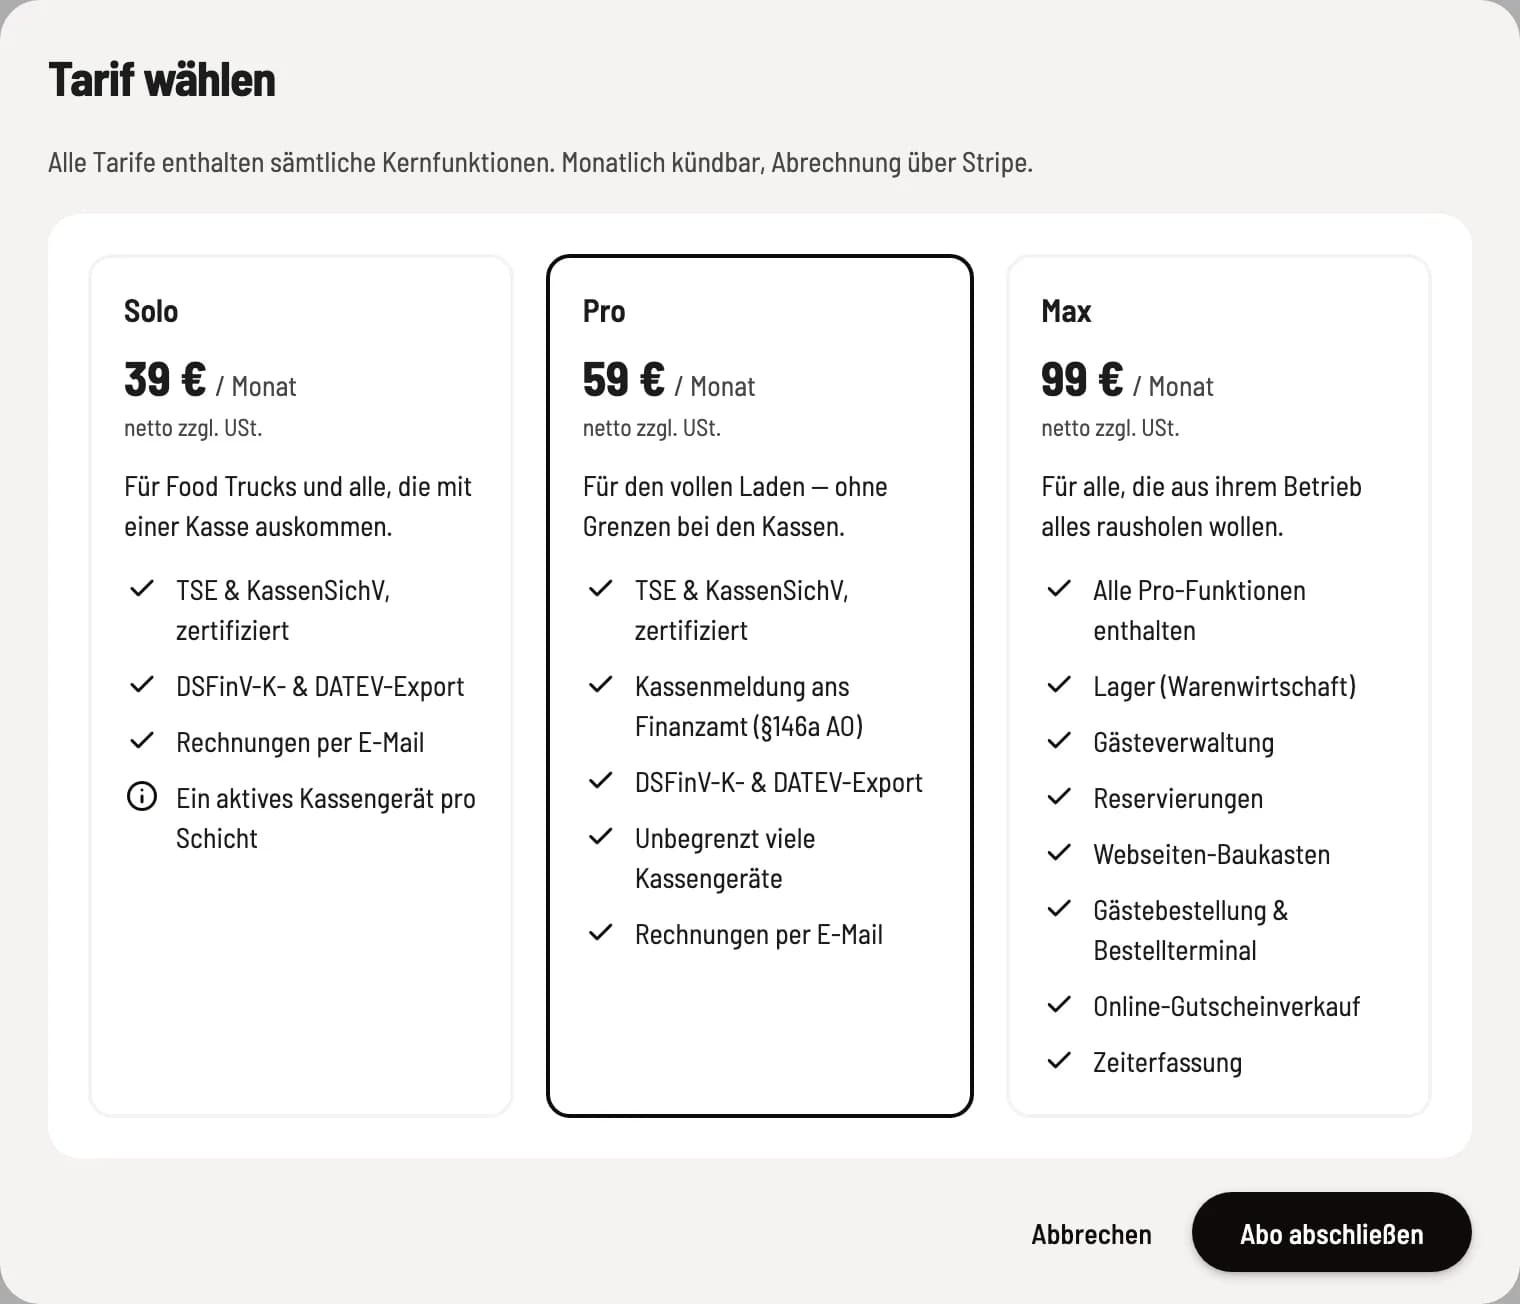
Choose a plan
Click on Subscribe. The Choose Plan dialog will display Solo, Pro, and Max with their prices and features. Select a plan and click on Subscribe.
If you have a partner code, you can enter it beforehand via … → Partner Code: Enter partner code for a subscription. What the plans include: Plans and trial period.
Pay with Stripe
You will be redirected to Stripe's payment page. There, please review the amount, payment method, and billing information, and confirm. Afterwards, the Web desk will display Welcome to Servire …! with the restaurant for which the subscription is now active.
During the Max Trial Period: If the restaurant's 14-day Max Trial Period is still running, you can still subscribe. The higher rate applies until the end of the trial period, and the subscribed rate applies thereafter. Billing begins from the date of subscription.
Then set up the TSE .
On the confirmation page, **Next step: Set up TSE ** follows. Create TSE now starts the setup of the Technical Security Device, which signs each receipt; Set up later leads to the dashboard. The subscription alone does not create a TSE: Create TSE.
You can change your tariff, payment method and cancel later in the restaurant's menu ….