
Import and export coupons
Here's how to transfer coupons from a previous system via CSV file and export your coupon list.
You can import vouchers from a previous system or online shop via a CSV file so they can be redeemed at the checkout. In the Web desk, open Vouchers and click on … at the top.
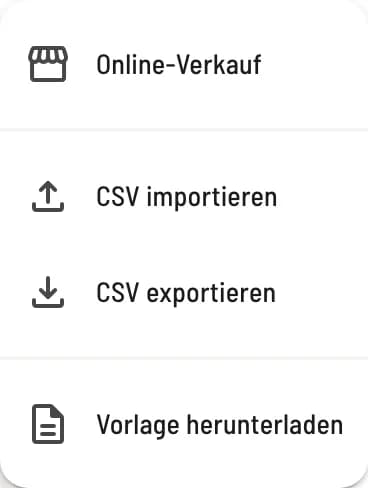
Menu …
Import CSV opens the import process, Export CSV saves the list, Download template provides a blank template.
Template and columns
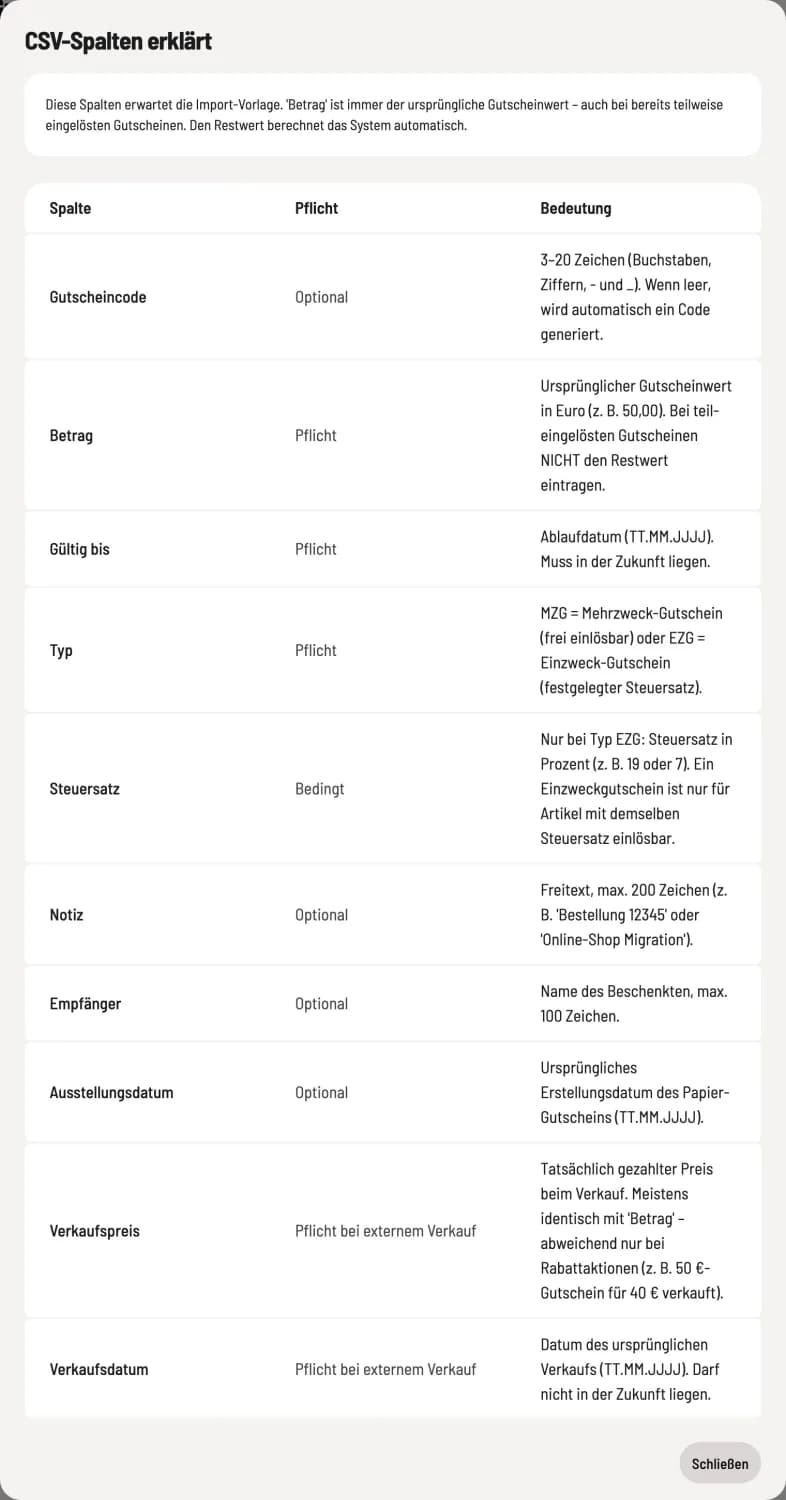
CSV columns explained
The info icon in the import dialog explains each column. Required fields are Amount, Valid until (in the future), and Type (MZG or EZG); for EZG, also a Tax rate that you have defined. Voucher code is optional; if left blank, Servire will generate one. Dates must be entered in DD.MM.YYYY format.
Always enter the original voucher value under Amount, never the remaining balance. Amounts already redeemed belong in Redeemed Amount with Redemption Date; Servire calculates the remaining balance automatically.
Import
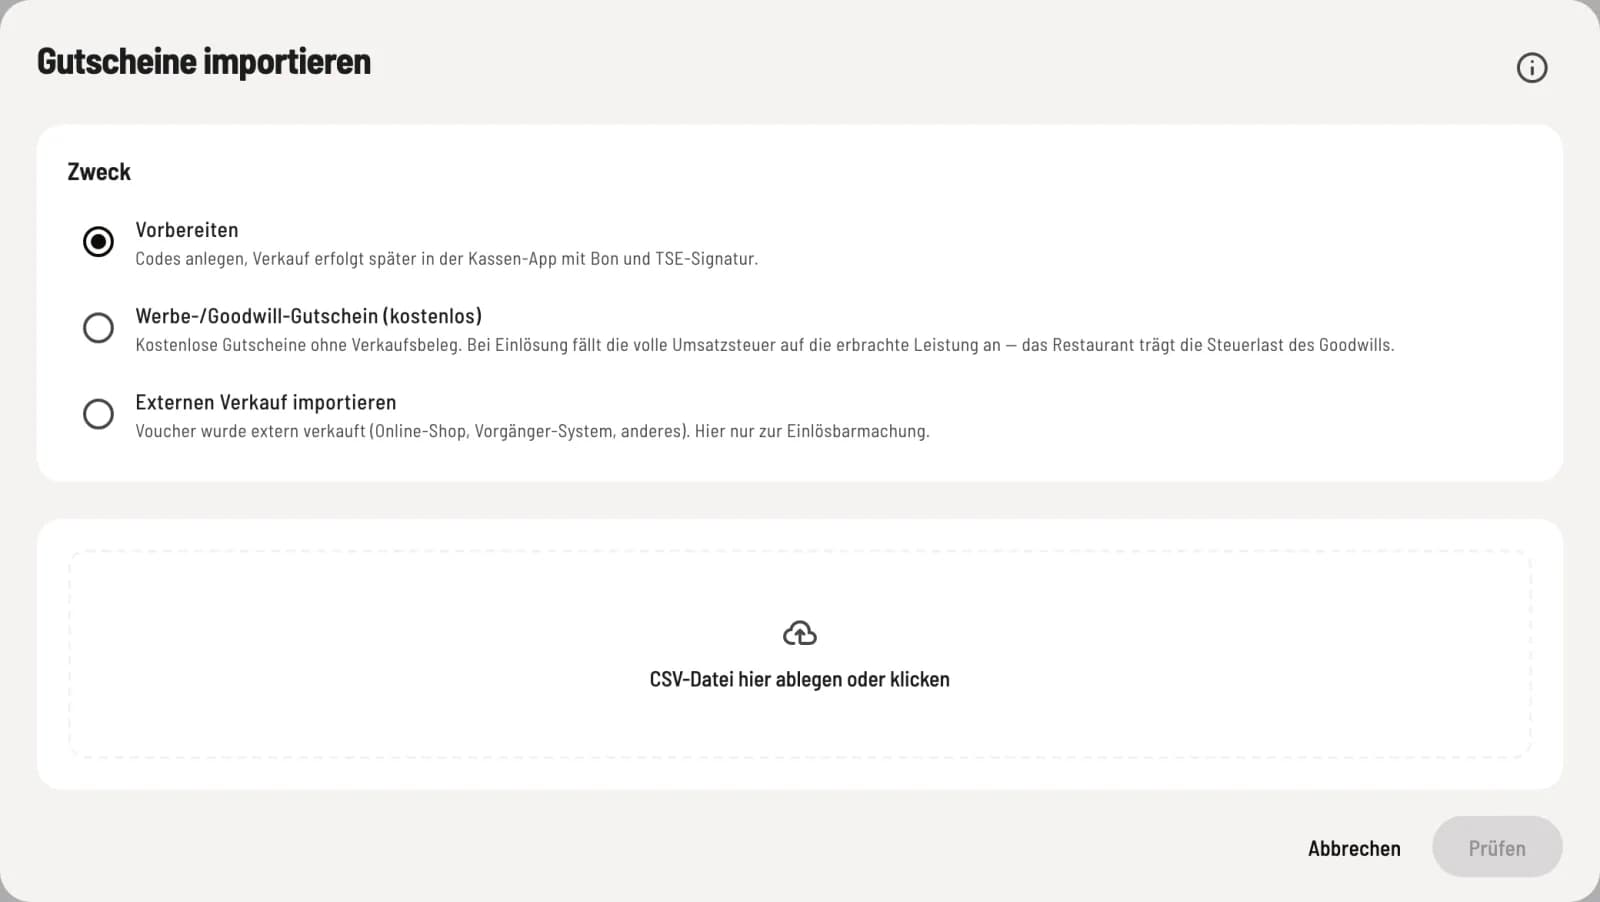
Select and check purpose
Select the purpose: Prepare (for later sale at checkout), Promotional/Goodwill Voucher (free) (MZG only), or Import External Sales for vouchers that have already been sold; Sale Price and Sale Date are mandatory for each line. Save the file (maximum 1 MB) and click Check.
The preview shows each row with its status: New, Duplicate (exists), Duplicate in file, or Error, along with a message. Only new rows are created using ... Import coupons.
Export
Export CSV saves the currently displayed list with all columns and the "Source" column. You can export selected coupons via the bar that appears at the bottom (Export CSV).