
Employee permissions in detail
What templates, the main switch, the cash register app, and the Web desk can do, and how each individual right can be edited in the employee dialog.
You assign permissions in the Web desk dialog box Edit Employee, see Edit Employee Data and Permissions. There are four sections on the right: Template, At the Checkout, Manage · Checkout + Web desk, and ** Web desk**. Each permission can only be granted once. It applies wherever it is used.
Who can do what? Only the owner can change permissions. They always have full rights; their buttons are locked. Everyone else sees the message: Only the owner of the location can change permissions.
Permissions per plan: The dialog hides permissions for modules not included in your plan. Reservations, shift schedule, team area, inventory, guests, and online orders are included in the Max plan, while accounting integration is included in the paid plans. Time tracking & payroll management is visible in every plan because it also opens the employee list.
Templates
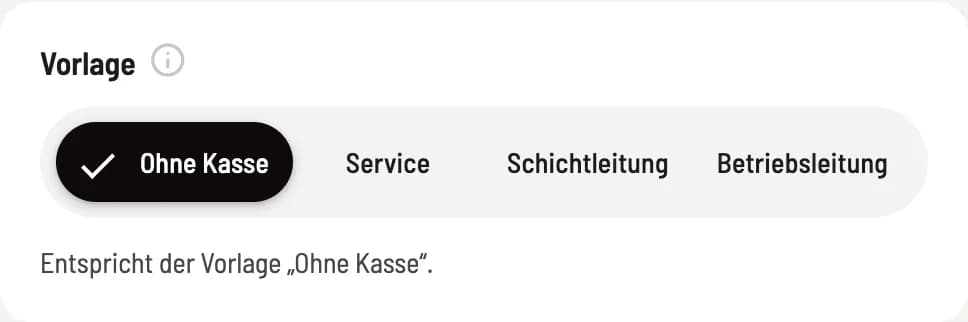
Select template
Clicking on a template automatically sets all the switches below it accordingly. If you then change a switch, it will say Individual – deviates from the templates. The changes are only saved when you click Save.
Without a cash register: neither a cash register app nor a Web desk. The app only displays clocking in and out, your own times and dates. For kitchen and reception, see cash register for clocking in and out only.
Service: POS app with checkout screen, ordering, payment, opening the cash drawer, and marking item as sold out. No Web desk.
Shift Management: This includes managing and canceling discounts and surcharges, cancellations, all shift data, printer settings, the cash register book, and reservations. View receipts and reports and manage the shift schedule in the Web desk .
Operations Management: everything from shift management, plus **Edit menu **, Manage Guests and the other areas in the Web desk.
Four switches do not affect Service, Shift Management, and Operations Management: Allow setting up payment providers (SumUp, Stripe, PayPal), Change payment settings, Manage accounting integration, and the Team area. Only Without POS disables the first three and enables the Team area. Time clock for the team does not set a template; you always assign this individually.
New Employees: Anyone who connects to your restaurant using the company PIN will start with the Service template and the Team area. If someone returns after leaving, they will regain their previous permissions. If a previously connected employee enters the PIN again, their permissions remain unchanged.
At the checkout
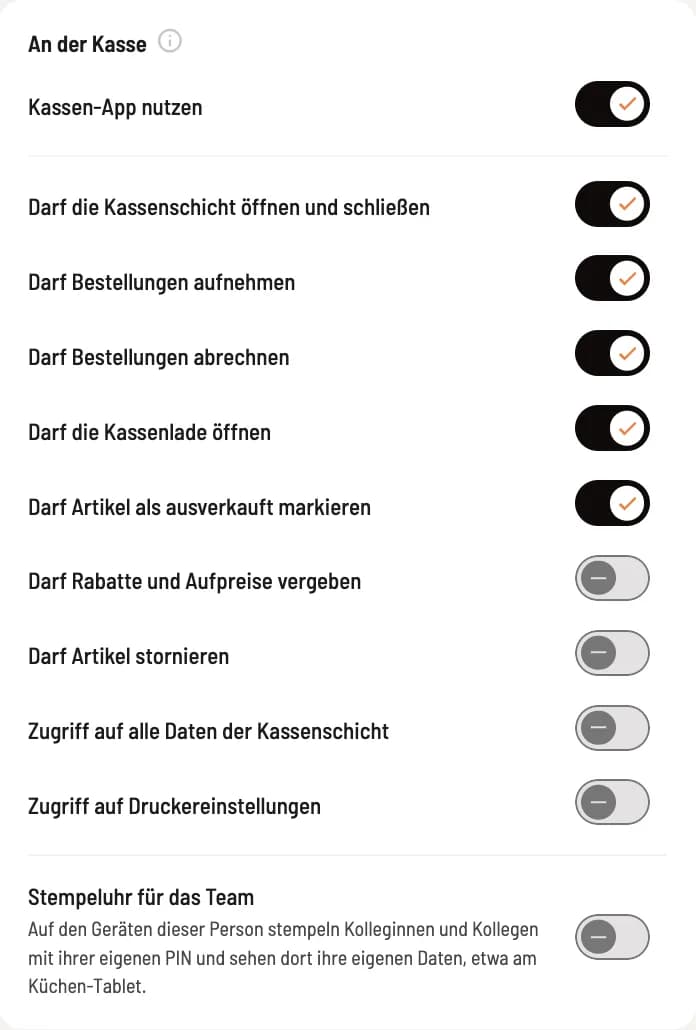
Rights at the checkout
These toggles apply to the POS app on iPad, iPhone, and Android. The main toggle, Use POS App, is at the top. Only when it's activated will the POS permissions below it appear; if you deactivate it, they remain saved but are inactive. The Service template is selected in the image.
Using the POS app: This is the main switch for the cash register. If it's off, the app only displays clocking in, your own times and dates, and your own account; see Cash register for clocking in only.
May open and close the cash register shift: Start and end the cash register shift, including cash count, clearing, and Z-report. Without this right, it says "The cash register shift is opened by the shift supervisor." Anyone with access to the cash book may also perform a forgotten cash count.
May take orders: Record item at tables and at the counter , notify the kitchen and release courses at a timed interval.
Allowed to process orders: Collecting payments from tables and bar counters, issuing and settling invoices, selling vouchers, topping up balances, and opening their own cash register. Without this right, the person cannot cancel any receipts for the current shift .
May open the cash drawer: Open the drawer without making a sale. It will still open when a sale is made.
Can mark item as sold out: block and then re-enable an item at checkout.
May grant discounts and surcharges: Discounts and surcharges on individual item or the entire invoice.
**Cancel item **: Cancel sent item and receipts, and refund voucher balances. Each user must remove any unsent items themselves.
Access to all data of the cashier shift: View all transactions and reports of the shift . Without this permission, the person only sees their own.
Accessing printer settings: To set up and change printers in the POS app, go to General and select print options.
Team Time Clock: This works even without a POS app and only appears when time tracking is active. Colleagues clock in and out on this person's devices using their own PIN and can see their own data there, for example, on the kitchen tablet or at the main cash register. Without this permission, each person only clocks in for themselves; the holder always has this permission. See Clocking in for Colleagues.
Cashier shift and Team time clock also work in older app versions because Servire additionally checks them on the server. Use the POS app and the restrictions for vouchers, service checkout, surcharges, print options, waiting list, and "Notify kitchen" function with the current app. Therefore, update all devices.
Cash register and Web desk
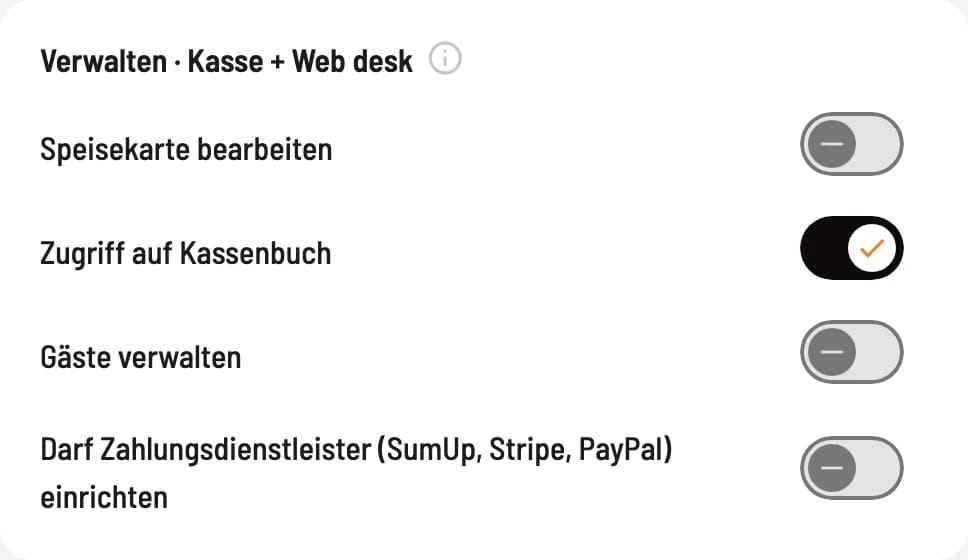
One switch for both locations
The permissions under Manage · POS + Web desk apply at the POS and in the Web desk. In the Web desk , they only take effect if **Use Web desk ** is also enabled.
**Edit menu **: create, change and import item via AI at the cash register; in the Web desk , the menus section.
Access to Cash Book: The cash book with the cash balance is accessible at the cash register; the cash book with its exports is accessible in the Web desk under Documents. Without this setting enabled, the cash book remains inaccessible everywhere.
Can cancel and delete reservations: Cancel, delete and mark reservations as no-shows, remove entries from the waiting list, at the checkout and in the Web desk.
Manage guests: at the checkout, for example, receipts can be retroactively assigned to a guest; in the Web desk , the Guests section contains guest data, stamps, import functions, and invitations. Data export, anonymization, and merging remain the responsibility of the owner.
Can set up payment service providers (SumUp, Stripe, PayPal): at the checkout, activate Tap to Pay and set up card readers; in the Web desk, connect and disconnect SumUp, Stripe, and PayPal.
Change Payment Settings: At the checkout, under Settings → General → Payments, you can configure payment methods, consumption type, receipt, Name / Guest, the action button entries, and vouchers. In the Web desk , under Settings → Checkout, you can select the Payments tab. The consumption type determines the tax rate for each item. This also includes enabling or disabling Cover Letters. When enabled, it works at the checkout even without **using the Web desk **; without this permission, Payments is only viewable there.
Web desk
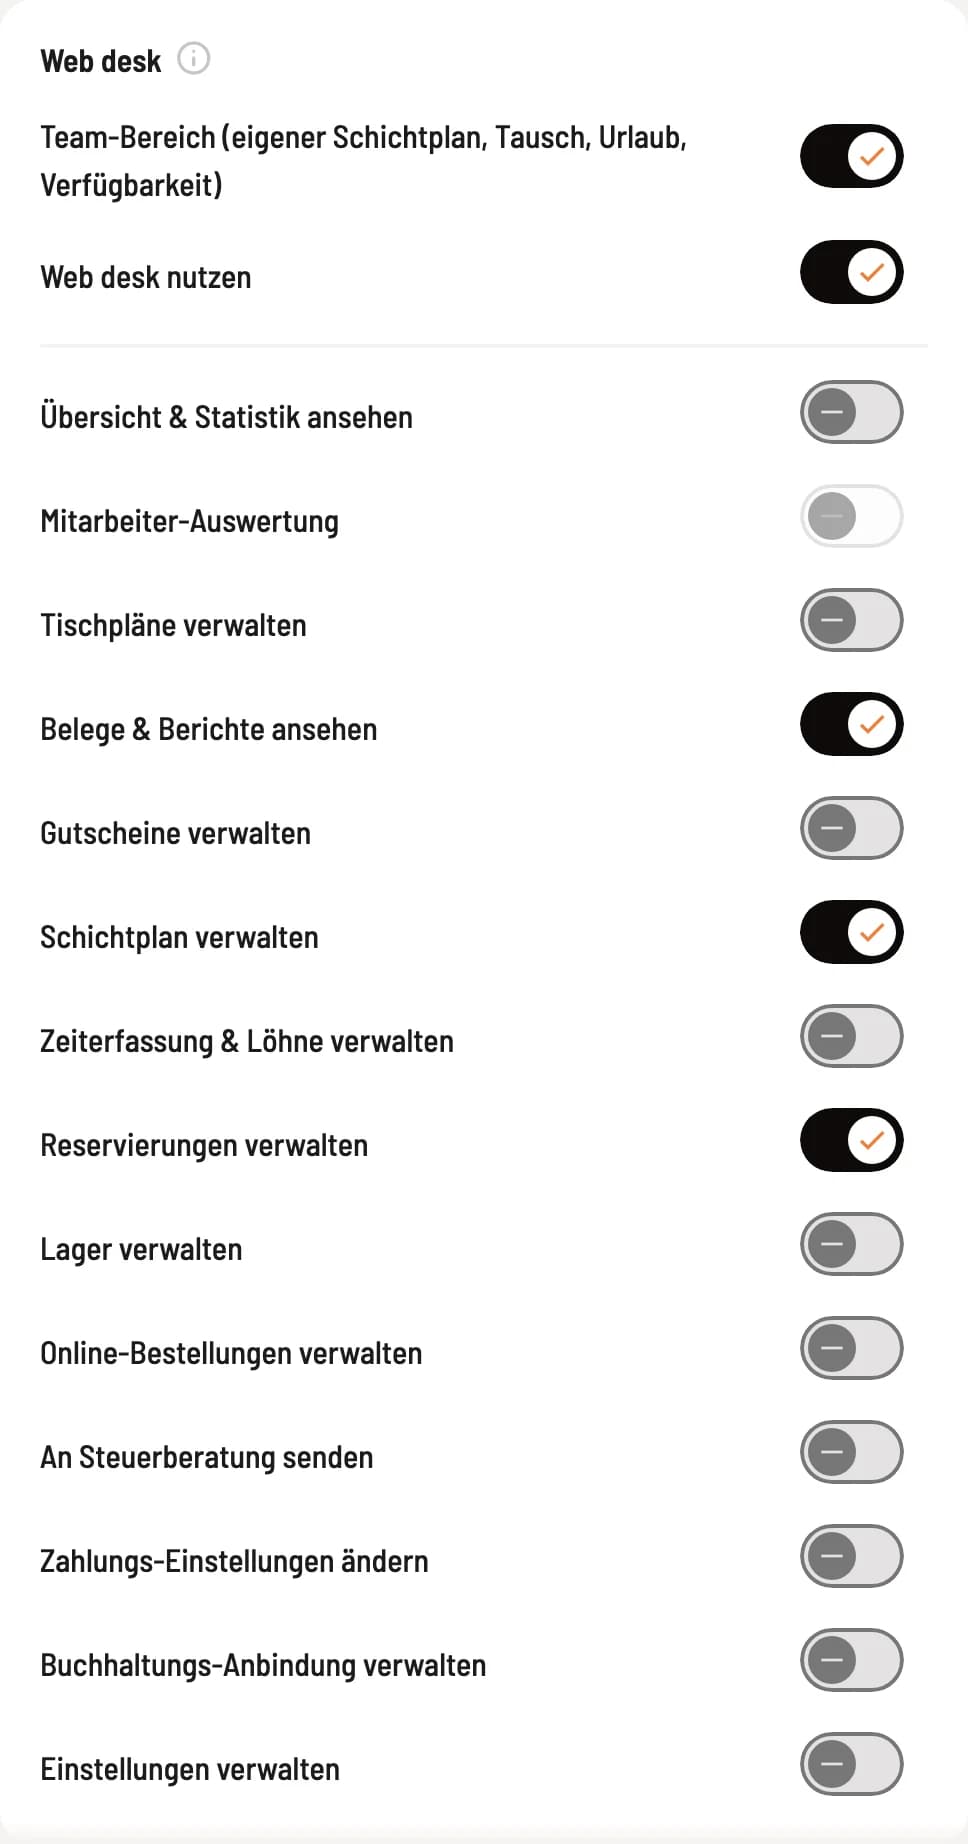
Main switches and areas
**Use Web desk ** is the main switch for logging into Web desk. The different sections only appear below it when it's switched on. If you switch it off, the section switches remain saved but no longer function, not even for exports.
Team Area (own shift schedule, swaps, vacation, availability): View, swap, or submit your own shifts in the browser, request vacation, and enter your availability. Without using ** Web desk **, the person only sees this area; see The Team Area for Employees.
View Overview & Statistics: the homepage Overview with sales and tip, the Statistics with exports, and reports via email. Without permission, the Web desk opens to the first area the user is authorized to access.
Employee Evaluation: Sales, tip, and cancellations per person. Because this is a performance review, you assign them individually. It only works in conjunction with View Overview & Statistics; without statistics, the switch is deactivated and locked.
Manage table plans: the Table Plans section.
View receipts & reports: under Receipts you will find receipts, shift and employee reports, invoices and the DATEV export.
Manage vouchers: the Vouchers section.
Manage shift schedules: Plan and publish shifts, enter absences, decide on requests, see rights for the duty roster.
Manage Time Tracking & Payroll: The Employees section contains the employee list, and with Max, also time tracking. You can also correct times, create payroll exports, and view them in the Payroll & Billing dialog.
Manage reservations: the Reservations section with its settings.
Manage inventory: Correct stock levels, book goods receipts, complete inventory counts, and order from suppliers.
Manage Online Orders: The Online Orders section includes guest orders and delivery services. Together with Manage Vouchers, it also includes the online sale of vouchers.
Send to tax advisor: Send cash register statements, DATEV posting batches and master data to a freely selectable email address.
Manage accounting integration: Connect sevdesk or DATEV , assign accounts and start transfers.
Manage settings: Under Settings, you'll find the tabs Restaurant, Cash Register, ** DATEV Export**, and ** TSE**, as well as the Google connection, the Website, and the opening hours. These tabs will remain locked without the necessary permissions.