
Correcting time entries and deciding on correction requests
This is how you change time entries, close forgotten entries, and decide on applications.
You can make corrections in the Web desk under Employees in the Time Tracking tab, directly in the All Entries list. Every change requires a justification and is permanently recorded in the entry's change log.
Prerequisite: The owner and anyone with the rights **Use Web desk ** and Manage Time Tracking & Payroll can make corrections. Four-eyes principle: Only the owner can correct their own times; everyone else must submit a request at the cash register or in the team area.
Edit completed entry
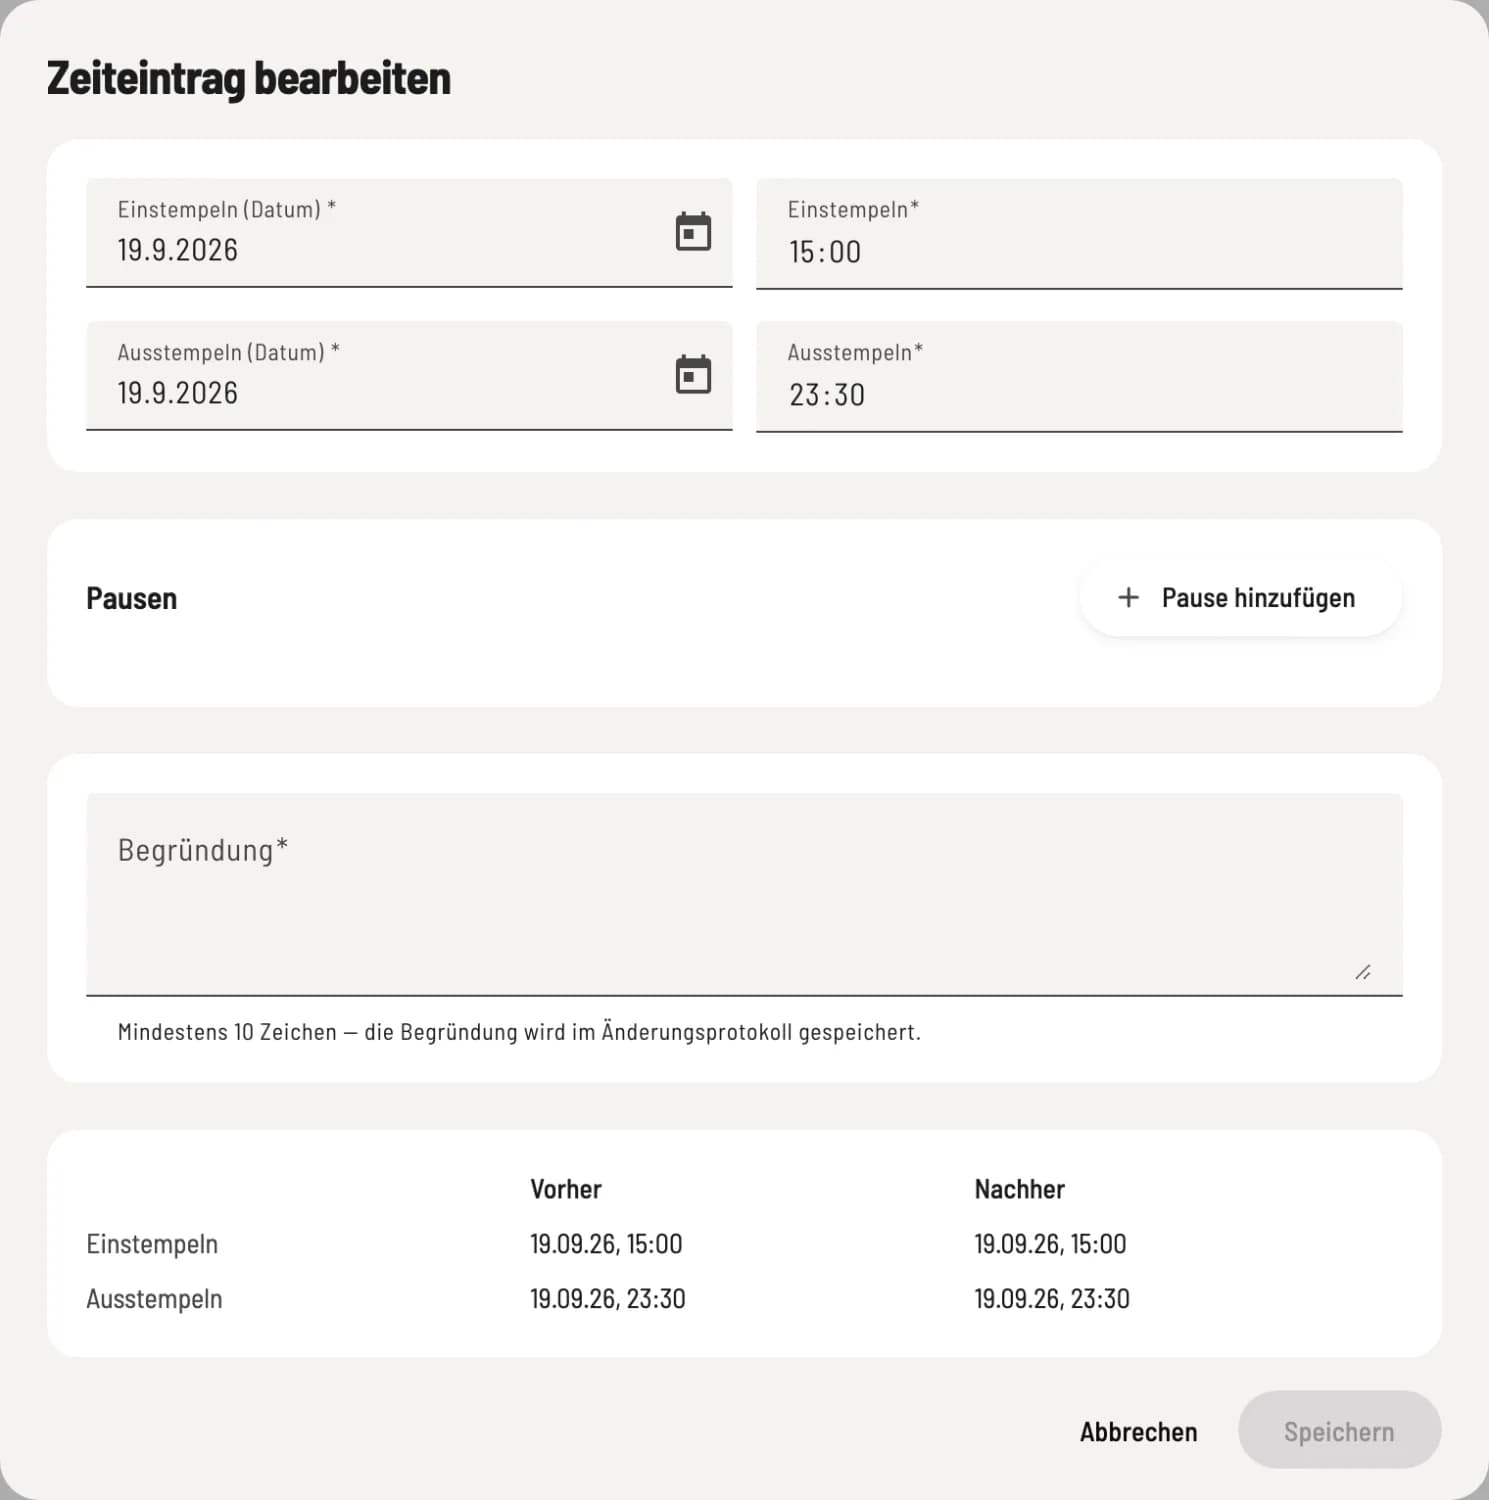
Times change and explain
In All Entries, click on the entry. Adjust Clock In, Clock Out, and Breaks; Add Break adds a break. The Before / After overview shows the change. The Reason must be at least 10 characters; otherwise, Save will be disabled.
Servire recalculates net pay, wages, and bonuses, and the entry is marked as Edited. Older entries can also be modified. Servire rejects future times and breaks outside of working hours.
Close open entry
If someone forgets to clock out, click on the current entry (status Active or Pause). In the Close Entry window, enter the end of work time and a reason, and click Close Entry. If you do nothing, Servire will close the entry automatically 16 hours after clocking in and mark it for review.
Correction requests decide

Open correction requests
Requests from the cash register and the team area can be found under Employees in the Requests tab, in the Open Correction Requests section. The Open Requests tile displays them, and Check Requests leads to them. Each request shows the current and requested time and the reason for the correction.
Approve accepts the values and recalculates the entry. With Reject, you can enter a comment (optional) and confirm with Confirm Rejection. How employees submit a request: Requesting a correction to a working time.