
Create payroll export and submit it to the payroll office
Here's how to check the billing month, generate the file, and manage previous exports.
The payroll export process consists of three steps: select the month, review the preliminary results, and generate the file. The file will only be created once all restrictions have been lifted and you have provided all required confirmations. The necessary pre-configuration steps are explained in the "Setting up payroll export" section.
Step 1 of 4
Open payroll export
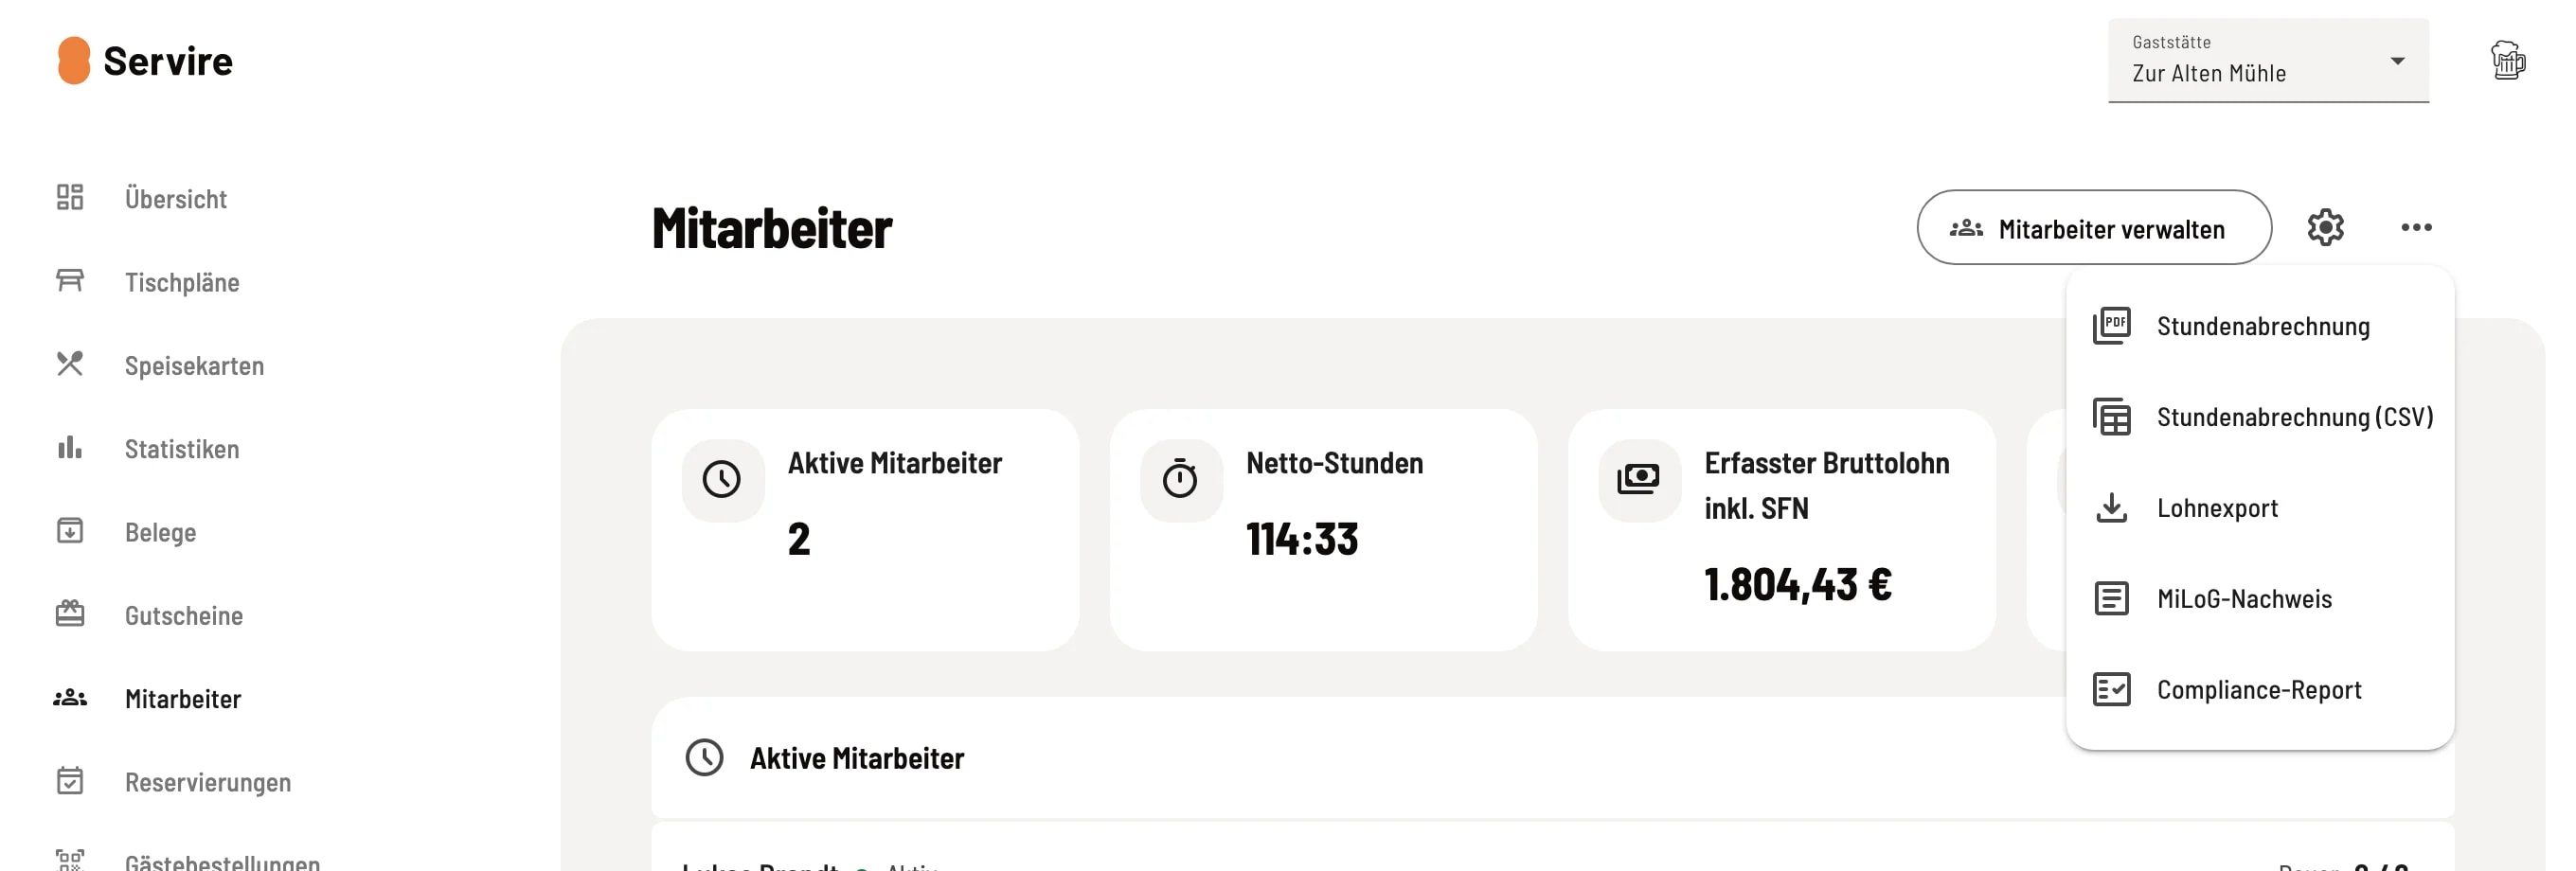
Navigate to Employees, open the menu with the three dots in the upper right corner and select Payroll Export.
Step 2 of 4
Select billing month
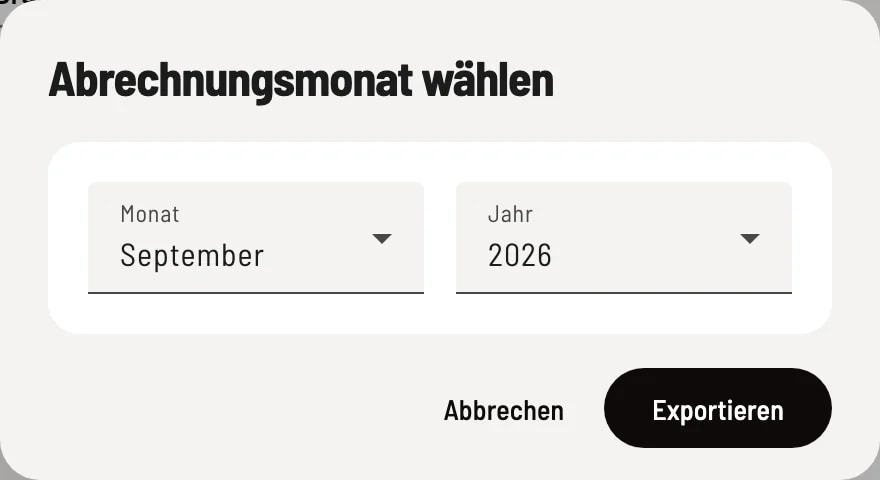
Select Month and Year and click Export. An entry is counted towards the month in which work began; a night shift from the 30th to the 1st therefore belongs entirely to the previous month.
Step 3 of 4
Read the preliminary review
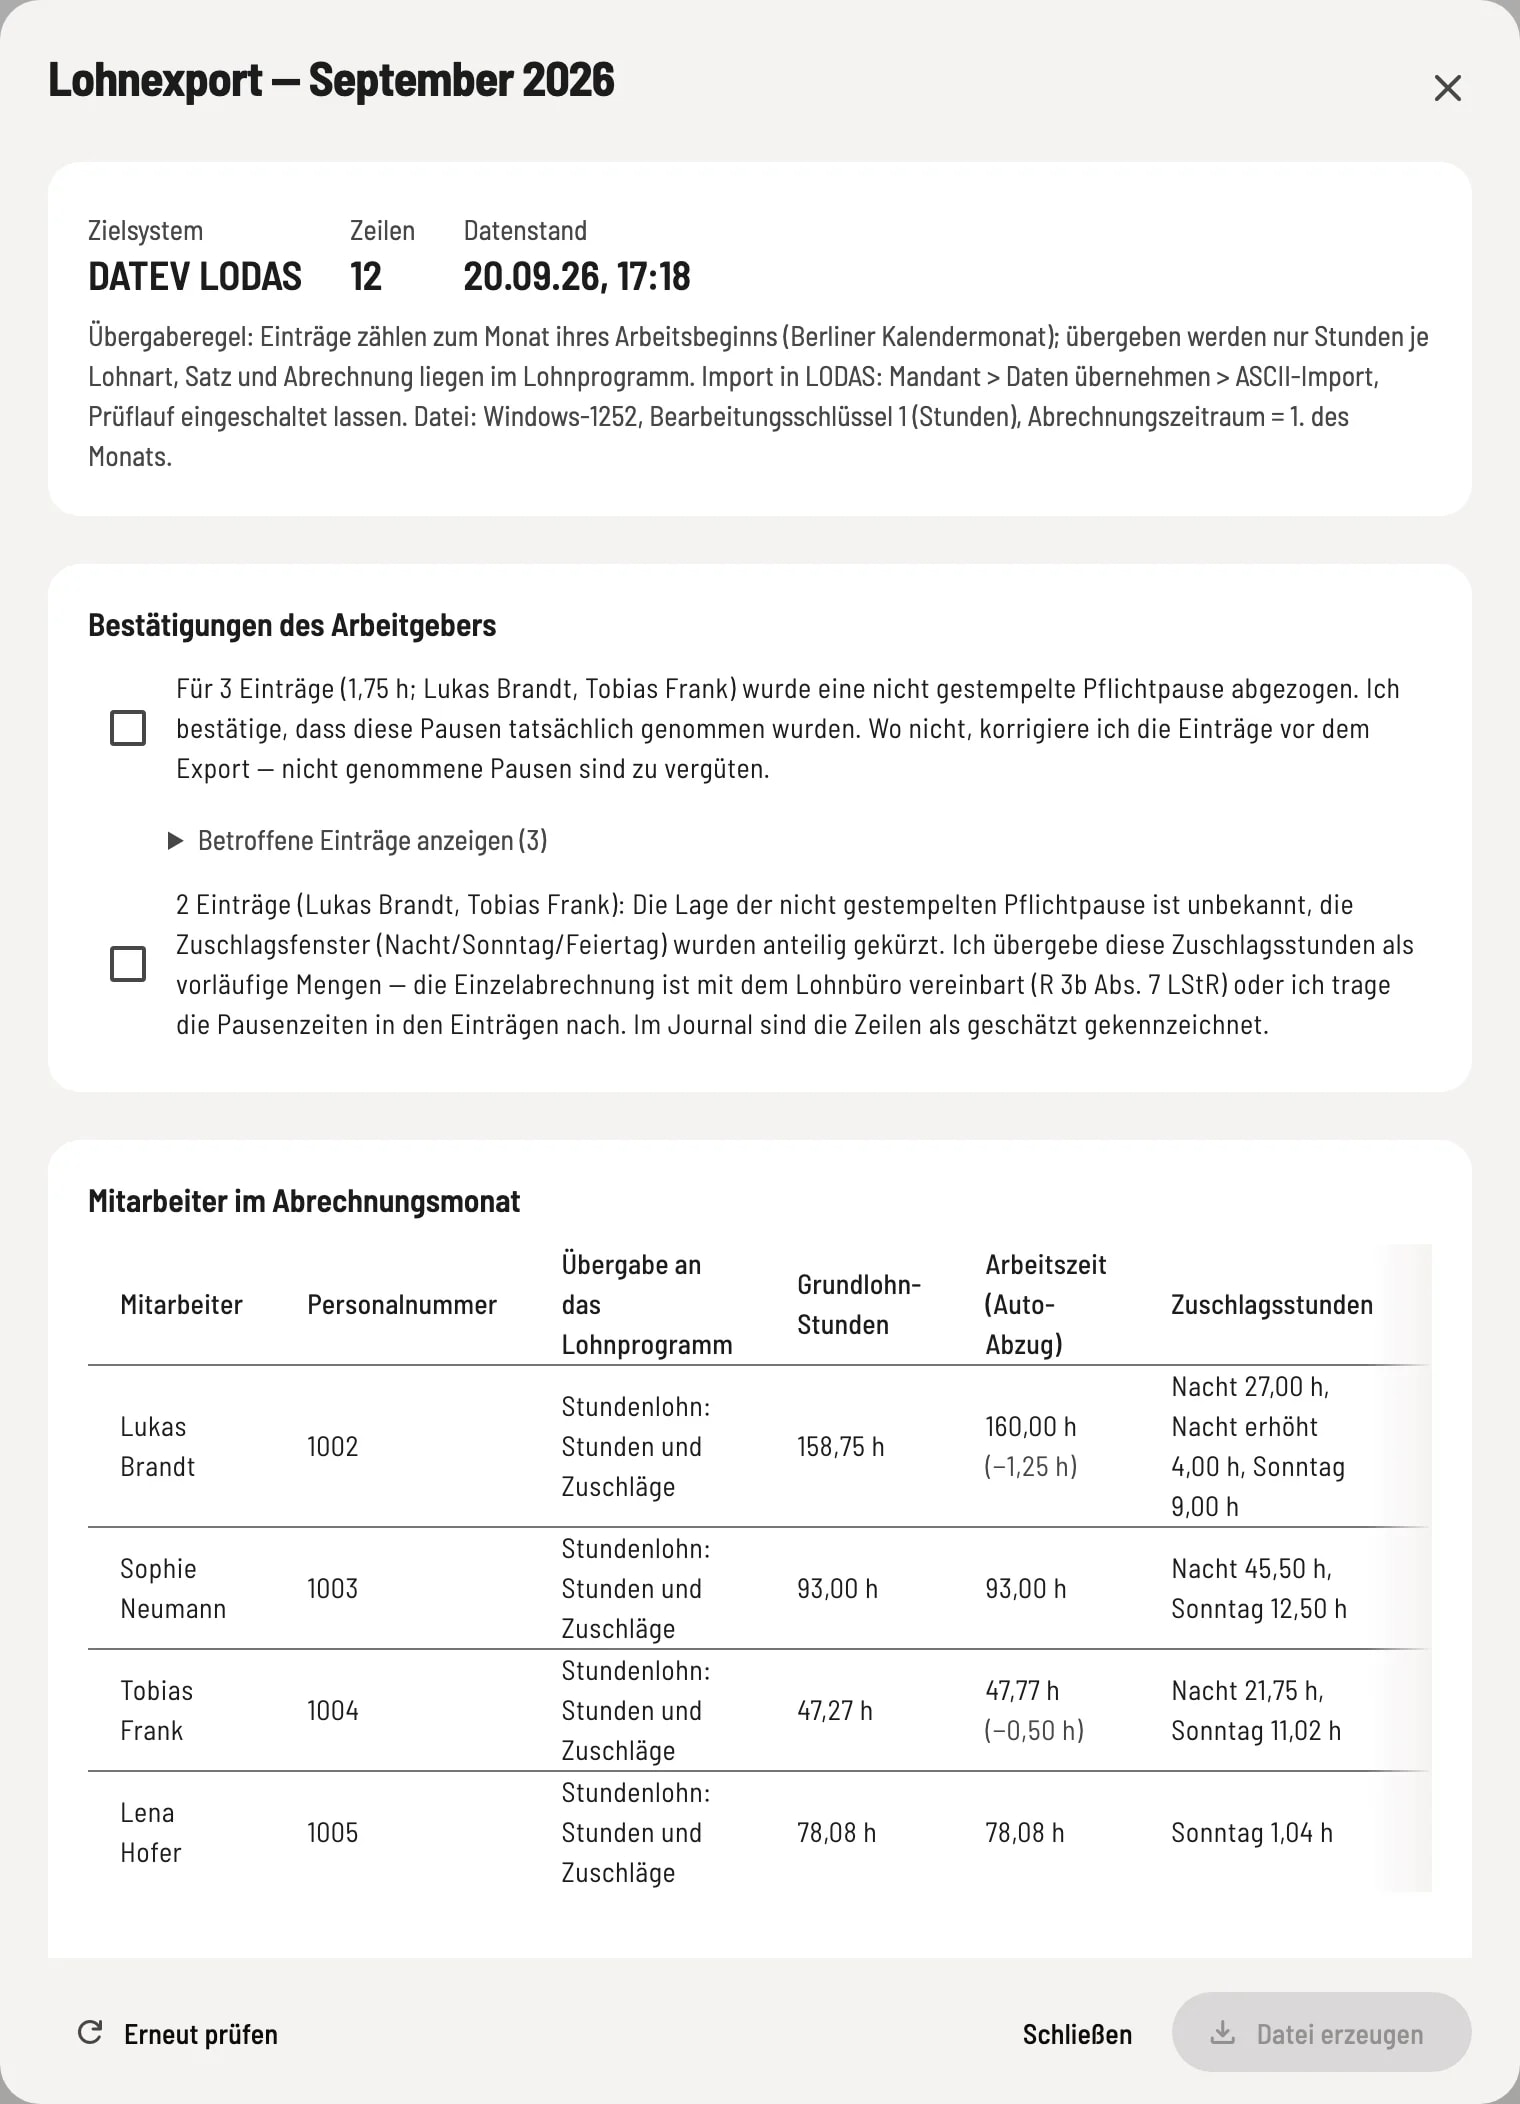
The header displays the target system, rows, and data status. Below this are Blocks, Employer Confirmations, the Employees in the Payroll Month table, and Notes. Recheck retrieves the current status, for example, after you have corrected an entry.
Step 4 of 4
Confirm and generate file
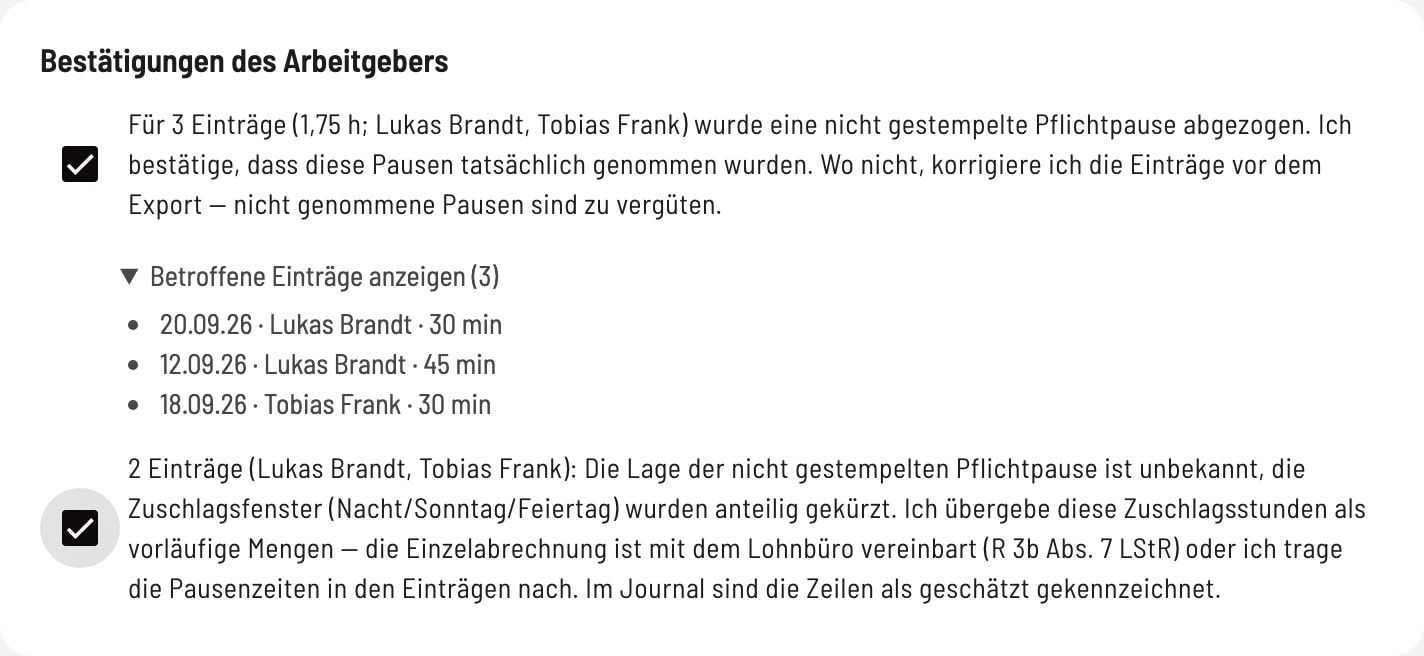
Check all boxes for confirmations and click Create File. The file will be downloaded, and a message will display the file name and export ID. If any entries, payroll data, or settings change between the check and creation, Servire will repeat the check, and you will need to confirm again.
Lock out
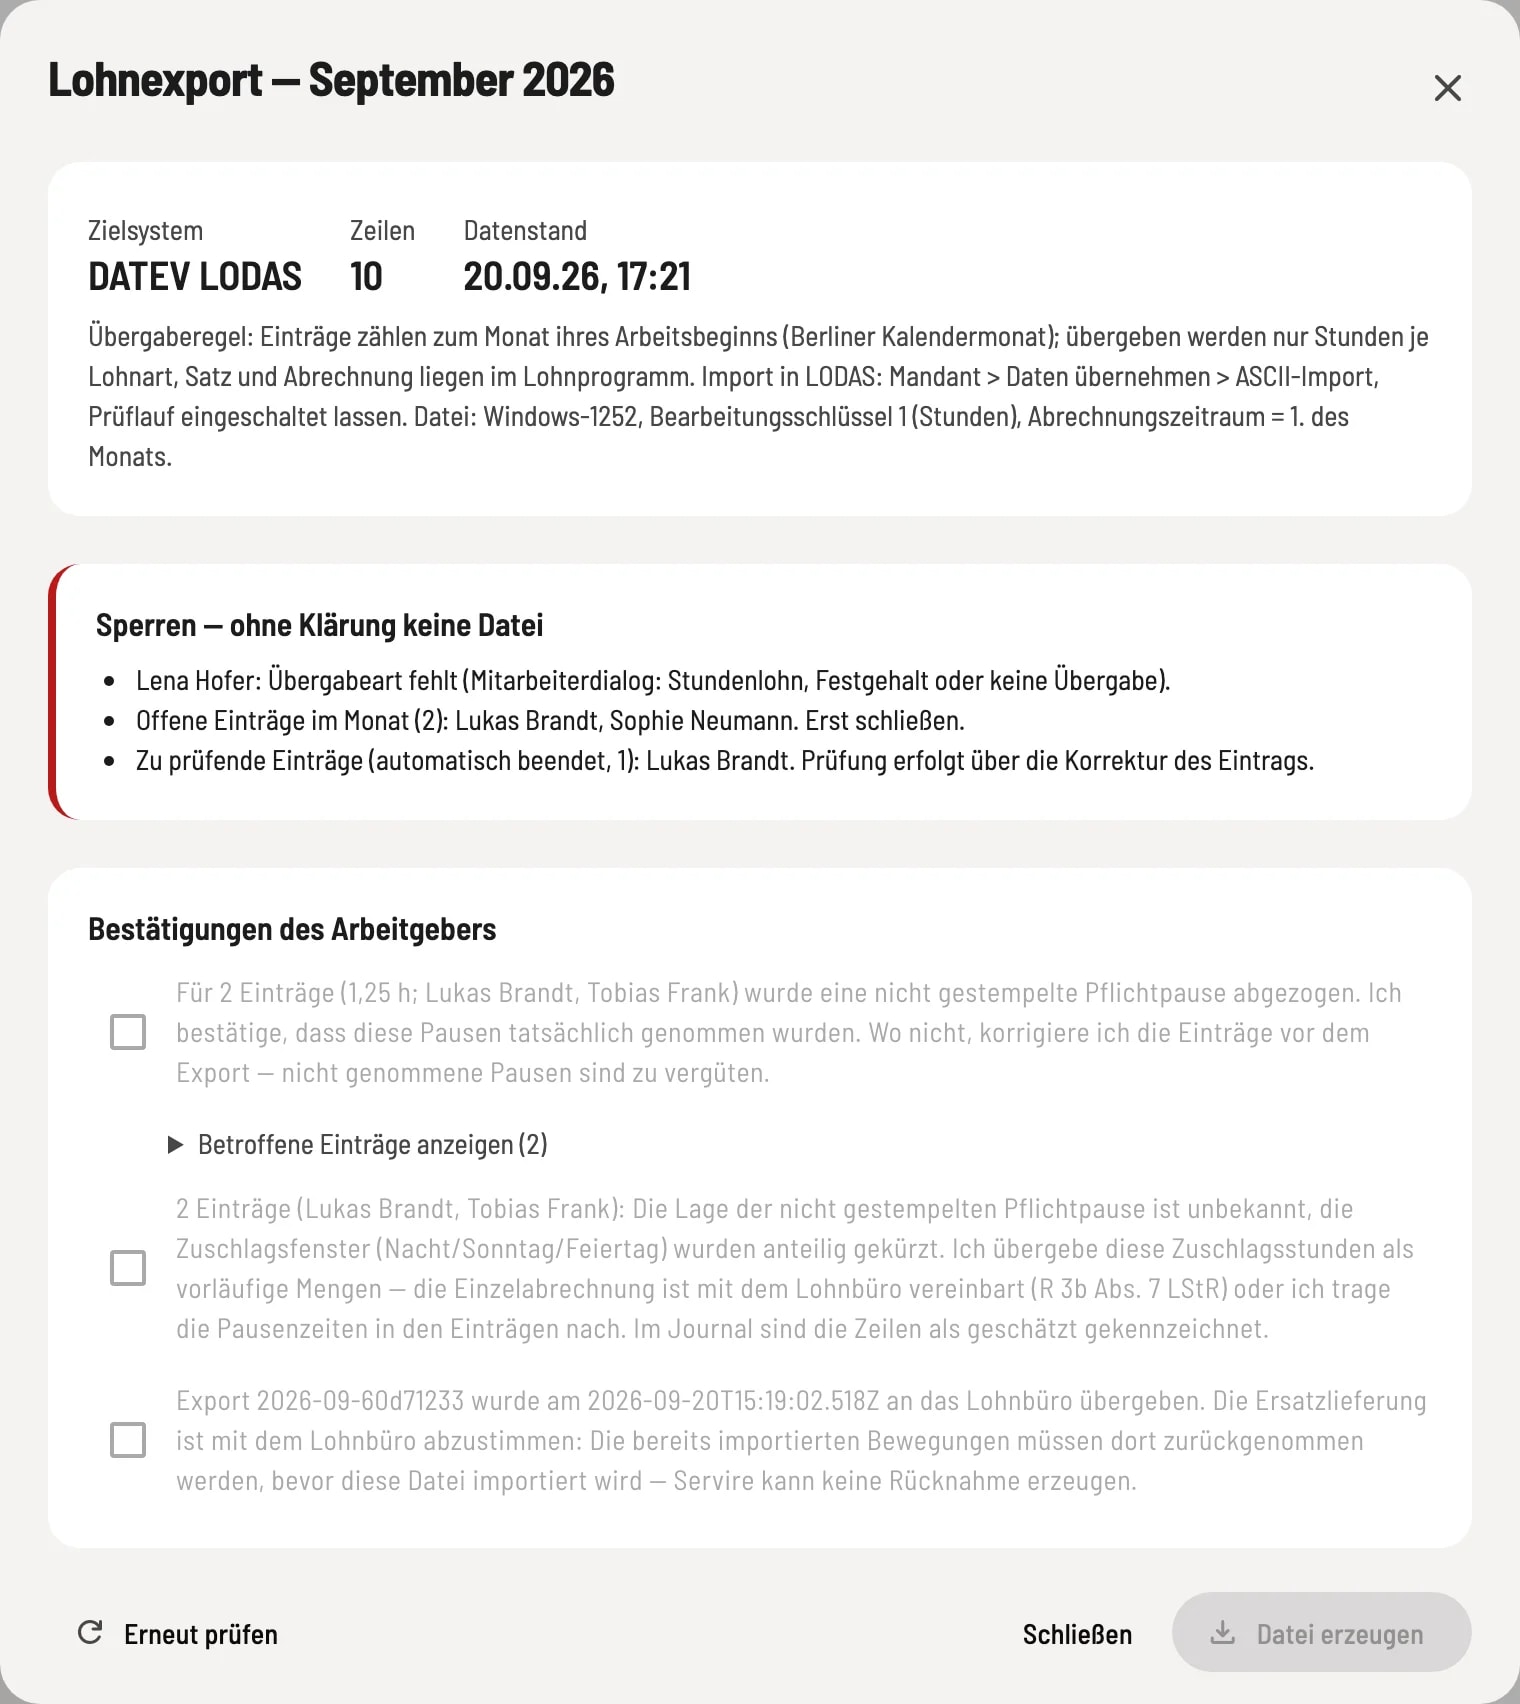
A block indicates what's missing. As long as it's active, no file will be created. Typical blocks include: no target system, consultant number or wage type not entered, reconciliation with the payroll department not confirmed, personnel number missing, invalid for DATEV, or duplicated, transfer type missing, open entries in the month, entries to be checked that were automatically closed, or bonuses without a wage type. Close open entries and correct entries to be checked, as described in the "Correcting Time Entries" section. Then Check Again.
Employer confirmations
Confirmations concern decisions that Servire is not authorized to make for you: - Untimed mandatory breaks have been automatically deducted. You confirm that these breaks were indeed taken; Show Affected Entries lists them. Where no break was taken, correct the entry beforehand, as untaken breaks must be compensated. - Proportional Overtime Surcharges: With automatic break deductions, Servire does not know the break's timing and proportionally reduces night, Sunday, and holiday hours. You submit these surcharge hours as preliminary quantities or enter the break times in the entry later. - Repeated Export: A file already exists for the month; the new one completely replaces it.
Employees in the billing month
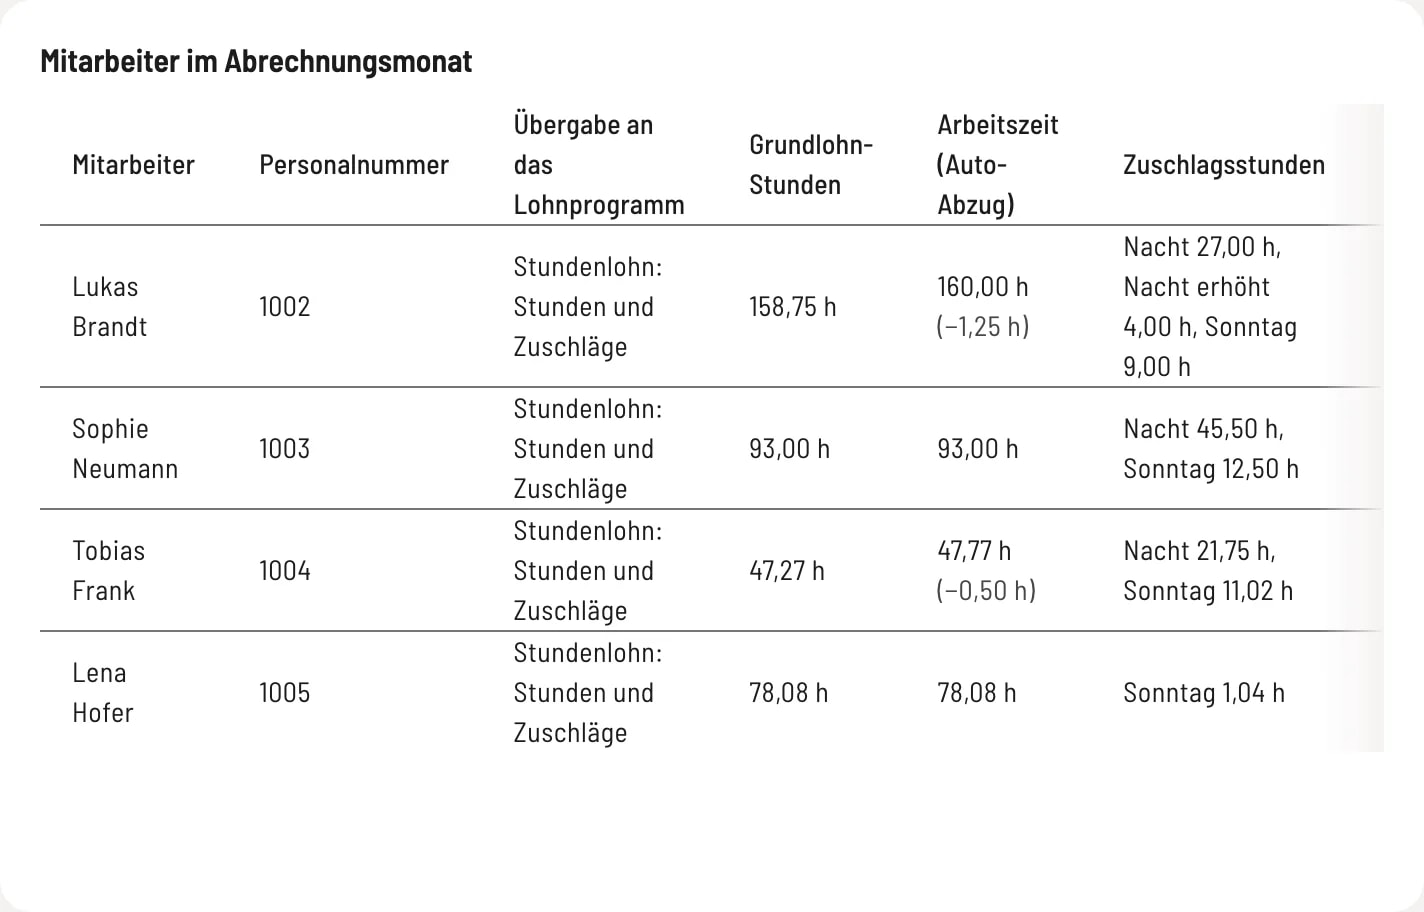
The table shows each person's basic wage hours, the actual working hours with automatic break deductions in parentheses, the overtime hours by type, and the status: ready, locked, not submitted, or no activity. Hours are rounded to two decimal places, never to the employee's disadvantage. For fixed salary: overtime only, the basic wage hours remain blank. Notes are recorded in the log but do not lock entries: for example, an hourly rate below the minimum wage, automatically closed entries that have been reviewed, or rounding in favor of the employee.
Import file
DATEV LODAS: The filename begins with LODAS, followed by the client number and export ID. Your payroll department imports the file under Client → Import Data → ASCII Import and enables the validation run. Hours (processing key 1) are transferred with the payroll period beginning on the 1st of the month. DATEV Payroll and Salary: The filename begins with LuG. The payroll department reads the file under Data Import → Import Transaction Data and creates a one-time, three-column import description (personnel number; wage type; value). The first line of the file lists the consultant number, client number, and month. Payroll Preparation Journal: The filename begins with Payroll Preparation. The CSV file uses semicolons and decimal commas. In Excel, open it via Data → From Text so that the personnel number remains as text and leading zeros are not lost. Each line contains the personnel number, wage type, description, surcharge rate, hours, actual working time, break deduction, rounding, hourly rate, amount and a note, for example if surcharge hours are estimated.
Previous exports and replacement deliveries

Each generated file is saved with its export ID. Under Previous Exports This Month, you can reload it unchanged using Redownload. Mark as Submitted records when the file was sent to payroll. If a new submission is required for a month after corrections, simply generate a new file. It will completely replace the previous one, and the previous file must be discarded by payroll. If the previous file was already marked as submitted, Servire requires additional confirmation: The payroll department must reverse the already imported transactions before importing the new file. Servire does not generate a cancellation file.
Without the Max tariff, payroll export remains accessible via Export on the Employees page, but the settings can no longer be changed. Servire retains the files and log until the end of the sixth calendar year following their creation.