
Create a reservation at the checkout
Record a telephone reservation including guest, date, table and details.
If you accept a reservation by phone or at the counter, you enter it directly into the cash register. It is immediately confirmed; if an email address is provided, the guest receives a confirmation.
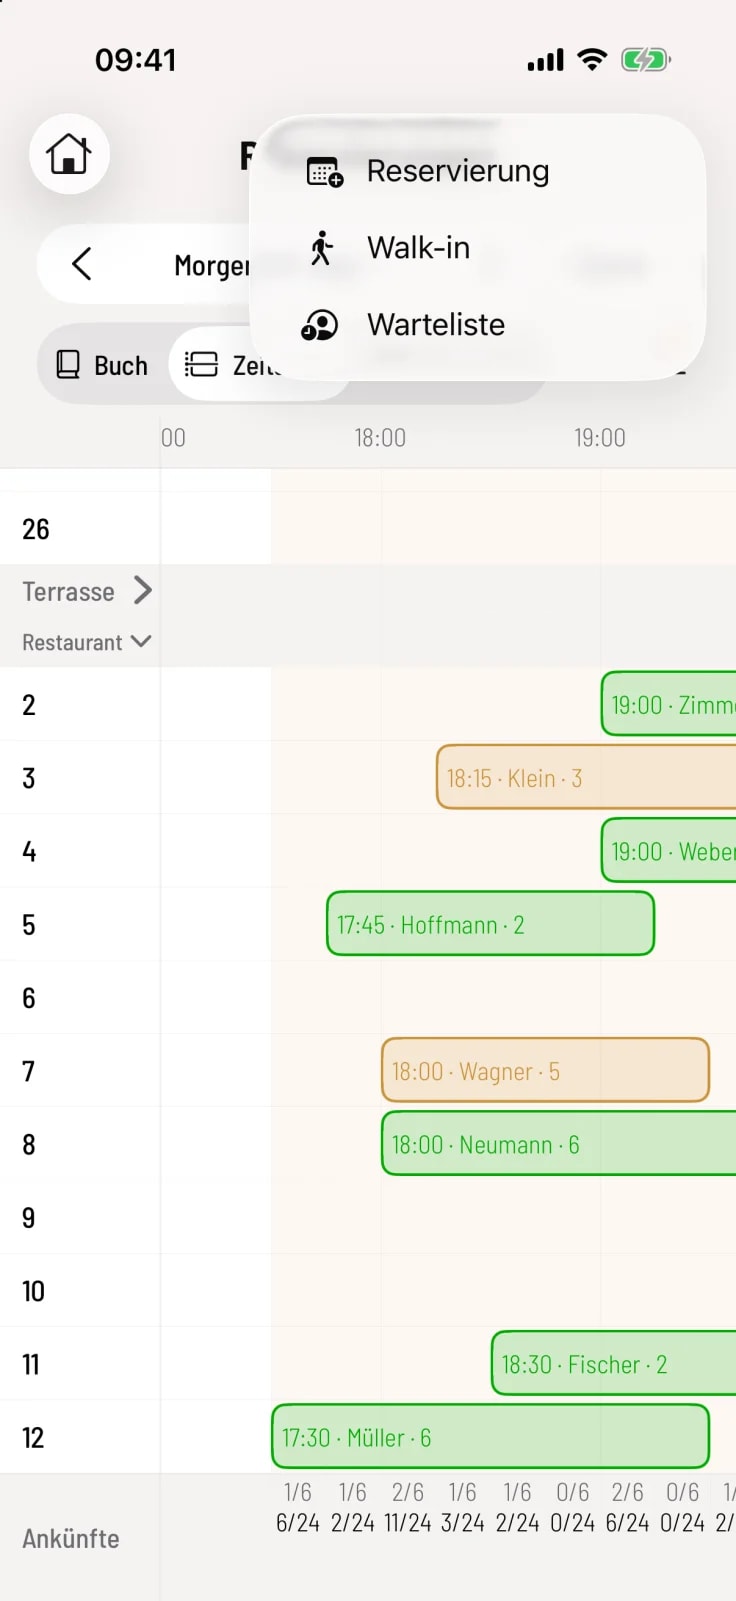
Step 1 of 5
Open form
Tap + in the top right corner and select Reservation. It's quicker from the timeline (tap an empty space) or from the floor plan – then the table and time are already entered.
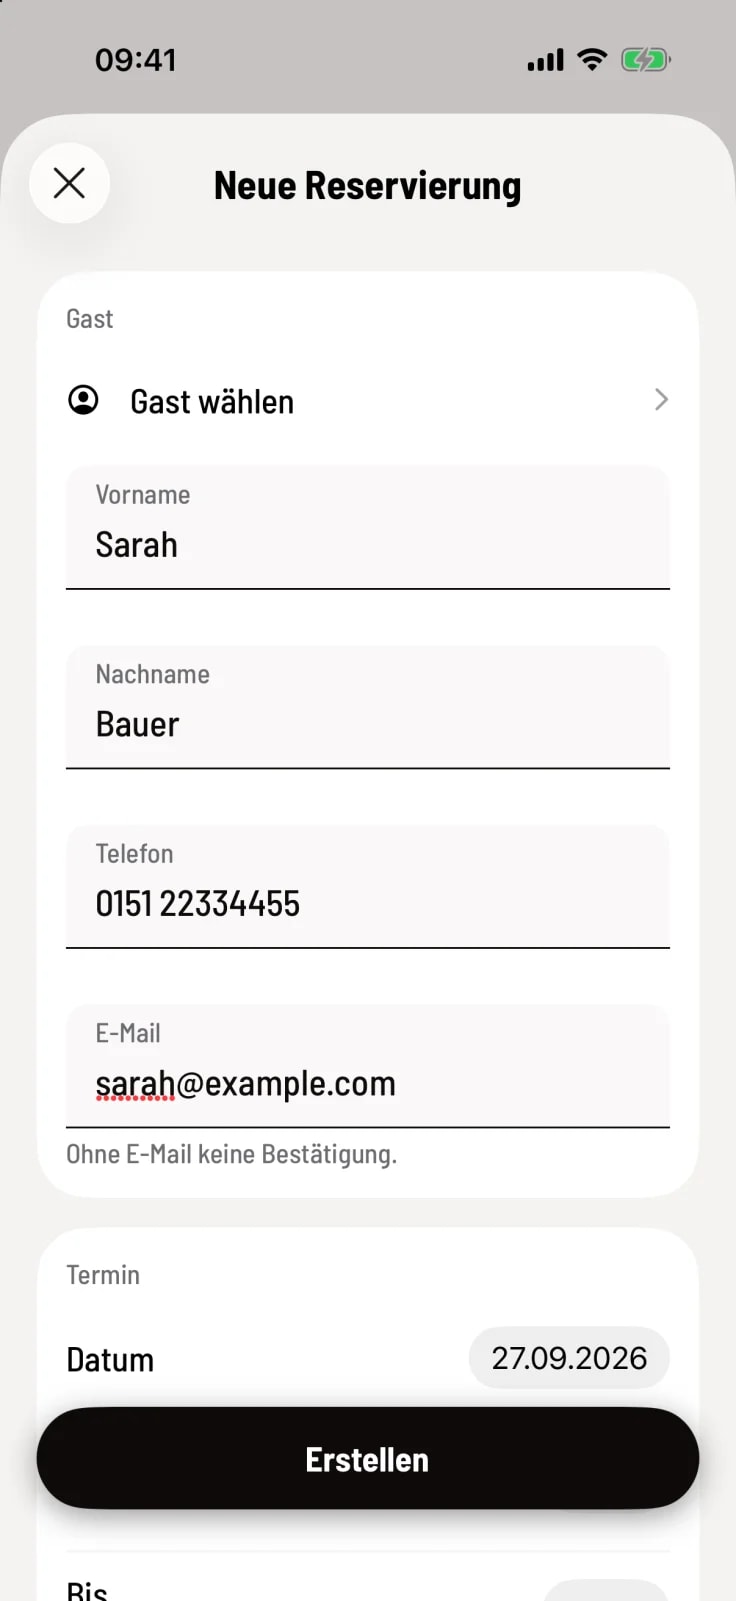
Step 2 of 5
Register guest
First or last name is sufficient. A phone number or email address is required if you have configured it that way in the Web desk . Selecting Guest allows you to add a guest from the guest management system, including their contact details and any allergies.
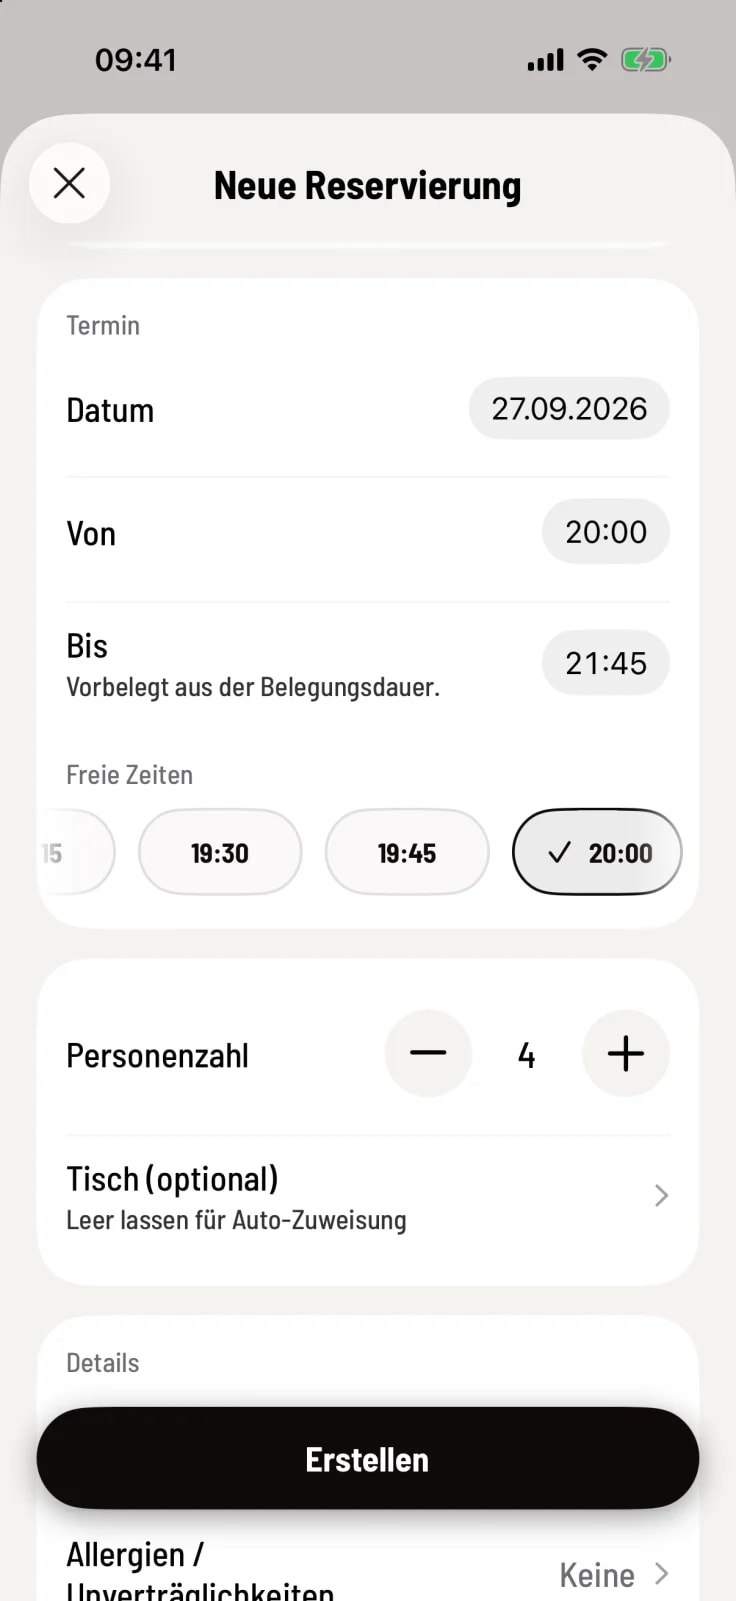
Step 3 of 5
Select a date
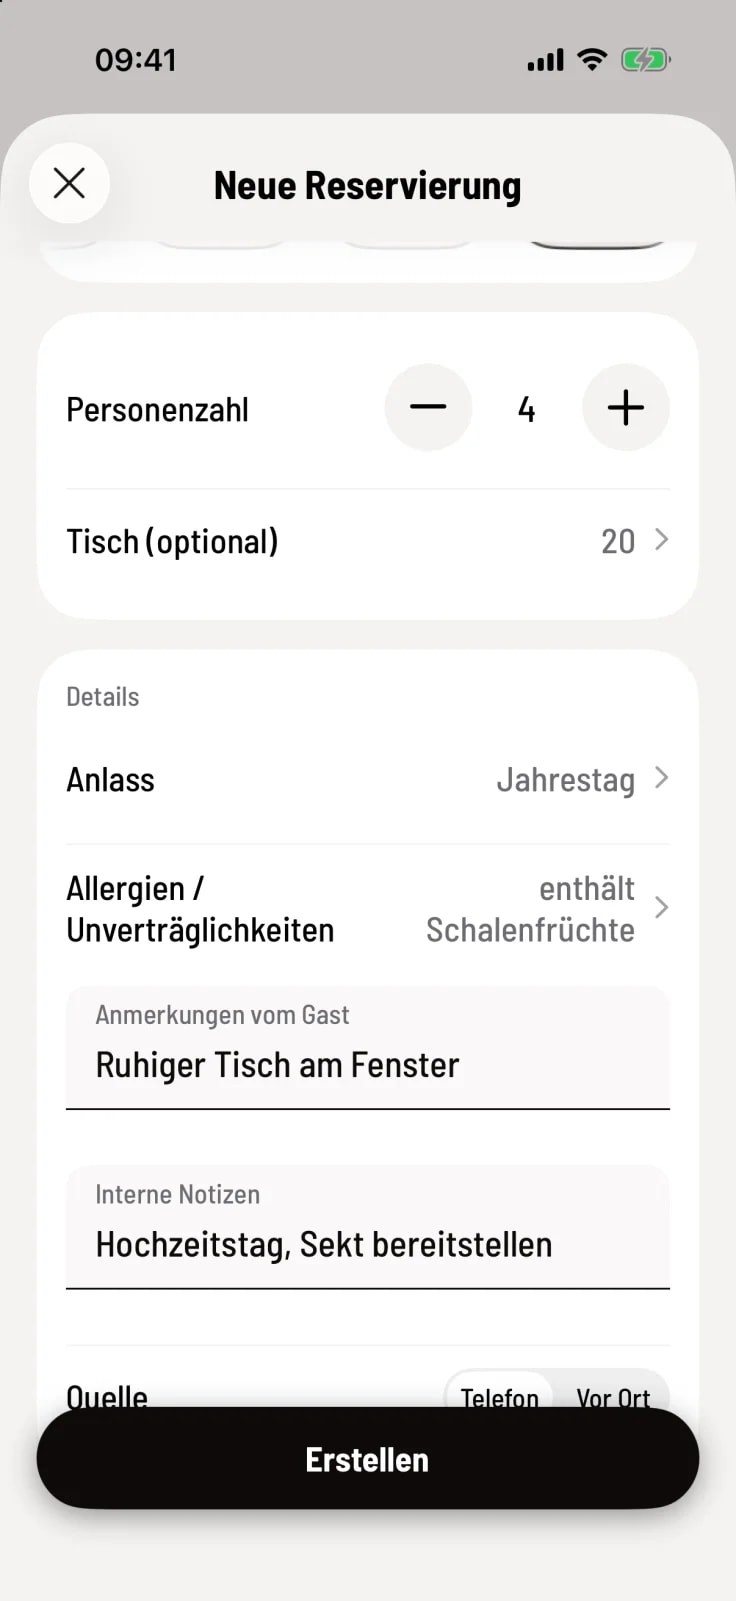
Select Date and From. The system automatically calculates the To date based on the booking duration until you change it yourself. Use the Free Times option to set the time with a single tap. Use − and + to adjust the number of people.
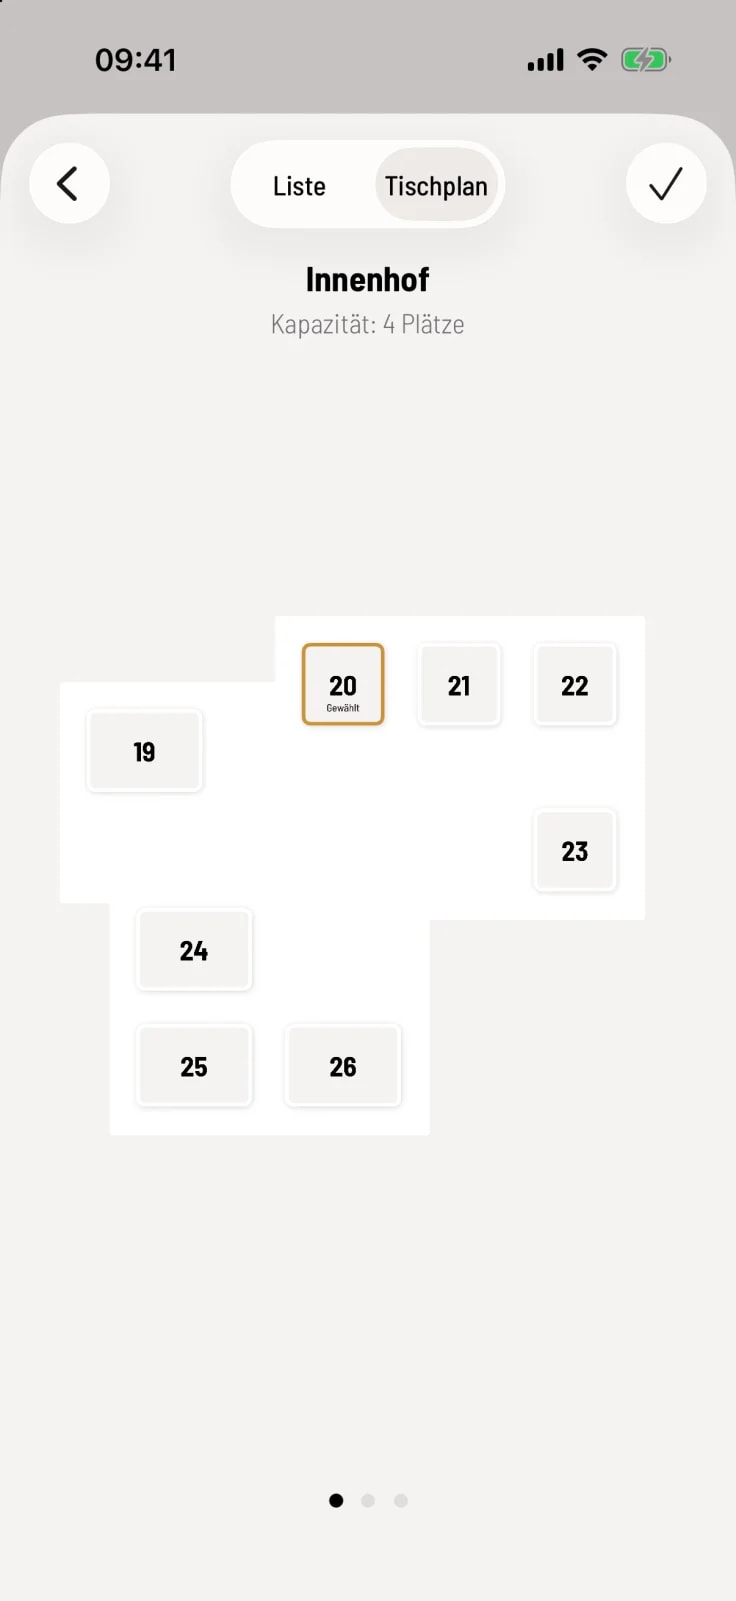
Step 4 of 5
Select table (optional)
Under Table you select one or more tables – either as a list or in the ** table plan**. If you leave the field blank, Servire will automatically assign a suitable table.
Step 5 of 5
Add details
Occasion (e.g., birthday), Allergies, Guest Comments, and Internal Notes will later appear as icons in the book and on the table. Under Source, you record whether the guest called or visited in person. Tap Create.
If the table is already occupied at that time, the system will report a table conflict and will not save the reservation. If the reservation is outside of opening hours, Outside of Opening Hours will appear – then you can adjust the time or duration.
Group size limits from the online settings do not apply at the checkout. You can therefore enter large groups here at any time.