
Manage employees in the Web desk
What the Employees page in Web desk shows and how to switch between time tracking and the employee list.
Under Employees in the sidebar of the Web desk, you manage all people associated with your restaurant. The appearance of this page varies depending on your plan and legal requirements.
Prerequisite: Only those with **Access to Web desk ** permission can open the Web desk . Only the owner can change permissions, connect and remove employees.
Two views
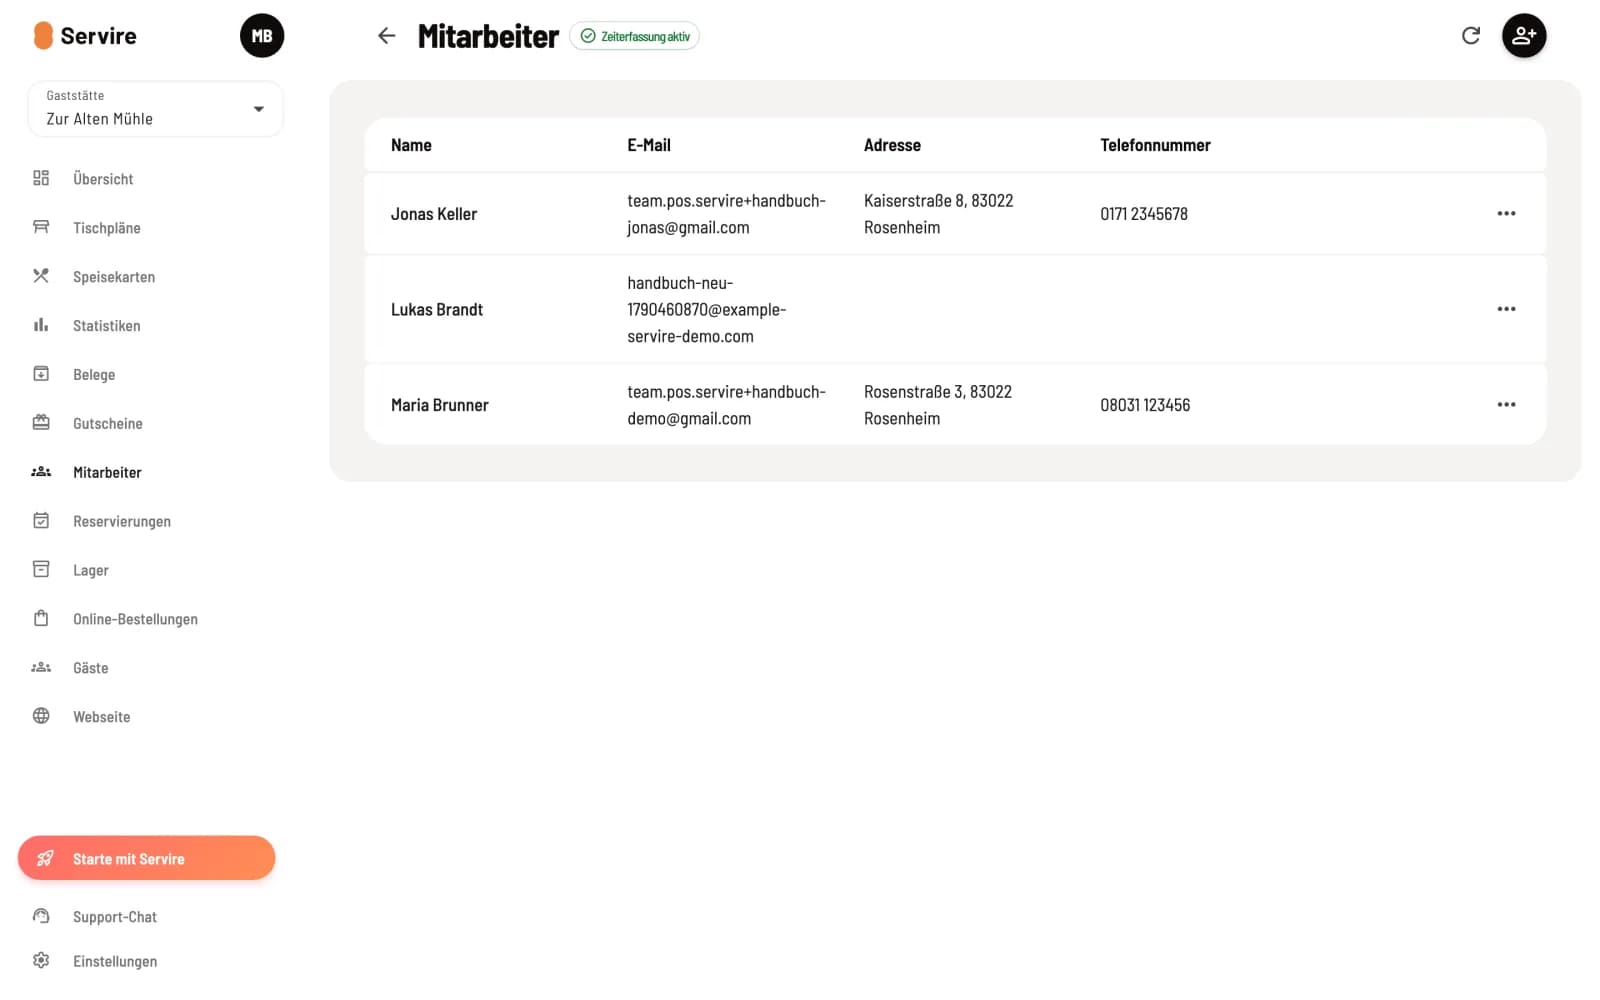
Employee List: Name, email, address, and phone number of all connected individuals. You will only see this view if time tracking is disabled, not included in your plan, or if you lack the Manage Time Tracking permission.
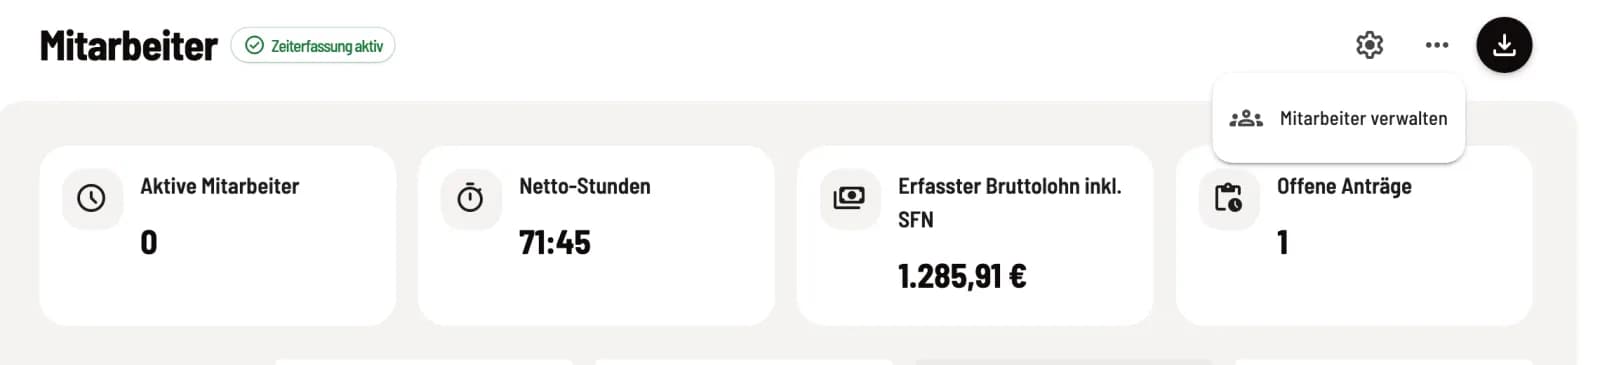
Time Tracking: Key performance indicators, correction requests, time tracking balance, and all time entries. This view appears in the Max plan when time tracking is enabled, provided you have management rights. You can then access the employee list via … (More Actions) → Manage Employees.
Step 1 of 2
Switch to employee list
Click on … in the upper right corner and select Manage Employees. Next to the heading is the badge Time Tracking Active or Time Tracking Inactive, on the right is the gear icon for settings and the download button for exports.
Step 2 of 2
Employee list
Clicking on a row opens Edit Employee. The circular arrow reloads the list, the round button with a person and a plus sign opens Connect Employee. The arrow to the left of the heading leads back to the time tracking screen.
What you are doing here
Recruiting new employees: Connecting employees with the restaurant
Maintaining data and payroll information: Editing employee data
Assigning rights: Employee permissions in detail
Separate those who have left: Remove employees
Recording working hours: Activate and set up time tracking
Without Tariff Max, previous records remain accessible: If your restaurant has already used time tracking, a Download button with timesheet, CSV, payroll export and MiLoG proof is located in the employee list in the upper right corner.