
Guest orders: Payment and QR codes
This is how you set up online payments, payment methods and tip , and generate the QR codes for your tables.
The tabs Payment & tip and QR Codes & Embedding can be found in the Web desk under Guests → Guest Orders tab → gear icon. The remaining tabs are described in the section on setting guest orders.
Guest orders are included in the Max plan. Upon first opening the account, an assistant will guide you through the ordering process, menu, payment, and access; prior to this, you, as the owner, must sign the data processing agreement. Only those with the Manage Guest Orders right are authorized to change these settings. Orders can only be placed while a shift is open at the register.
Payment & tip
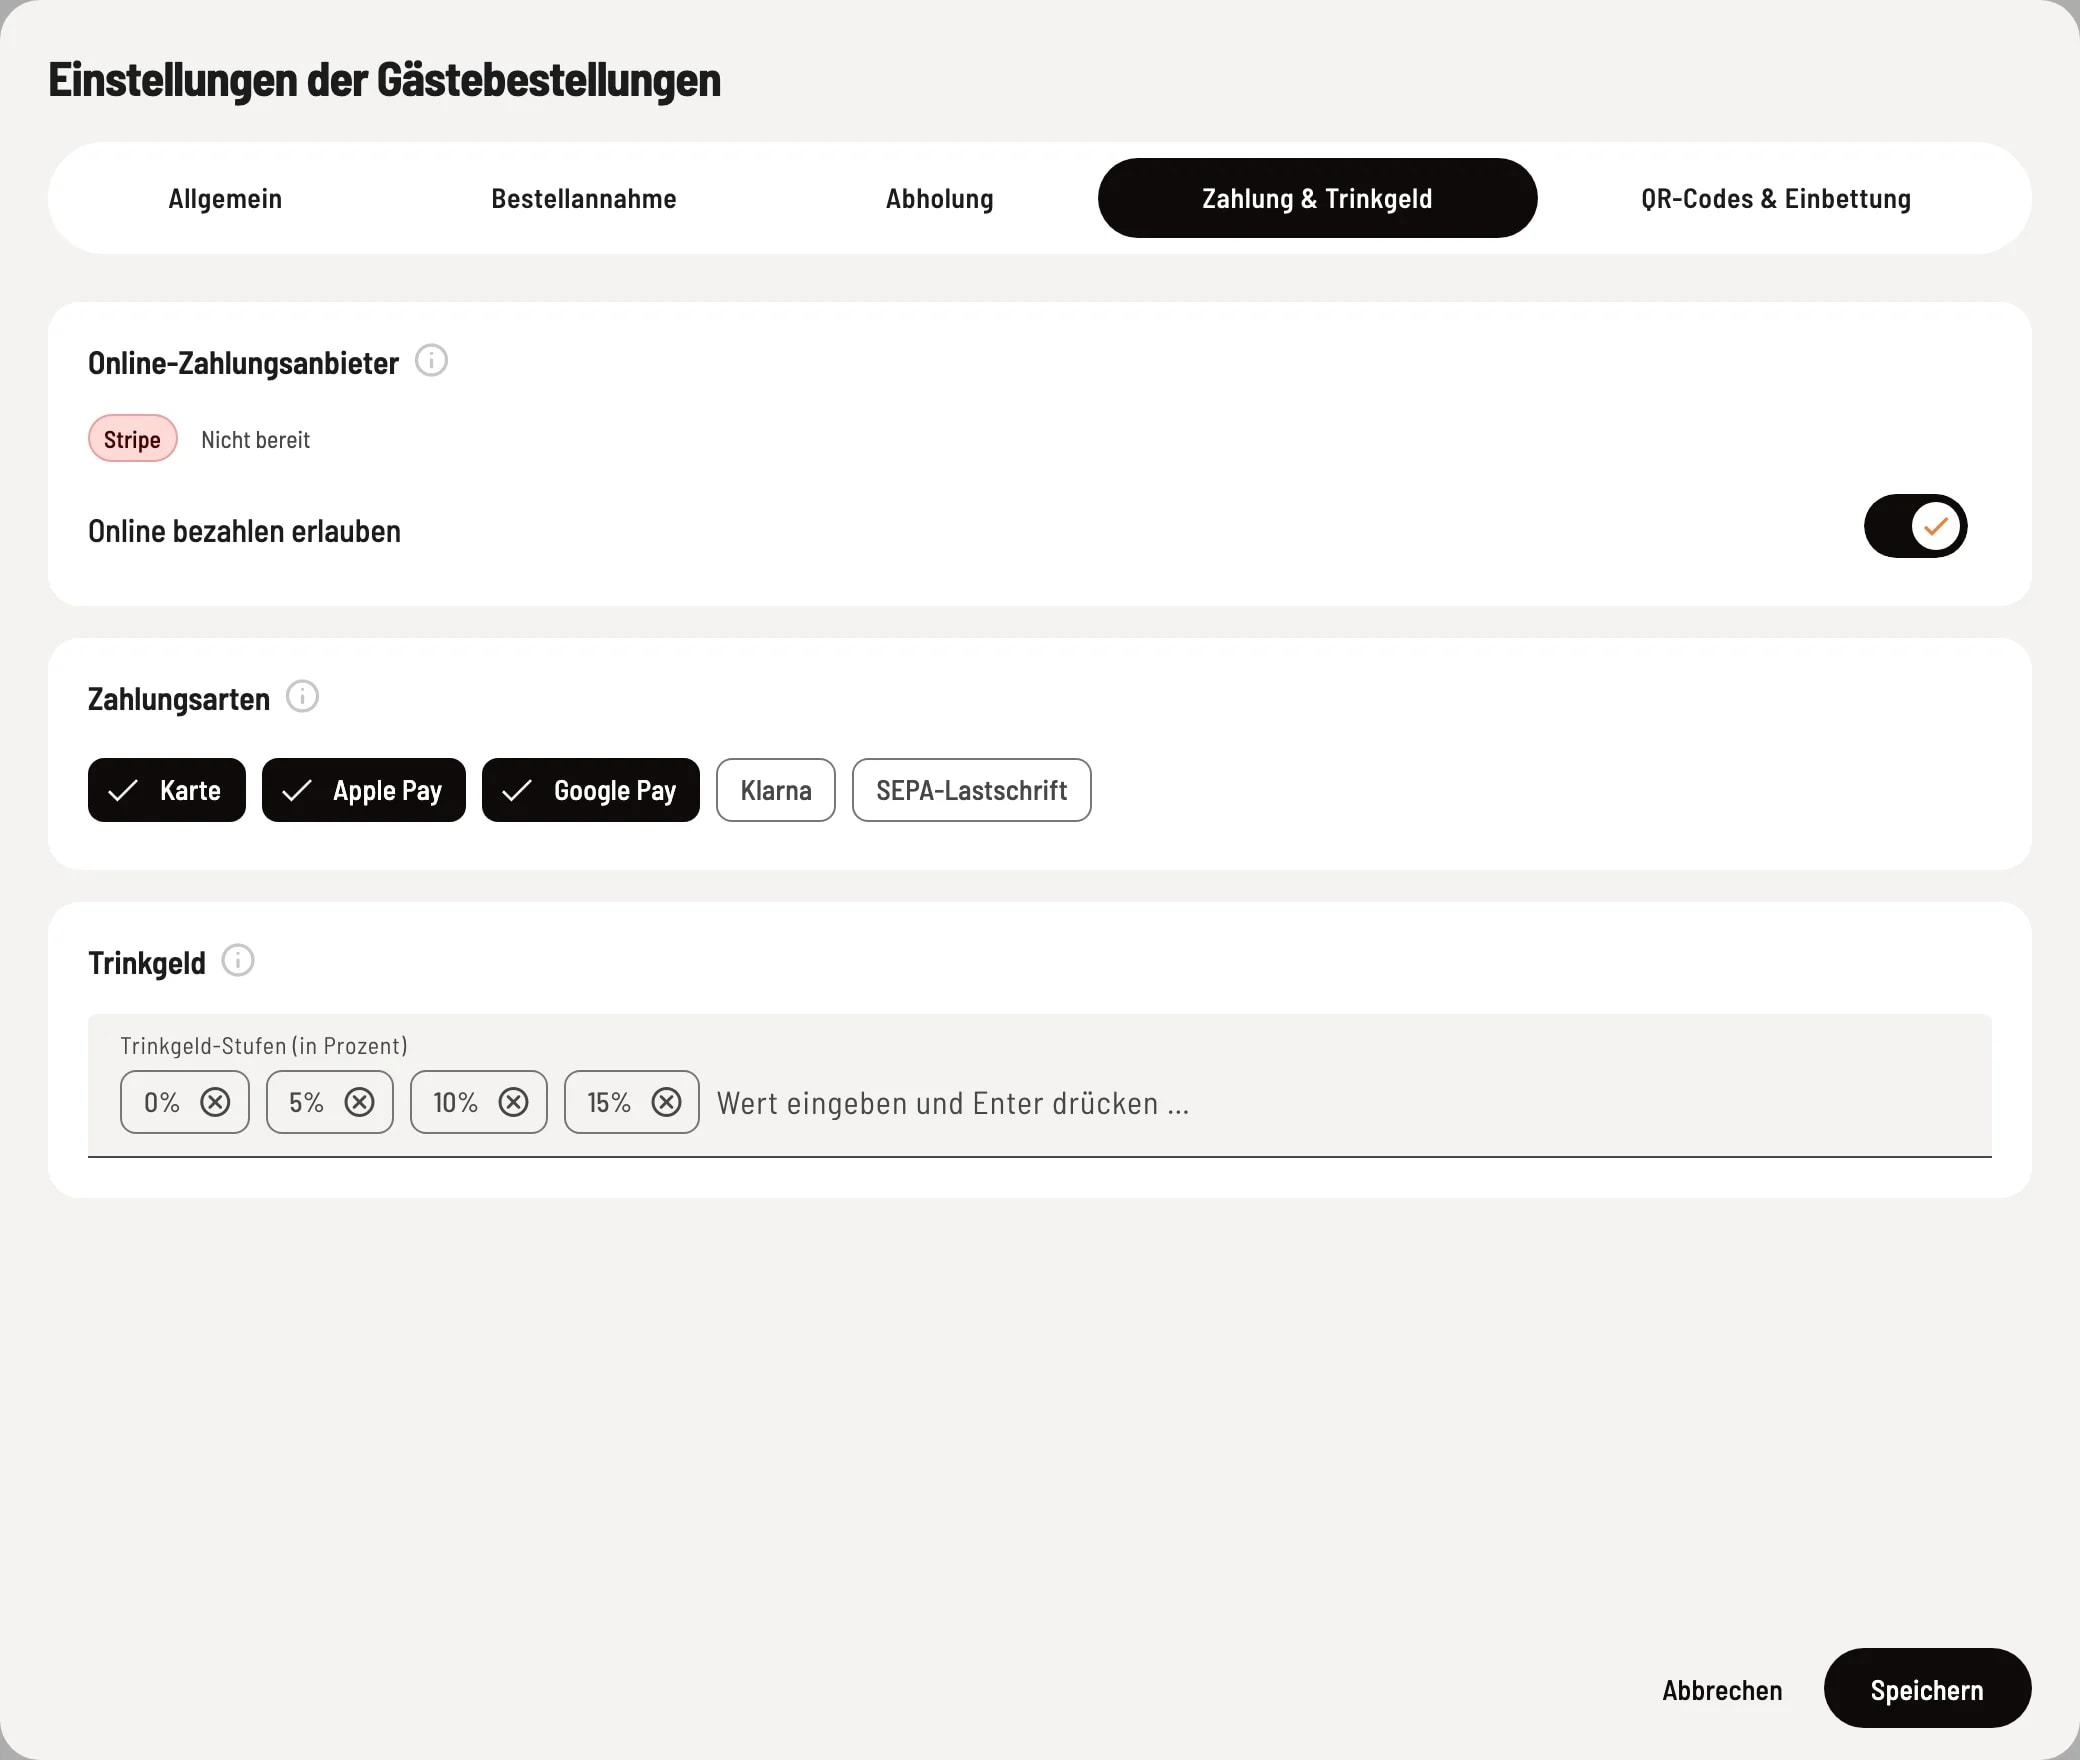
Rider Payment & tip
At the top you can see your online payment provider and whether it is ready. Below that you can select payment methods and tip levels.
- Online Payment Provider – shows which provider guests use to pay online. It is set up under Settings → Integrations (see Connecting Payment Providers ). - Allow Online Payment – guests pay directly when ordering. Off = payment only upon pickup. Note: Payment at the table is always online – without this setting, guests cannot order at the table. At least one payment method must be enabled. - Payment Methods (Stripe only) – Card, Apple Pay, and Google Pay are grouped together: If one is selected, the checkout offers all three, provided the guest's device supports them. Grayed-out payment methods are not yet activated in your Stripe account. For SumUp, your SumUp account determines the payment methods. - ** tip Levels (in Percent)** – these percentages are offered to guests when paying, always with the option "No tip". Permits range from 0 to 50%, with a maximum of 10 levels; 5, 10, and 15 have proven effective. Nothing is pre-selected. When paying upon collection, the selected tip is pre-filled at the checkout; no tip is requested at the ordering terminal.
QR codes & embedding
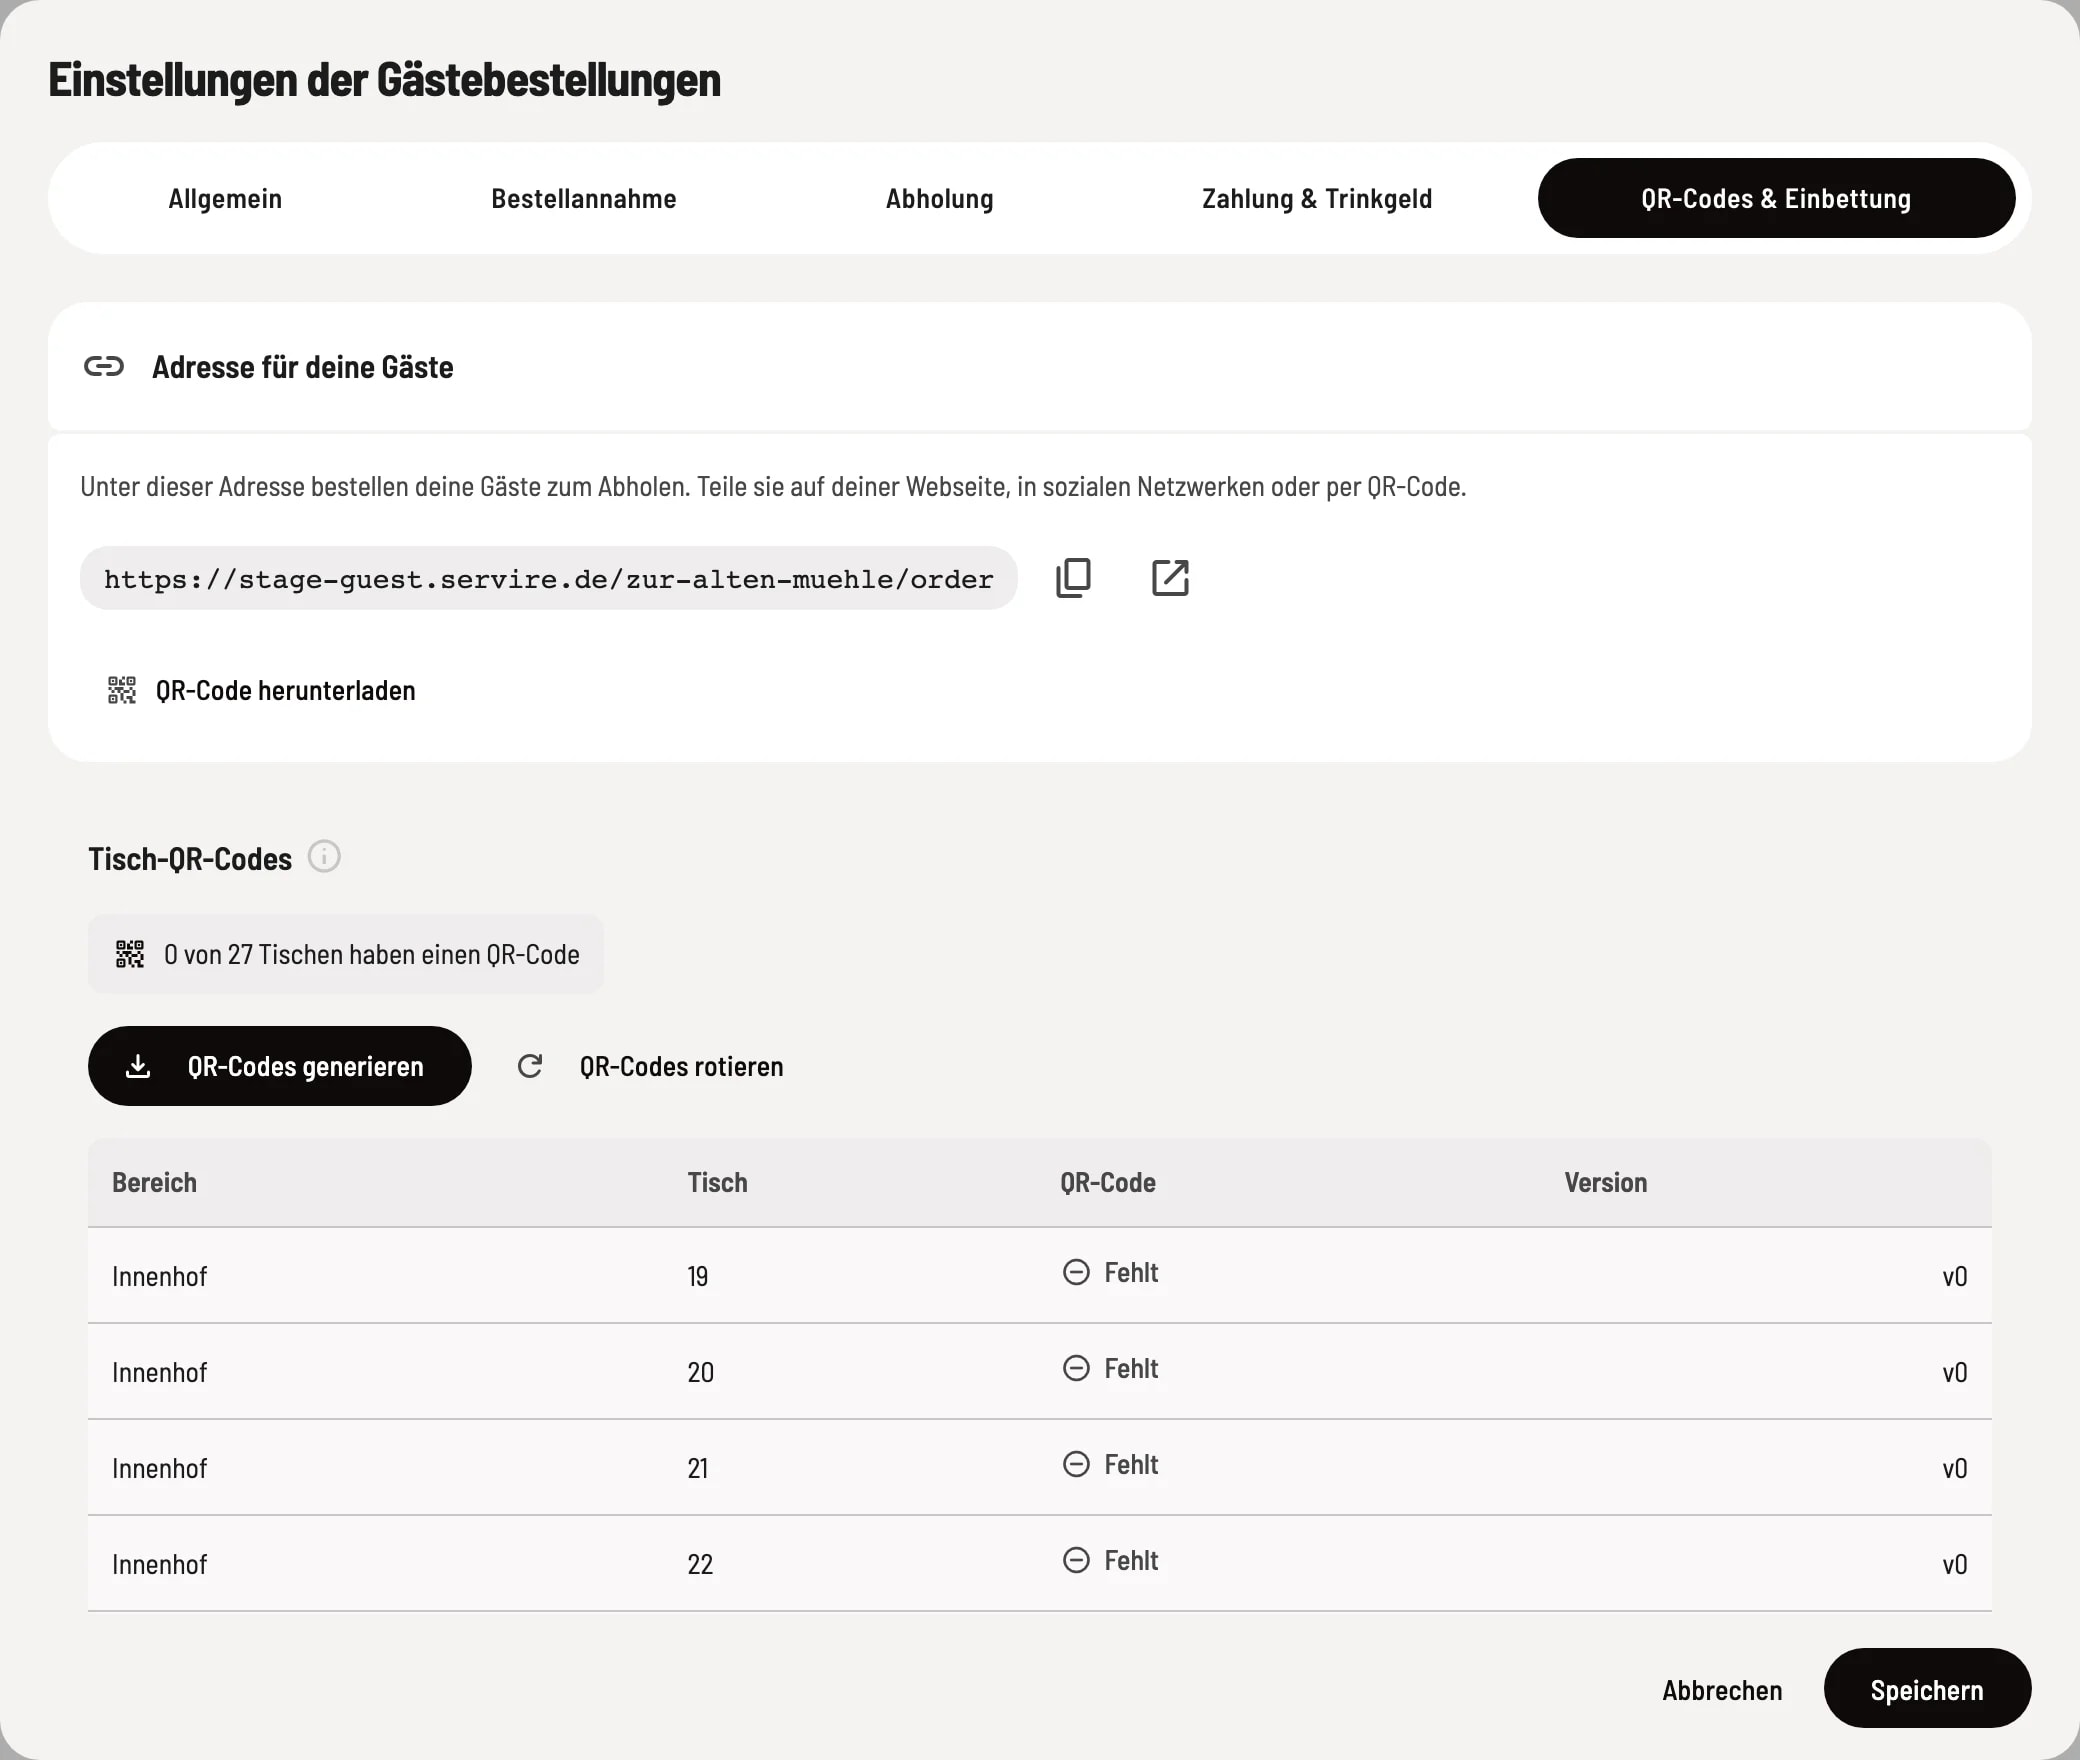
QR codes & embedding
Address for your guests shows the pickup link with options to copy, open, and download QR code. Under Table QR codes you can see which tables already have a code.
- Generate QR Codes – downloads a PDF with one QR code per table for printing. You can reload it at any time; previous printouts remain valid, even if you rename tables. The table name and area are shown on the receipt. - Rotate QR Codes – invalidates all previous printouts, e.g., if codes have been photographed. Then reprint and replace them. - The code of a deleted table will no longer work. This tab is only usable when guest orders are active and a payment method is available: a connected online payment provider or payment upon pickup.
Embedding on your own website
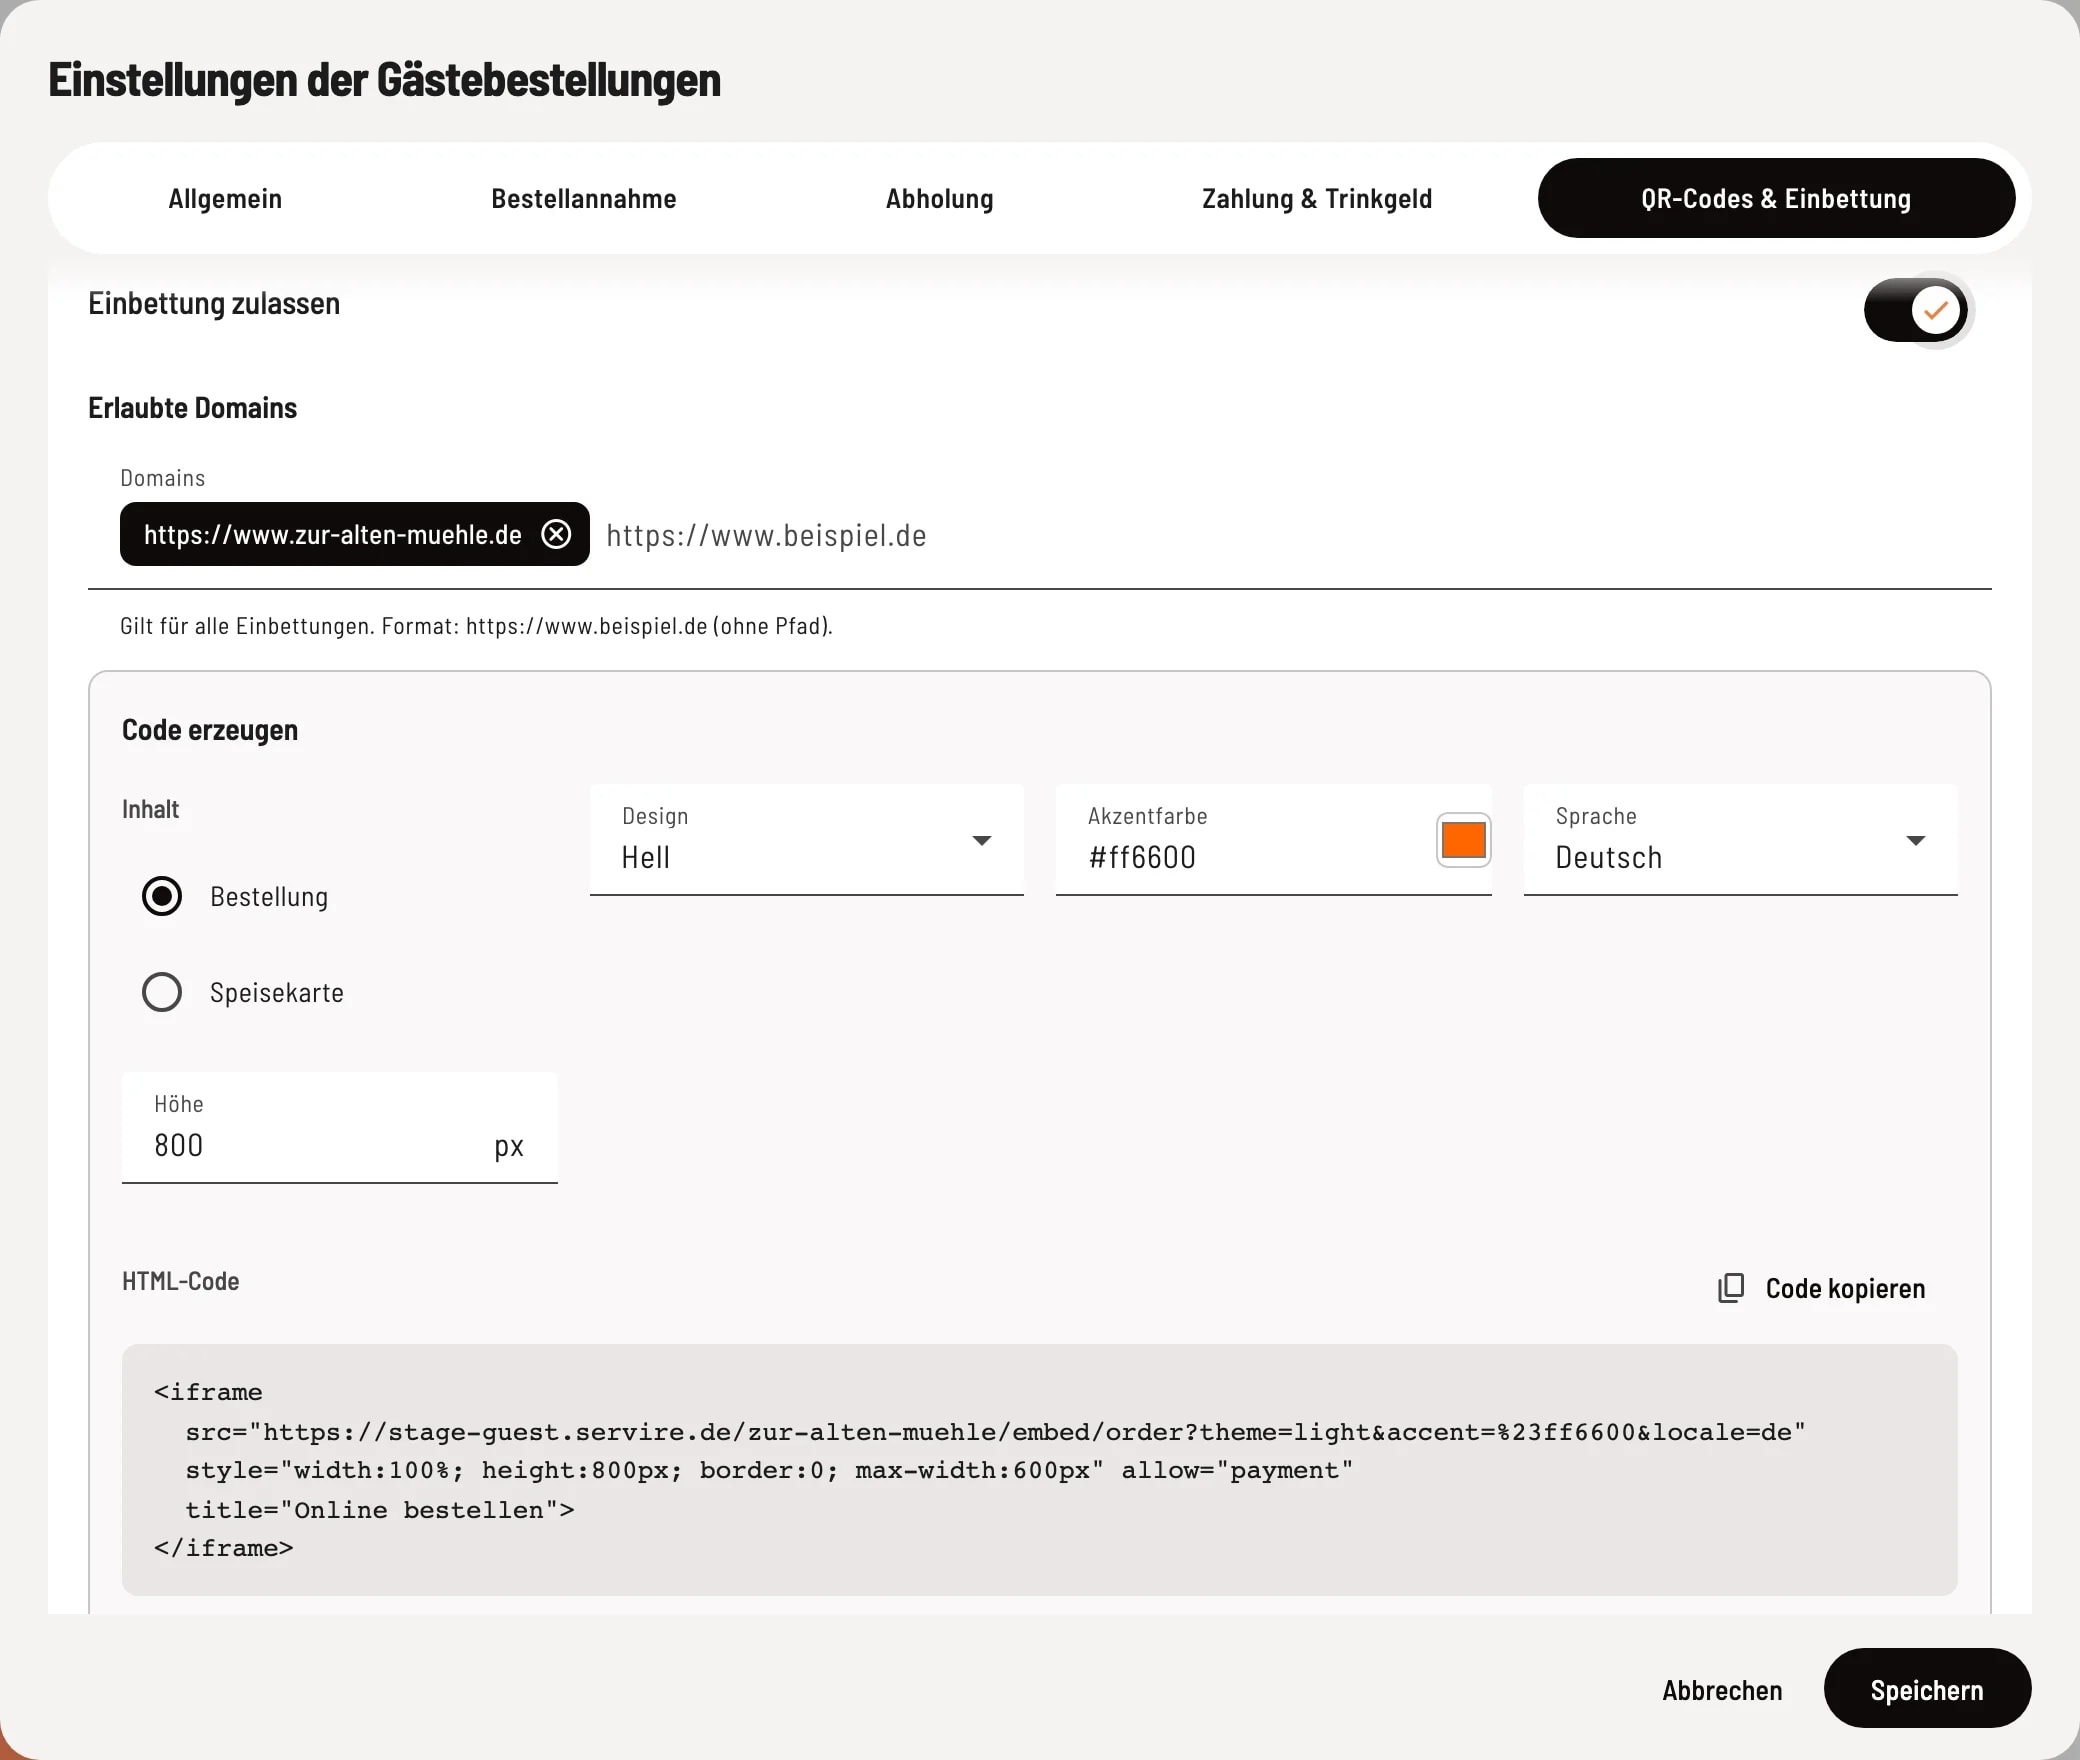
Embedding section
Enable Allow embedding, enter your website address under Allowed domains, and configure the content, design, accent color, language, and height under Generate code. Copy code will copy the finished HTML code.
- Allow embedding – enables ordering via the embedded page. - Allowed domains – the address of your website, e.g., https://my-restaurant.de (without the path). This list applies to all embeds: reservations, menu, orders, and coupons. - Generate code – choose Content (ordering or menu only), Design, Accent color, Language, and Height; you insert the code as an HTML block in WordPress or Wix, for example. Guests can then order there without leaving your site.
All integrations (reservation, order, menu, vouchers) explained in one place . Integrate reservation, order, menu or voucher on your own website.