
Manage reservations in the Web desk
Create reservations, assign tables by dragging and dropping, set walk-ins, place the waiting list, and change the status.
Everything you can do at the reception desk can also be done on the computer. The Reservations page in the Web desk provides the reservation card, room plan, and timeline.
Prerequisite: The Reservations module is part of the Max plan ( change plan ). An assistant will guide you through the setup process the first time you open it.
Create a reservation
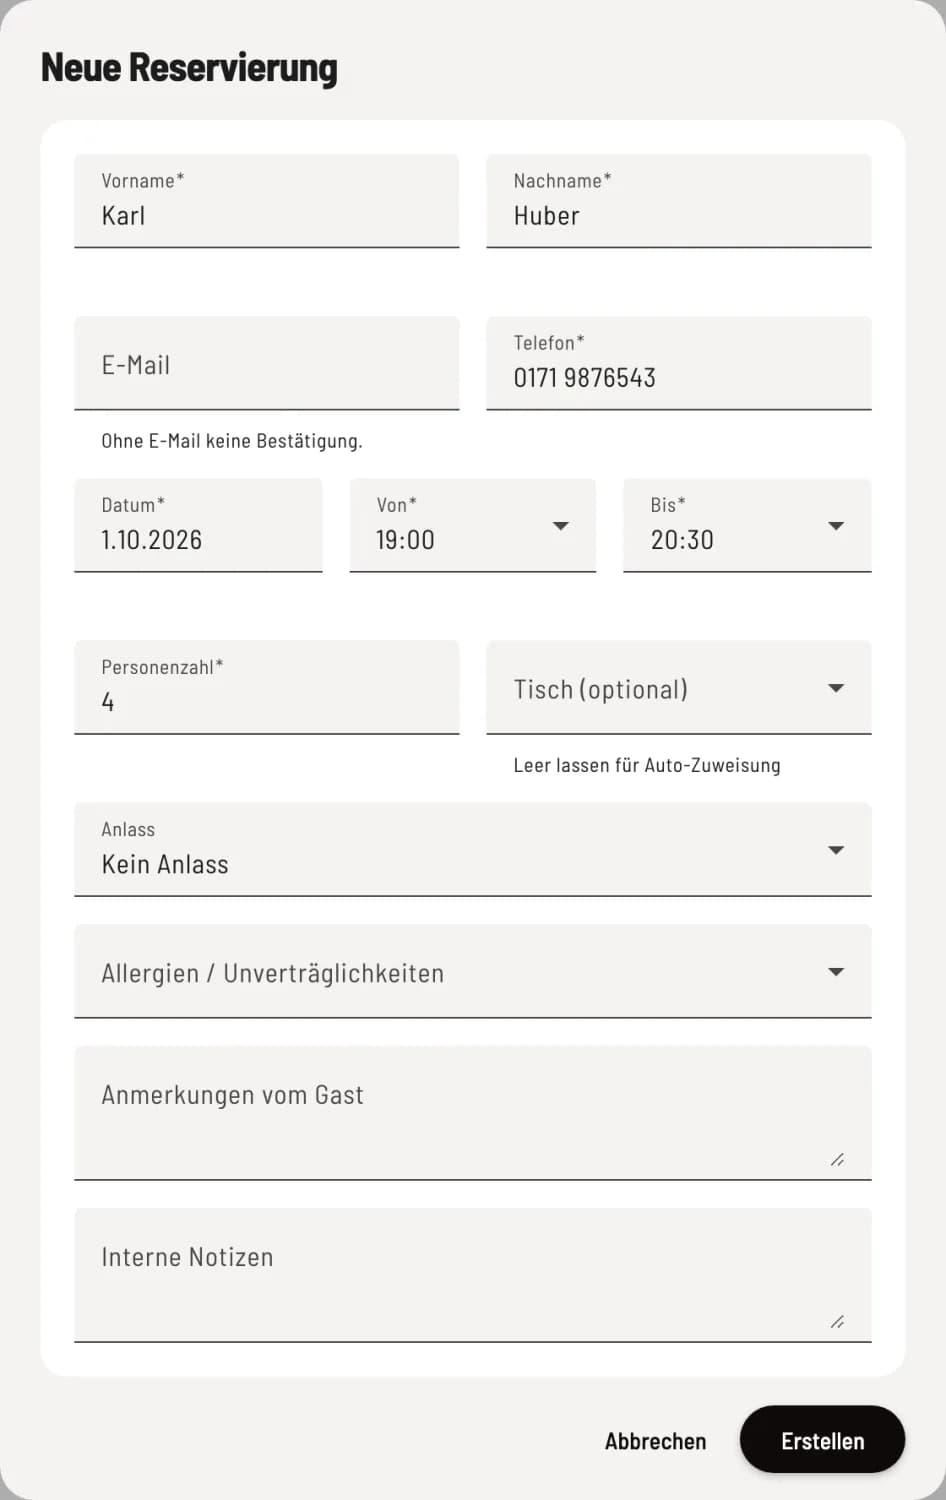
New reservation
Click on + in the upper right corner. Enter the guest, date, from, and number of people. The Web desk will automatically fill in the to field with the standard reservation duration; check this for large groups. Under table (optional), select one or more tables; if left blank, Servire will assign one. Also enter occasion, allergies/intolerances, guest comments, and internal notes. Click on Create.
It's quicker to book from the timeline (click on an empty slot) or the floor plan (click on a table → Reservation). The form warns you if the restaurant is closed according to its opening hours, if the group exceeds the online maximum, or if the date is outside the online booking window – as an employee, you can still save. If the table is occupied, Table already booked at this time will appear.
The reservation card
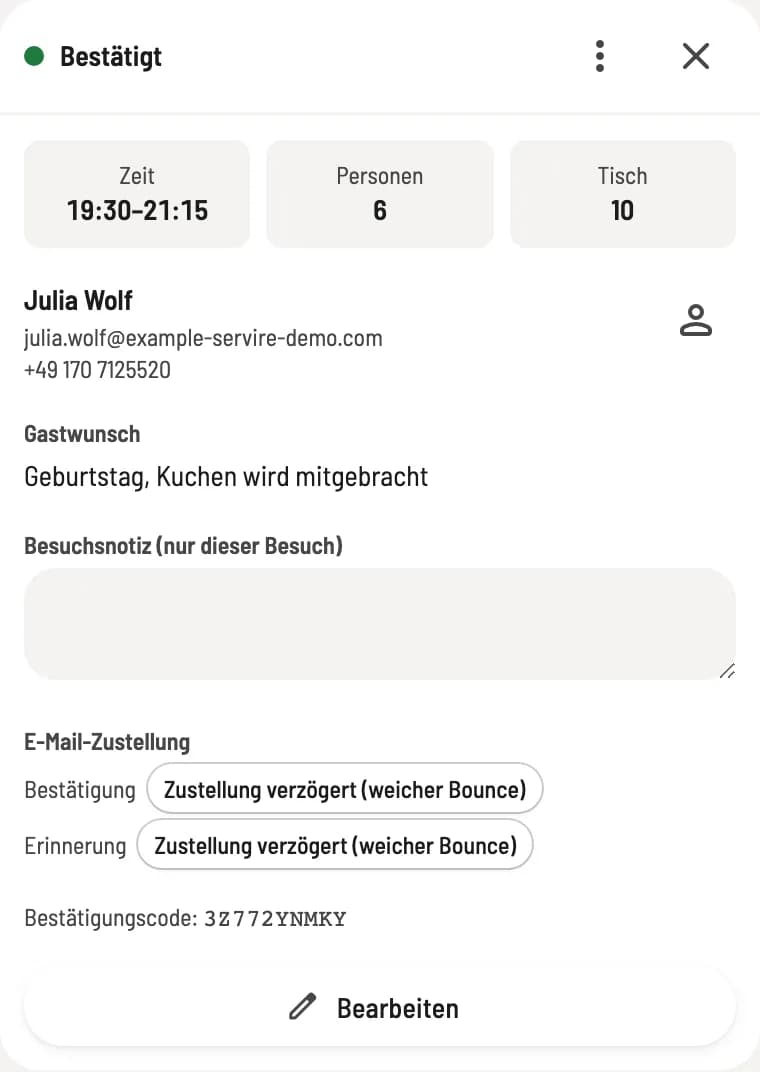
Step 1 of 2
Open map
Clicking on a reservation opens its map next to the floor plan. Clicking on the Time or Number of People tile changes it directly on the map, while clicking on Table starts the table assignment process in the floor plan. Below this, you'll find guest information with statistics, allergies, Guest Request, Visit Notes (this visit only), Email Delivery, History, and the confirmation code.
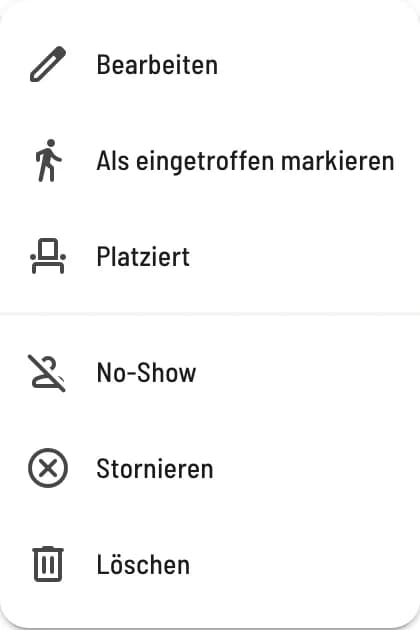
Step 2 of 2
Set status
Under ⋮ (Actions) at the top of the card, you will find the steps for the current status, for example Confirm, Mark as Arrived, Placed, Complete, Revert to Confirmed, No-Show, or Cancel. Edit opens the entire form.
Canceling asks for a reason for cancellation and offers the option to inform the guest via email. Canceled and no-show reservations can be retrieved with Reactivate, and completed reservations with Reopen. Canceling, no-shows, and deleting require the Cancel and Delete Reservations permission – otherwise, the Web desk will report that this permission is missing. More information about the statuses: Edit Reservation and Set Status.
Assign and move tables
Drag a reservation from the service list onto a table in the floor plan – it will be assigned that table. It will not accept a table that is already occupied at that time.

Several tables
To create a table combination, click on the Table tile on the map and then select the tables on the plan. The bar below the plan shows the selected tables and their capacity; if there aren't enough seats, the number of seats will be displayed in red. Click Assign.
In the timeline, you drag a bar to a different time or table. The Web desk saves immediately and briefly offers an undo option.
Walk-in
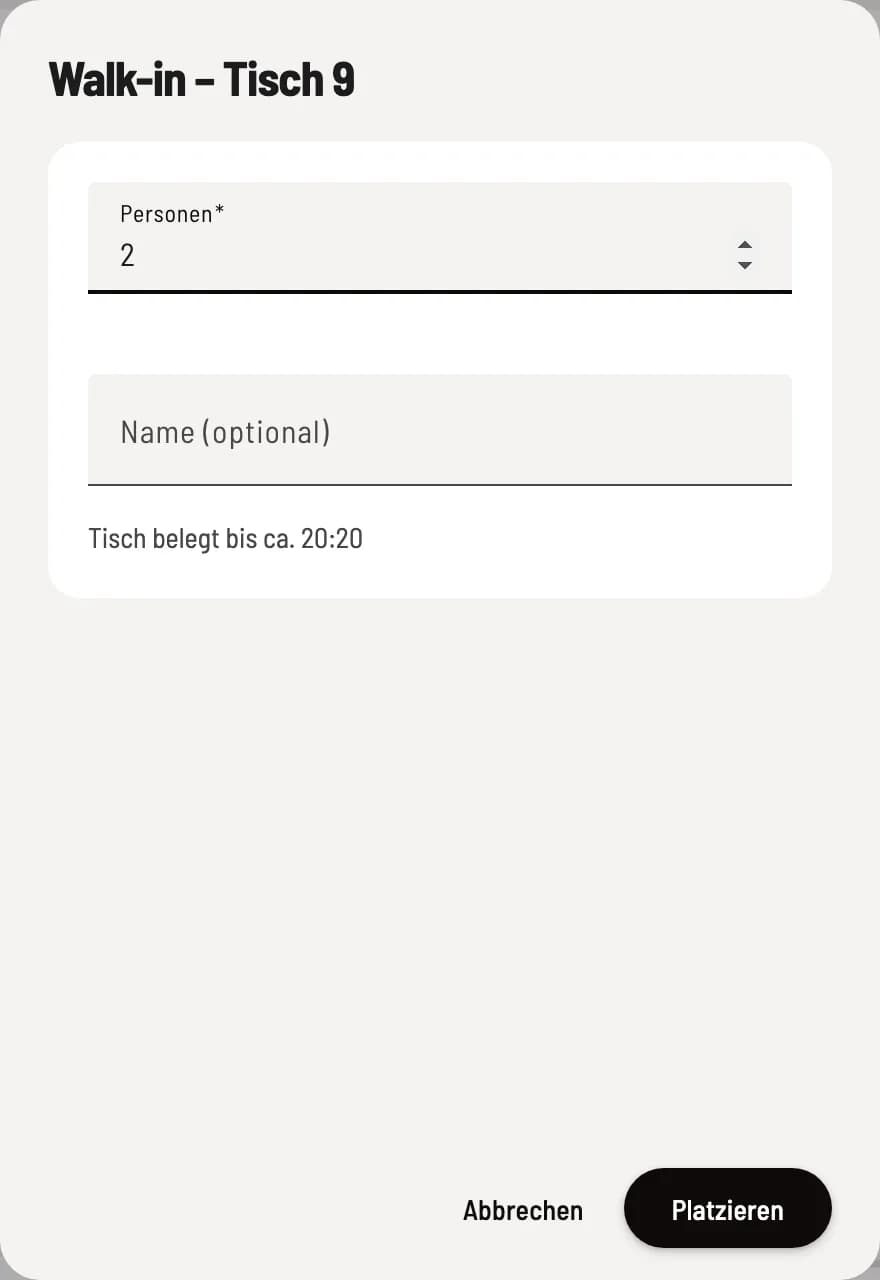
Walk-in seating
In the floor plan, click on an empty table and then on Set Walk-in. Enter the number of people (a name is optional) and click on Place. The dialog box will show until when the table is occupied.
Walk-in seating is only available today if the floor plan is set to Now and the restaurant is currently open.
Waiting list
Using the + button in the Waiting List section, you can add a guest to the list (Preferred Time or Any Time, plus a Note). When a table becomes available, click on the entry: The room plan will open on the requested date, and clicking on a table will seat the guest. Currently, you can only notify the guest by email or remove an entry in the POS app; see Managing the Waiting List.