
Room plan: who sits where and when
View the table plan at any given time, find available times and reserve directly at the table.
The floor plan only shows areas whose table plan is drawn in the Web desk .
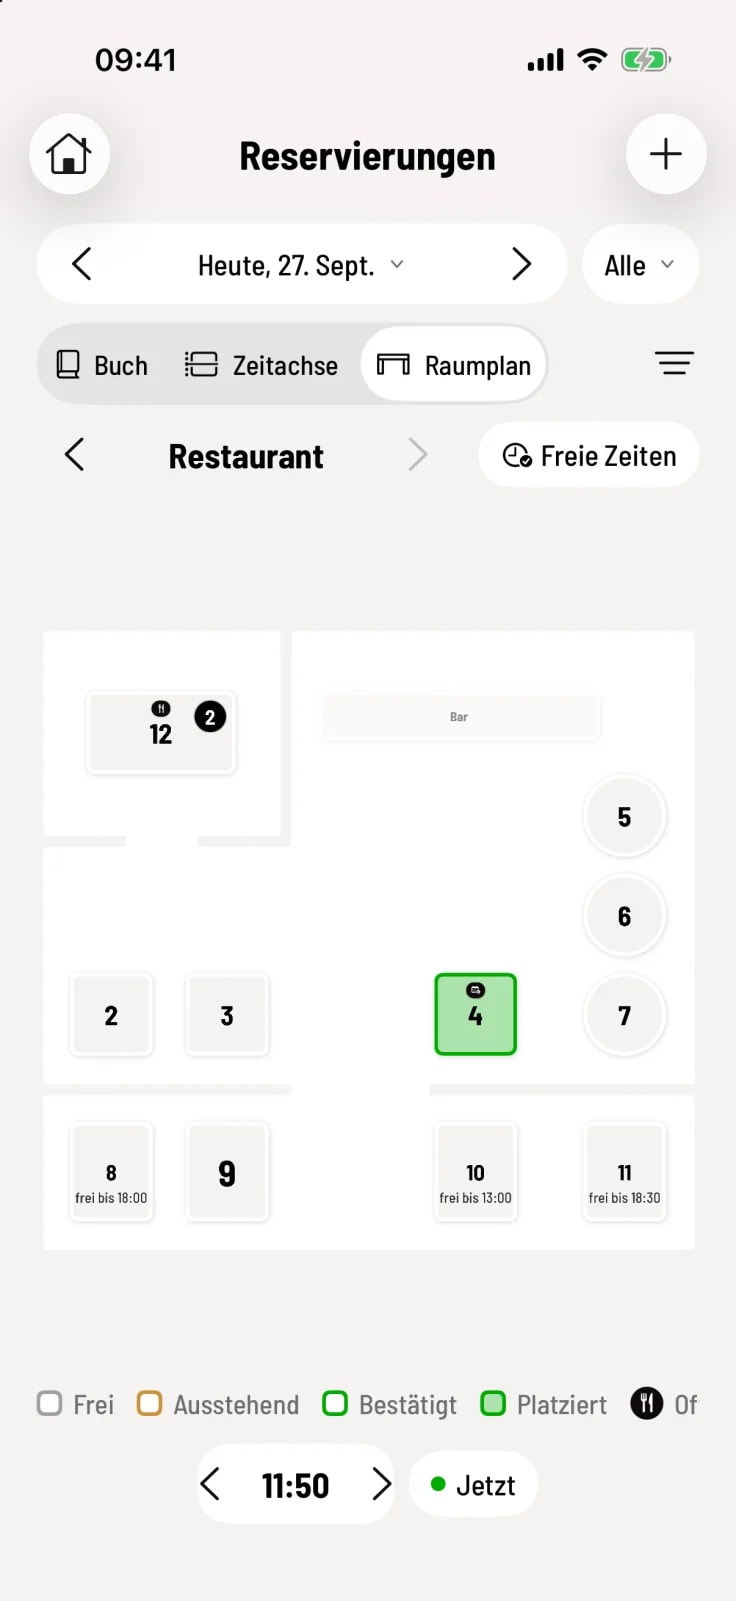
The Room Plan shows your table plan at a specific time. The border of each tile is colored according to its status; it appears filled when someone is seated. Below, it says until 7:30 PM (occupied) or available until 8:00 PM (next reservation). The small number in the upper right corner indicates the number of reservations for that day at that table.
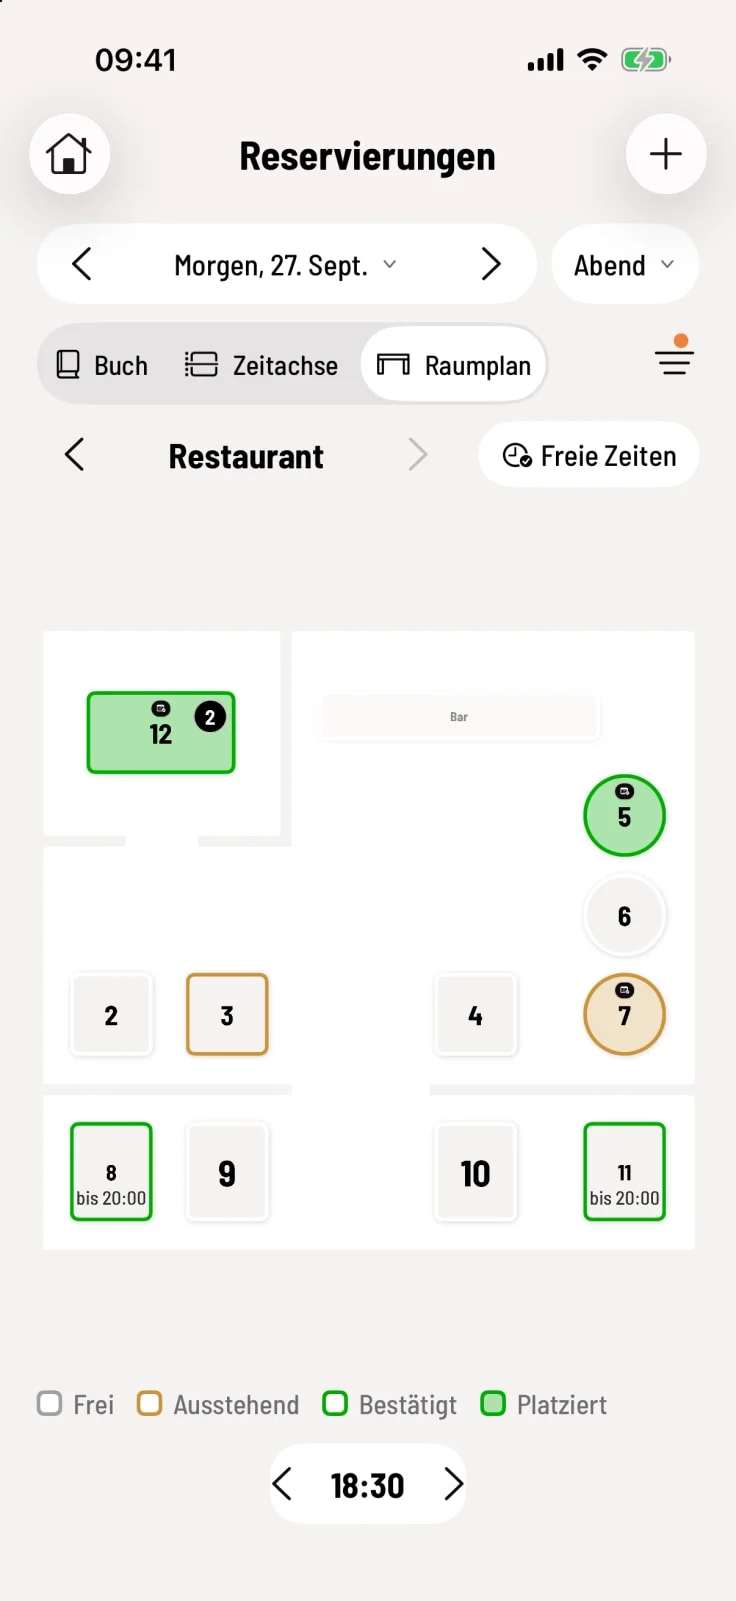
Area and time
Step 1 of 2
Choose time
Use the ‹ and › arrows above the map to scroll through the sections. The arrows at the bottom move the time; Now jumps back to the current time.
Step 2 of 2
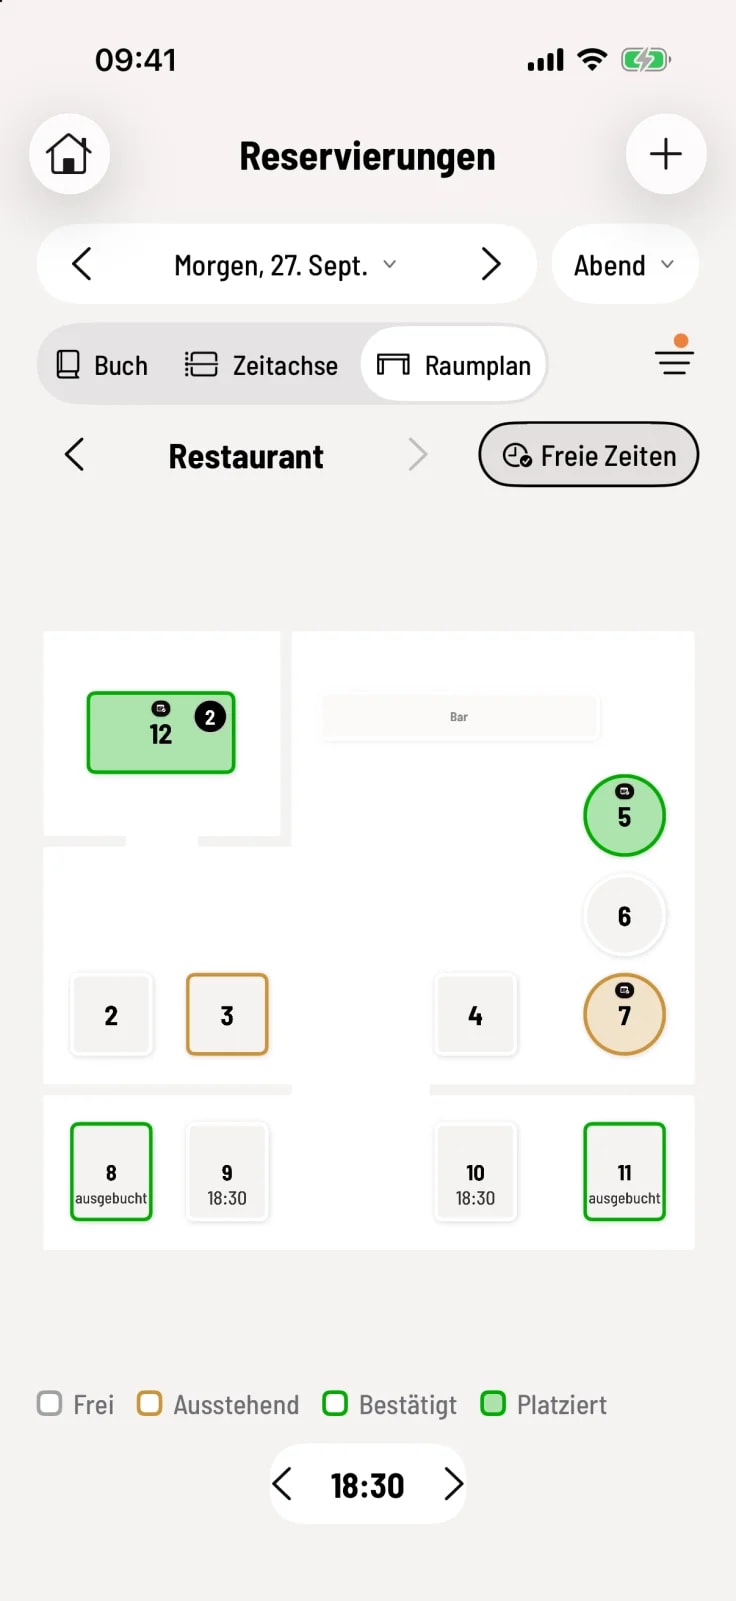
Free time
Tap on Available Times: The next available start times or fully booked will appear under each table. This is an indication, not a guarantee.
Trading directly at the table
Step 1 of 3
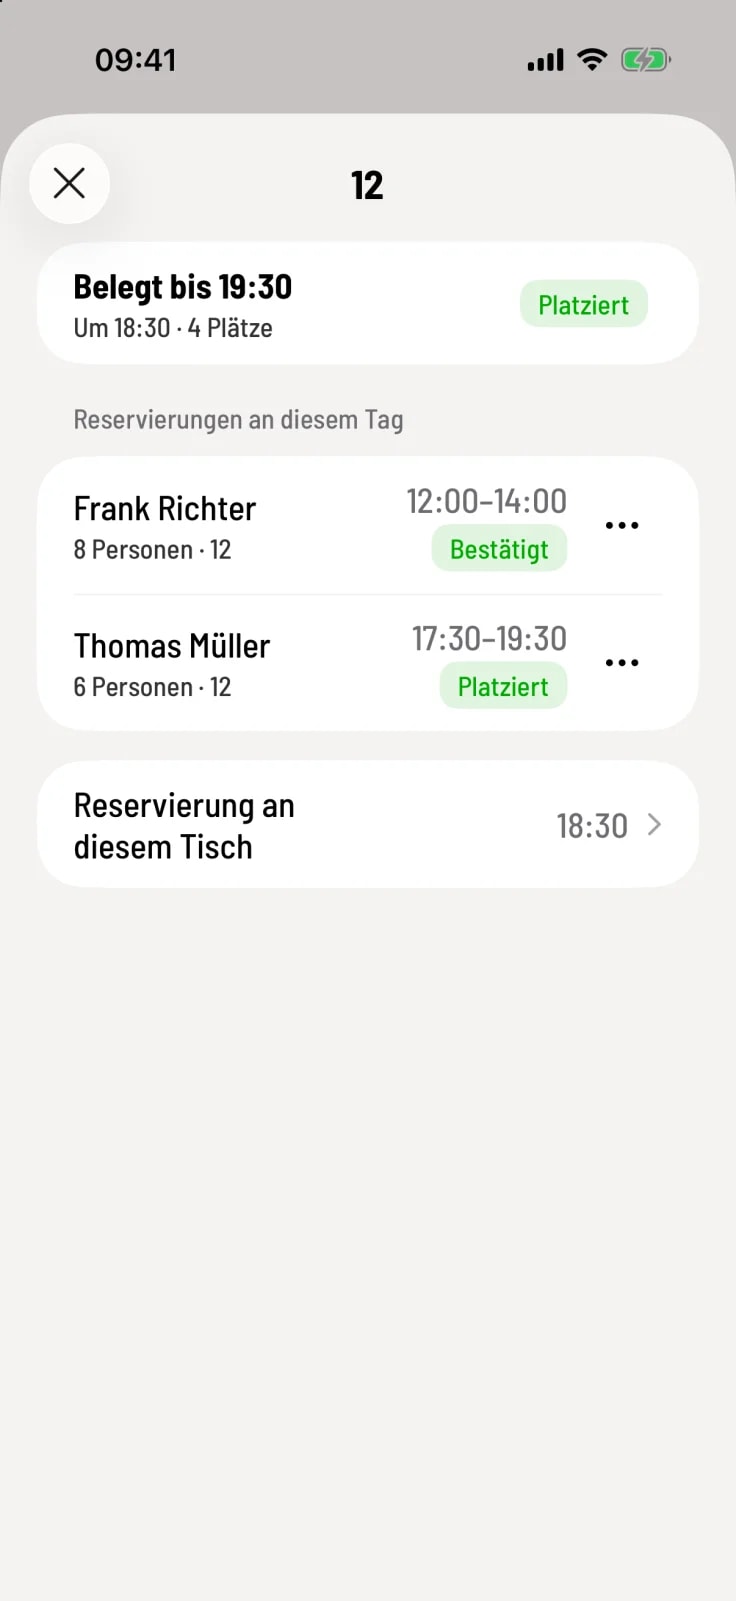
Tap the table
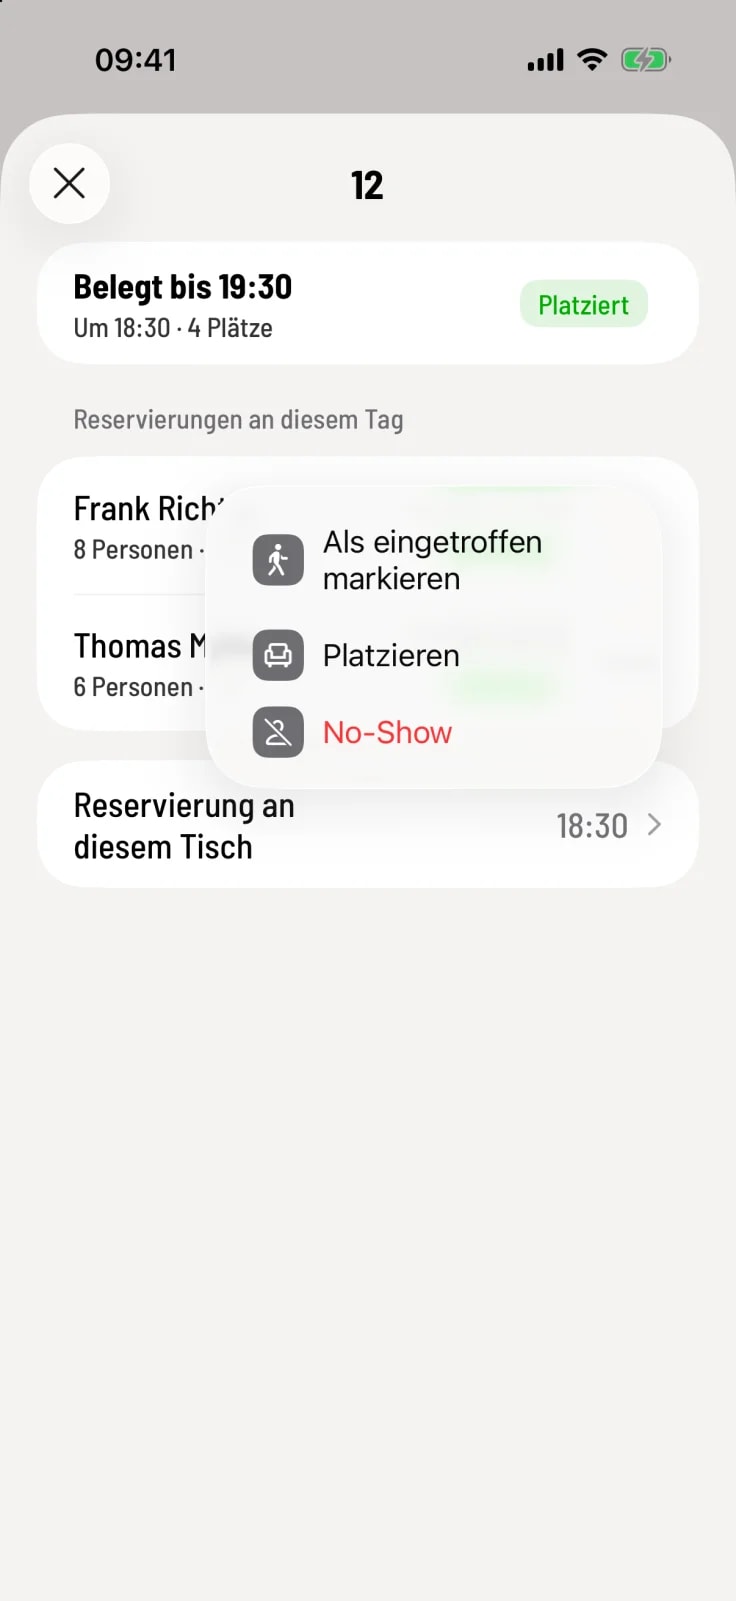
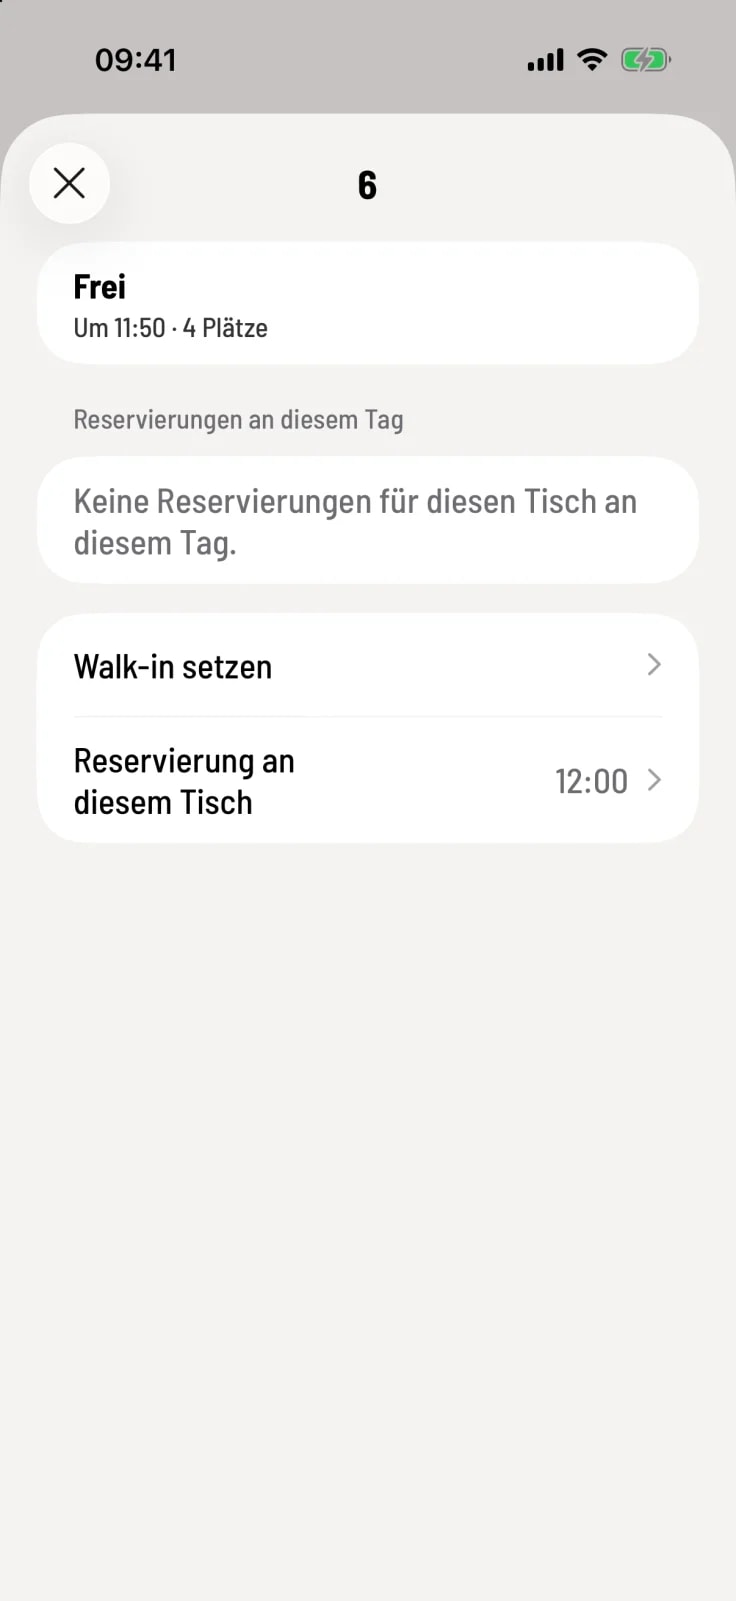
The screen shows whether the table is free or occupied, and all reservations for that day at that table. Tapping on a name opens the reservation details.
Step 2 of 3
Change status
In the section … next to a reservation, you can mark the guest as Arrived, Seated, Completed or No-Show.
Step 3 of 3
Walk-in or reservation
If the table is currently free, Walk-in seating allows walk-in customers to be seated directly there. Reservation at this table opens the form with the table and time options.
From the waiting list and via Select table you can enter the seating mode: At the top it says Select table for …, and tapping on a table assigns it.