
Reservations at the Web desk: a day in overview
The Reservations page on the computer: daily overview, service list, room plan, timeline and book.
In the Web desk, open Reservations in the left-hand menu. The page displays the same day as the reservation book in the POS app and uses the same colors: orange indicates a change requires attention, green indicates it's okay. Changes appear immediately on all devices.
Prerequisite: The Reservations module is part of the Max plan ( switch plans ). Upon first opening it, a wizard will guide you through the setup. You can activate and deactivate online reservations for guests using the Active or Inactive status next to the title; the page itself and all existing reservations remain accessible.
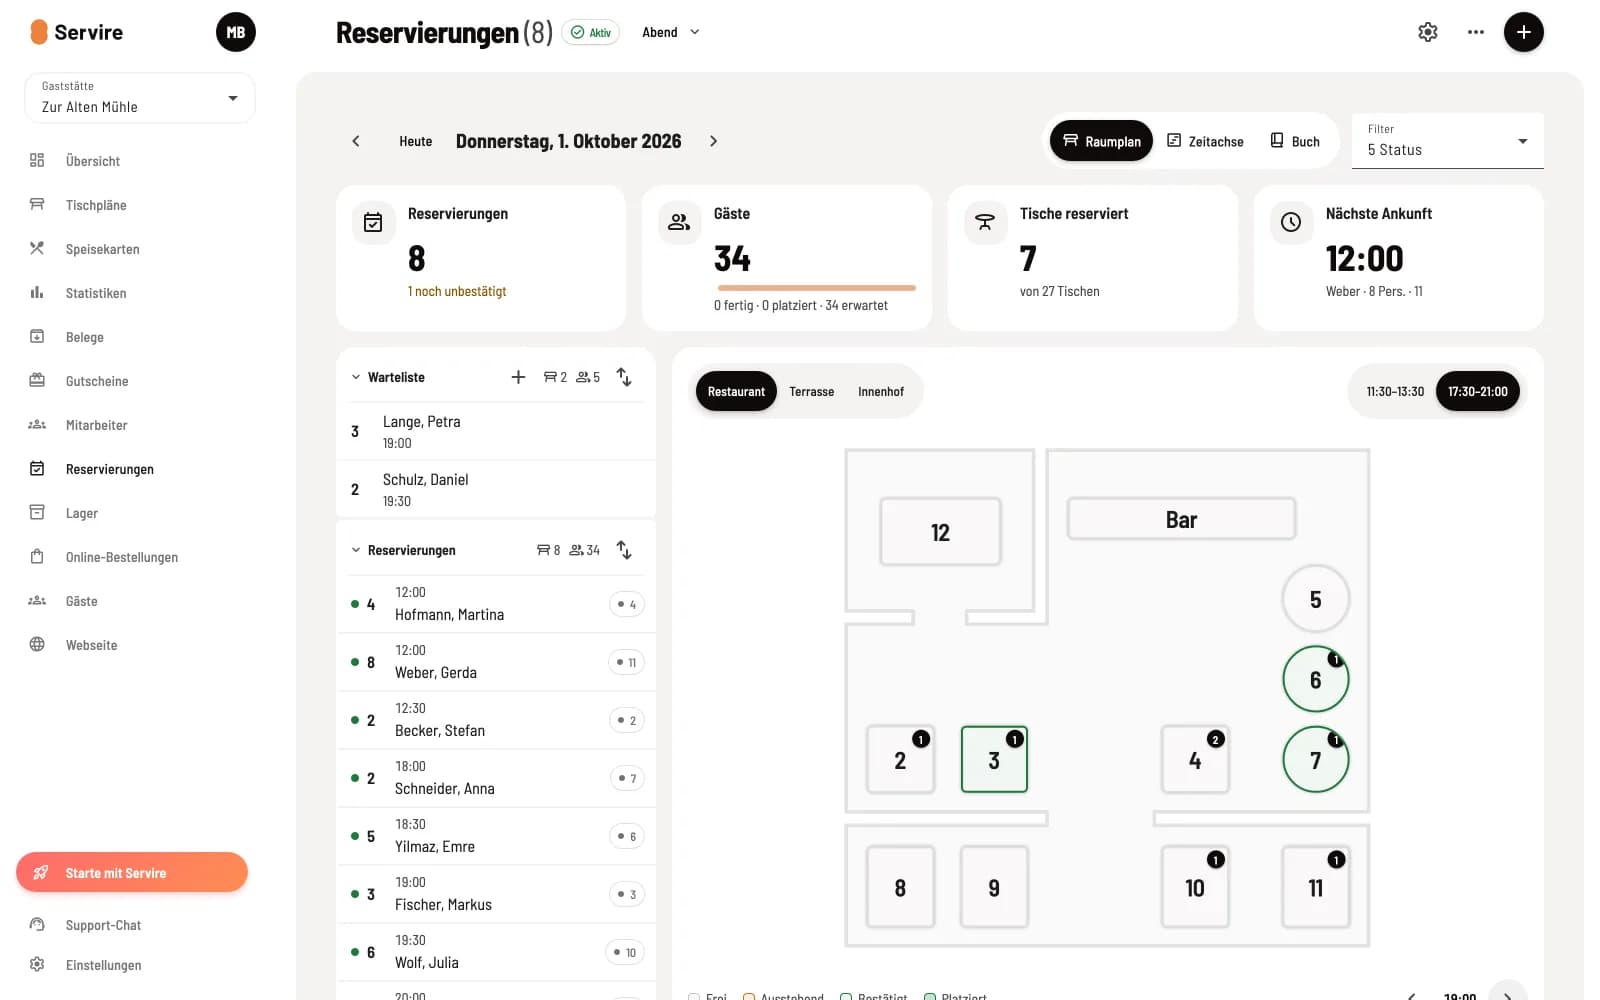
The head of the page
Status – Active or Inactive activates the online reservation.
Service Time – for example, Evening. If there are multiple service times, you select them from a list; the currently active one has a green dot.
Gear icon – opens the reservation settings.
… – Print daily list (time, people, guest, table, phone, status, note) and Export day as calendar file.
+ – Create a new reservation, see Edit reservations in the Web desk.
Below, you select the day with ‹ and ›, Today jumps back. On the right, you switch between Room Plan, Timeline and Book, and use Filter to refine your search by status and areas.
Daily overview

Reservations – the number of the day, including how many are still unconfirmed.
Guests – all expected guests, divided into ready, seated and expected.
Tables now occupied (on other days tables reserved) – of all tables.
Next Arrival – Time, name, number of people and table of the next reservation.
Cancellations and no-shows are not included. The tiles take precedence over the floor plan and timeline; the book has none.
Service list
Next to the floor plan and timeline, on the left is the service list with the sections Waiting List, Reservations, Seated, Completed, and Removed. Each section counts groups and guests and has its own Sort button, for example, by Scheduled Time, Arrived, Name, or Table. A row displays status, people, time, name, and table; No Table is highlighted in orange.
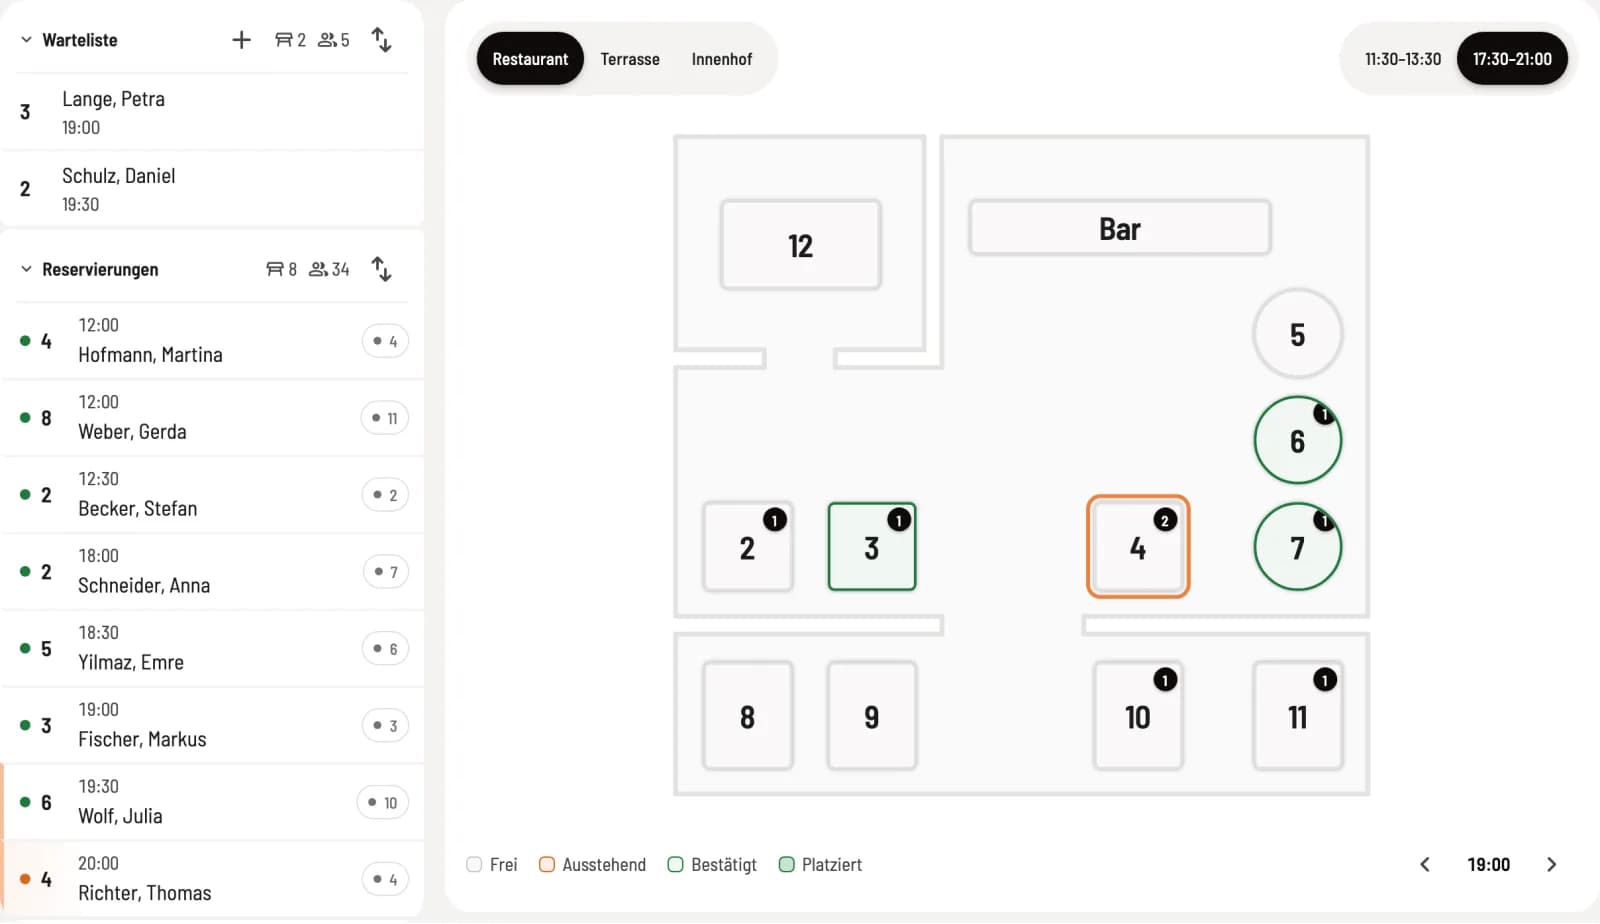
Find a table
When you hover your mouse over a reservation in the list, its table lights up on the floor plan. A click opens the reservation card next to the plan.
Floor plan
The floor plan shows your tables at a given time. At the top, you can change the section and jump to a specific service time; at the bottom, you can adjust the time using the arrows ‹ and ›. Now returns to the current time. The legend explains the colors: Free, Pending, Confirmed, Seated, and – currently close to "now" – Open Orders. Clicking on a table displays its reservations for the day.
Timeline
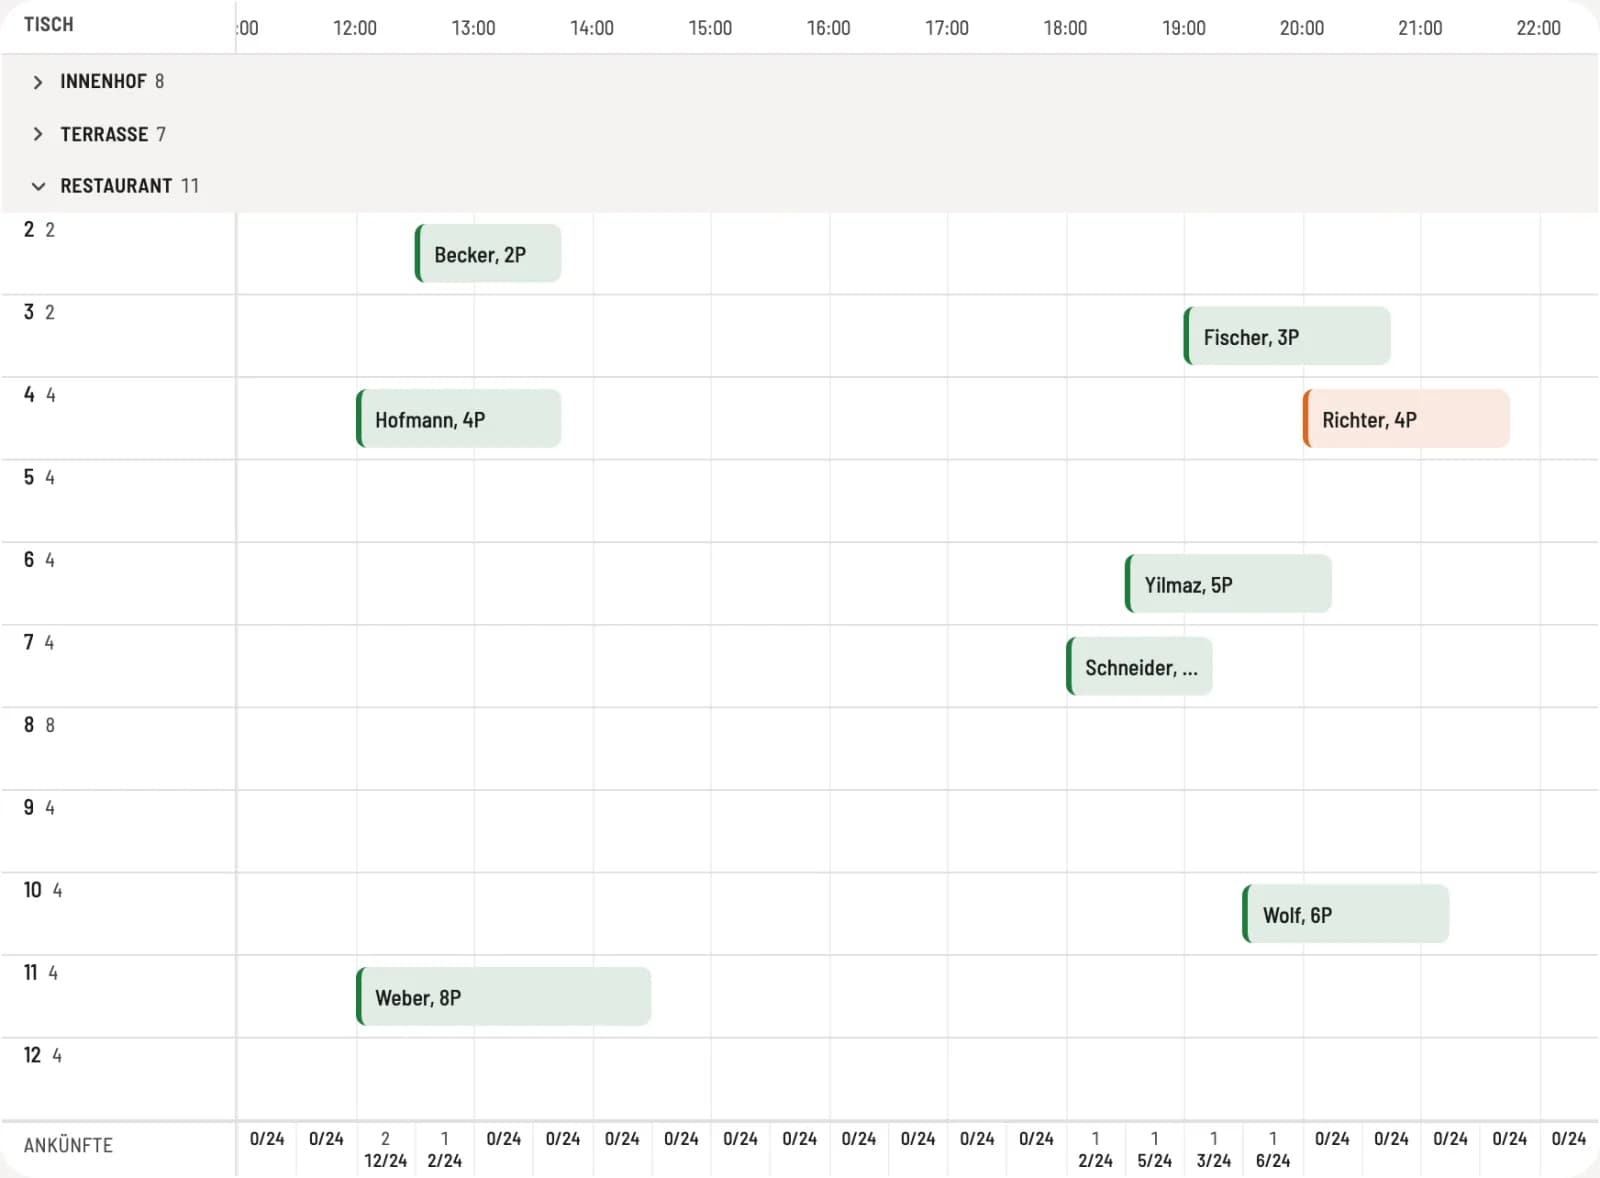
The timeline displays each table as a row and each reservation as a bar. Reservations without a table are listed at the top under No Table, and Double Bookings are marked in red. The Arrivals row counts groups and guests per time increment against the maximum service time. Clicking on an empty space creates a reservation there; you can drag a bar with the mouse to a different time or table.
Book
The book lists reservations in a table with time, guest, number of people, table, status, source, and notes. Use Search to find guests, Date range (From, To) to view multiple days at once, and Reset to clear both. Use the menu for each row to set the status.
The steps involved – creating a reservation, assigning a table, walk-ins, waiting list, status – are described in the "Edit Reservations" section of the Web desk. The same process applies to the "Reservations" view at the POS.