
Online booking: what your guests see
Here's how guests can make reservations via your link, your Servire website or the widget – step by step on their mobile phone.
Guests can make reservations via your reservation link, your Servire website, or the widget on your own website. They will see the same three-step page everywhere; it works on mobile devices and computers, in German and English. The reservation appears immediately in the POS system and on the Web desk.
Prerequisite: The Reservations module is part of the Max plan ( switch plans ). An assistant will guide you through the setup process the first time you open it. Online reservations must be set to Active. Guests will only see available times if tables are available for online reservation and have a specified number of seats, and only within your opening and service hours.
This is how a guest makes a reservation
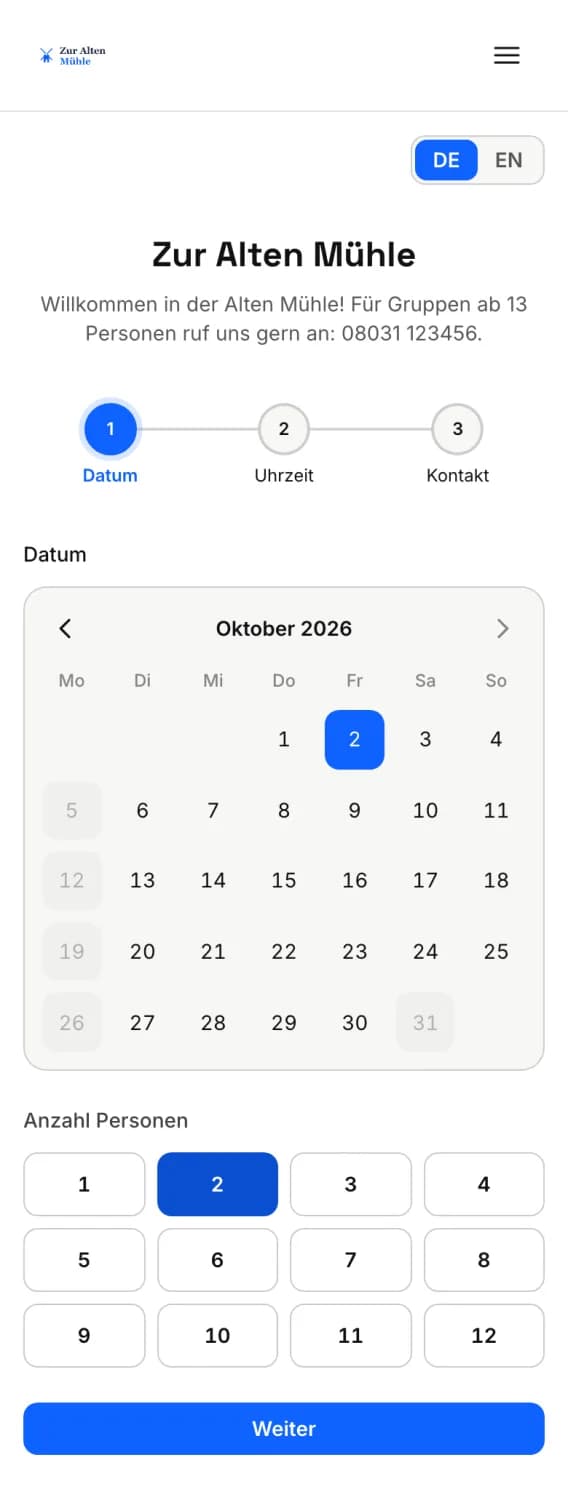
Step 1 of 4
1. Date and persons
At the top are the name of your restaurant and your welcome message. The guest selects a day from the calendar and the number of people. Closed days and days outside the booking window are grayed out.
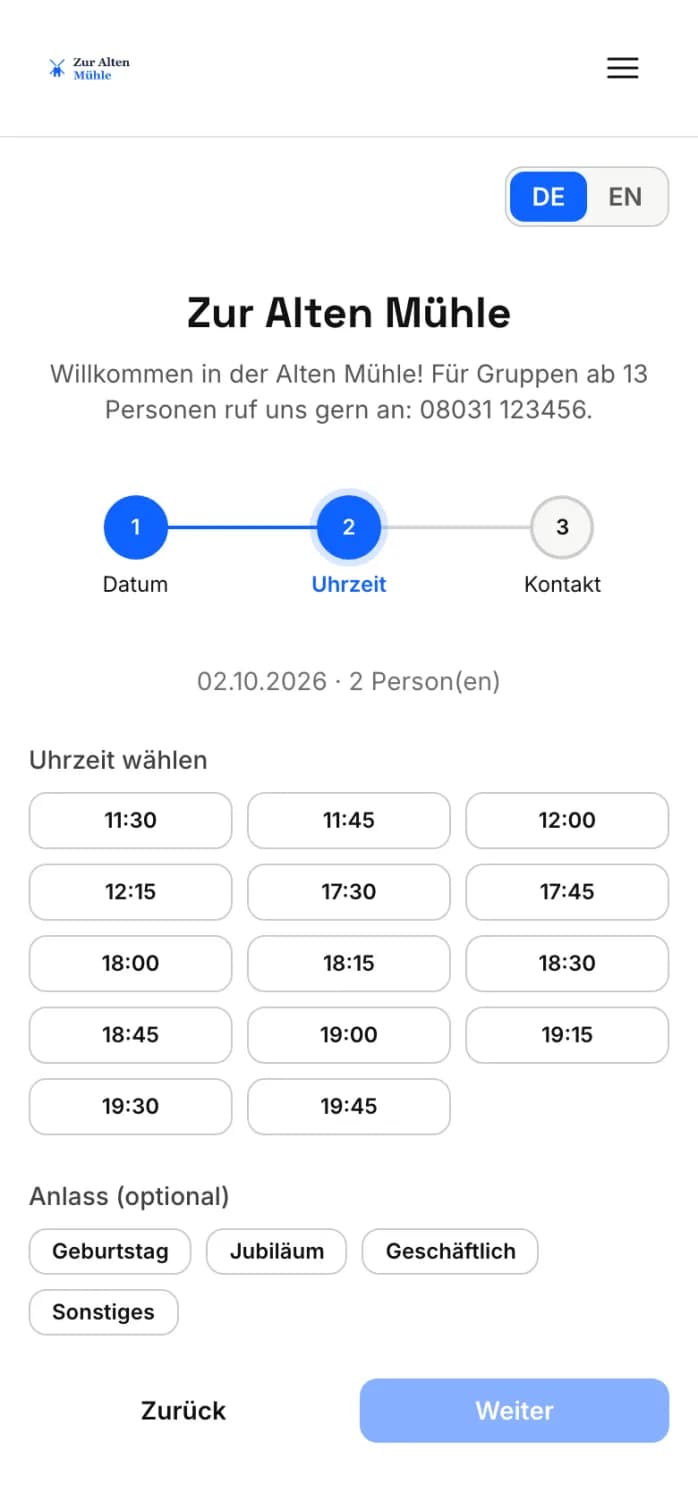
Step 2 of 4
2. Time
The page only displays times when a suitable table is available and the arrivals for each time slot are not full. Guests can optionally select an occasion. If no tables are available or the group is too large, your texts for fully booked times or oversized groups will appear, along with options to call the restaurant and add to the waiting list.
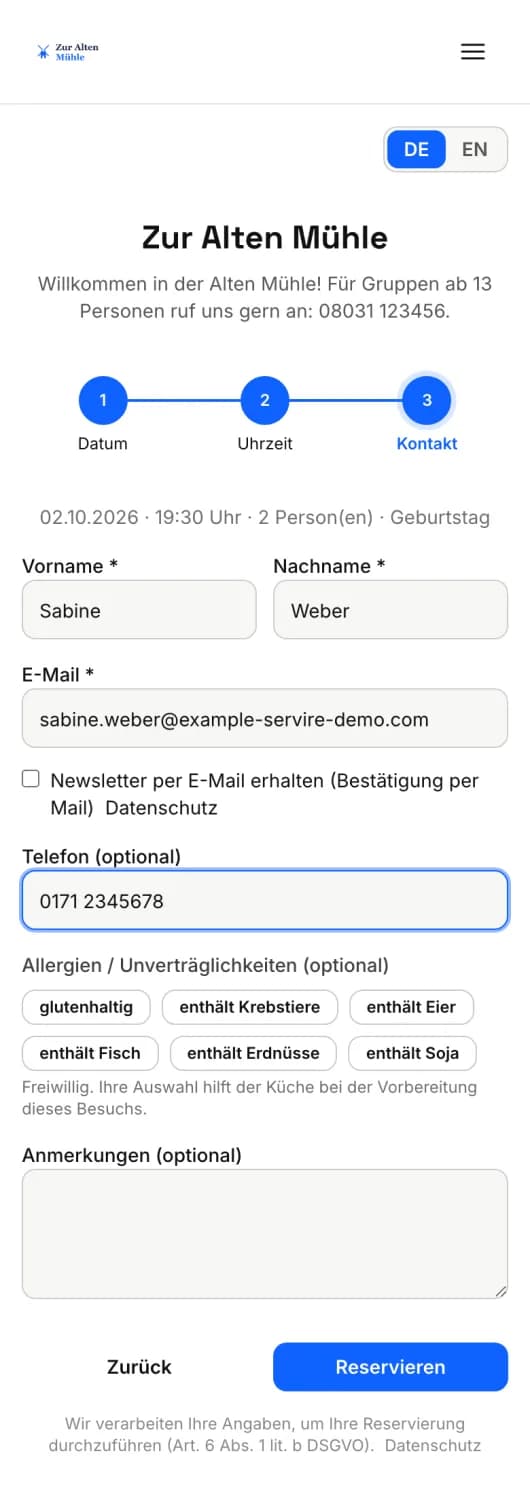
Step 3 of 4
3. Contact
Required fields are First Name, Last Name, and Email; optional fields are Phone Number, Comments, and – if you have enabled allergen disclosure – Allergies/Intolerances. If you require acceptance of your cancellation policy, it will be displayed here with a mandatory checkmark. The guest taps Reserve.
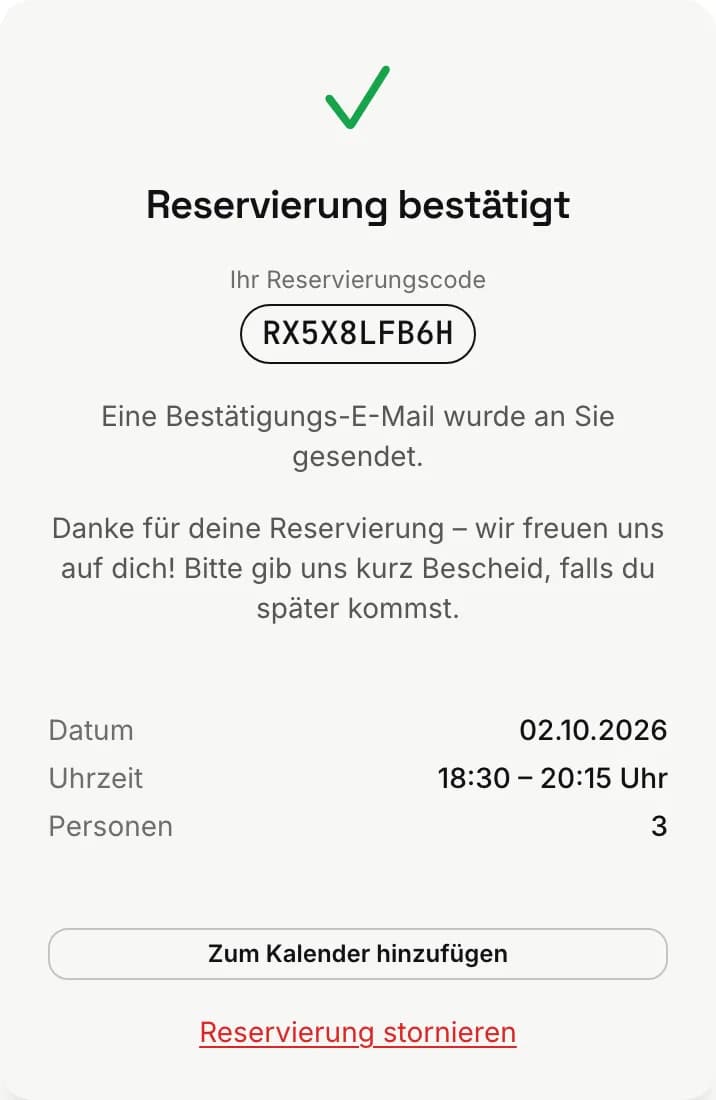
Step 4 of 4
Confirmation
The guest sees Reservation Confirmed with the reservation code, your confirmation message, date, time, and number of people. They can save the appointment by clicking Add to Calendar. The confirmation also arrives via email. If you need to review the reservation first, it will say Request Received, and the guest will receive a second email once you confirm.
Cancel and rebook
The guest cancels via the link in the confirmation email. If you have enabled guests can rebook online, they can also change the date, time, and number of people there – up to the minimum notice period before the appointment. You will see every change immediately in the POS system and Web desk.
Waiting list
If a guest can't find a free table, they can add themselves to the waiting list for that day, optionally specifying their preferred time. They will then be on your waiting list and will receive an email when you notify them.
You can configure the text, allergen information, and rules for this page in the reservation settings. Instructions on how to share the link and embed the widget can be found under General and Embedding.