
Setting up a duty roster
This is how you activate the duty roster, create positions and assign your team.
With the scheduling tool, you plan who works when in the Web desk and publish the week's schedule to your team. Your employees can see their shifts in the team area in their browser, even on their mobile phones. They don't need the POS app for this.
Prerequisite: The duty roster belongs to the Max tariff. It can be set up by the owner and anyone with the right May manage the duty roster. It processes your employees' data and therefore requires a data processing agreement. If this agreement is missing, it will appear first; only the owner can accept it.
Turn on the duty roster
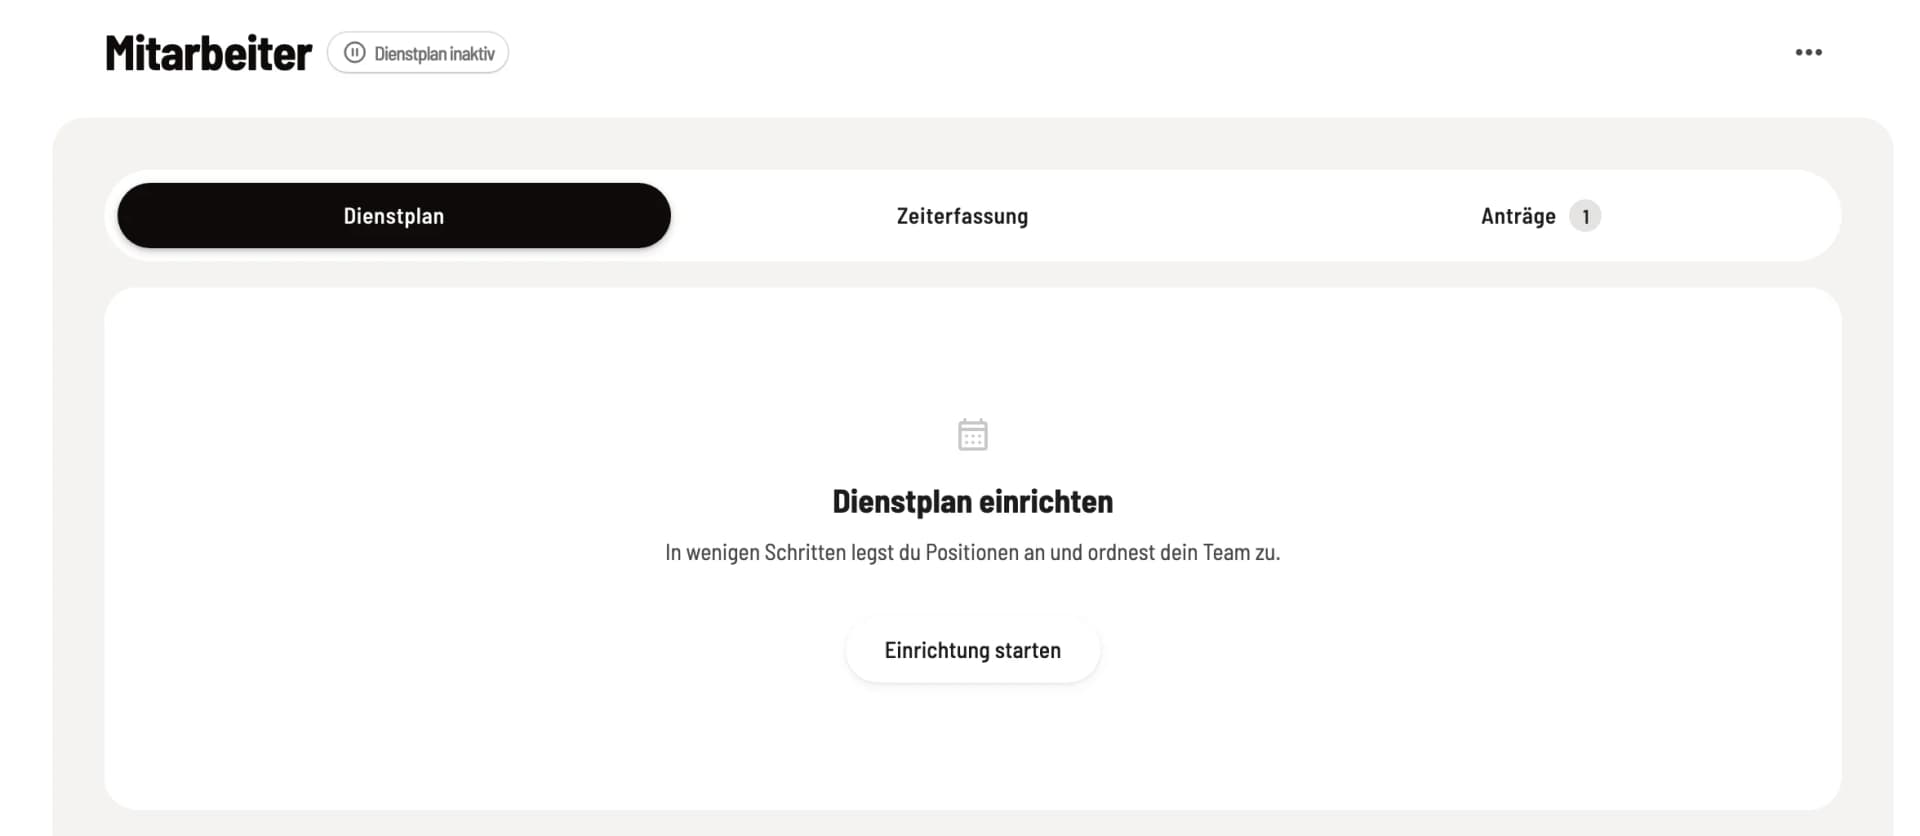
Start setup
Open Employees and the Schedule tab. As long as the schedule is not set up, it will say Set up schedule with the Start setup button. The gray Schedule inactive badge next to the heading also starts the setup wizard.
Do you only want to plan and not track hours? In the first step of the time tracking wizard, under Only use the schedule?, the link Set up schedule also leads here. Once the schedule is running, the Employees menu item will take you directly to the weekly schedule.
The setup assistant
Saving only occurs when you activate the duty roster. If you cancel before then, nothing will be saved.
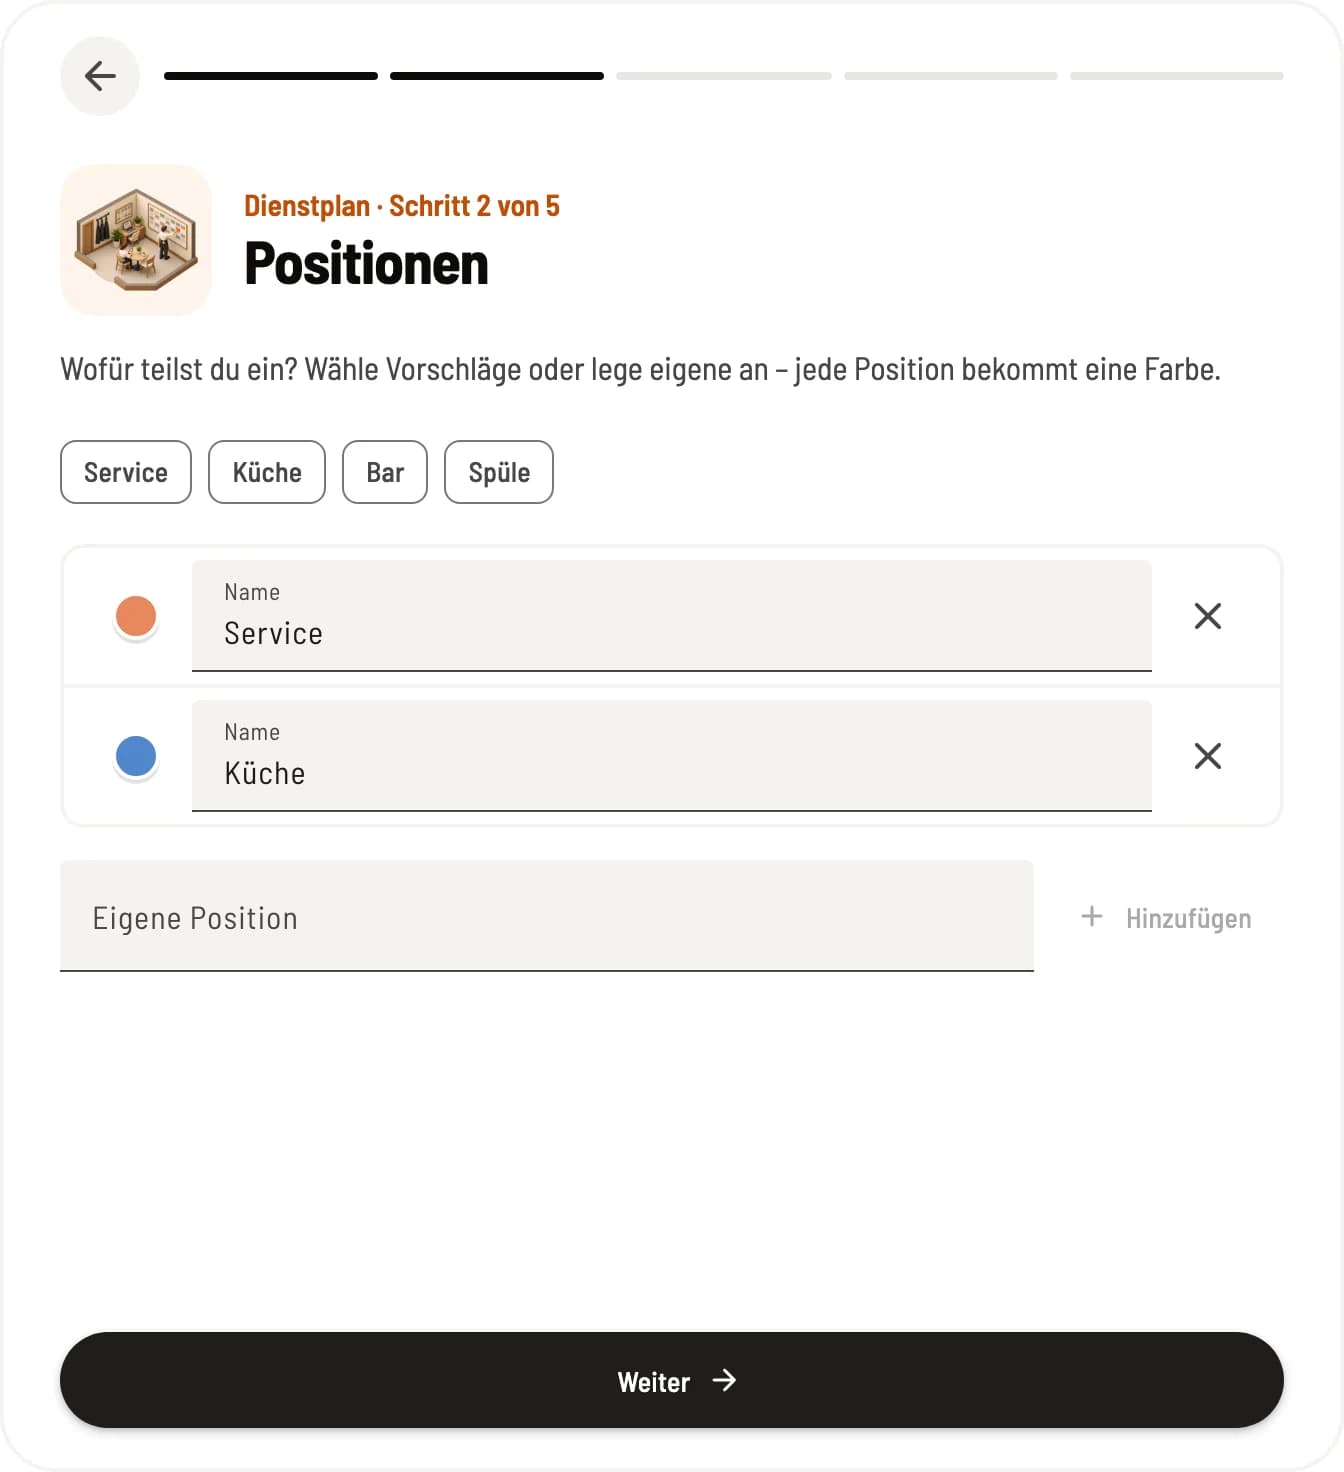
Step 1 of 3
Positions
The wizard starts with Start Setup. Then you choose what you want to allocate the space for. Service, Kitchen, Bar, and Sink are available as suggestions; you can add more under Custom Position. Each position is assigned a color so you can easily identify its duties on the plan.
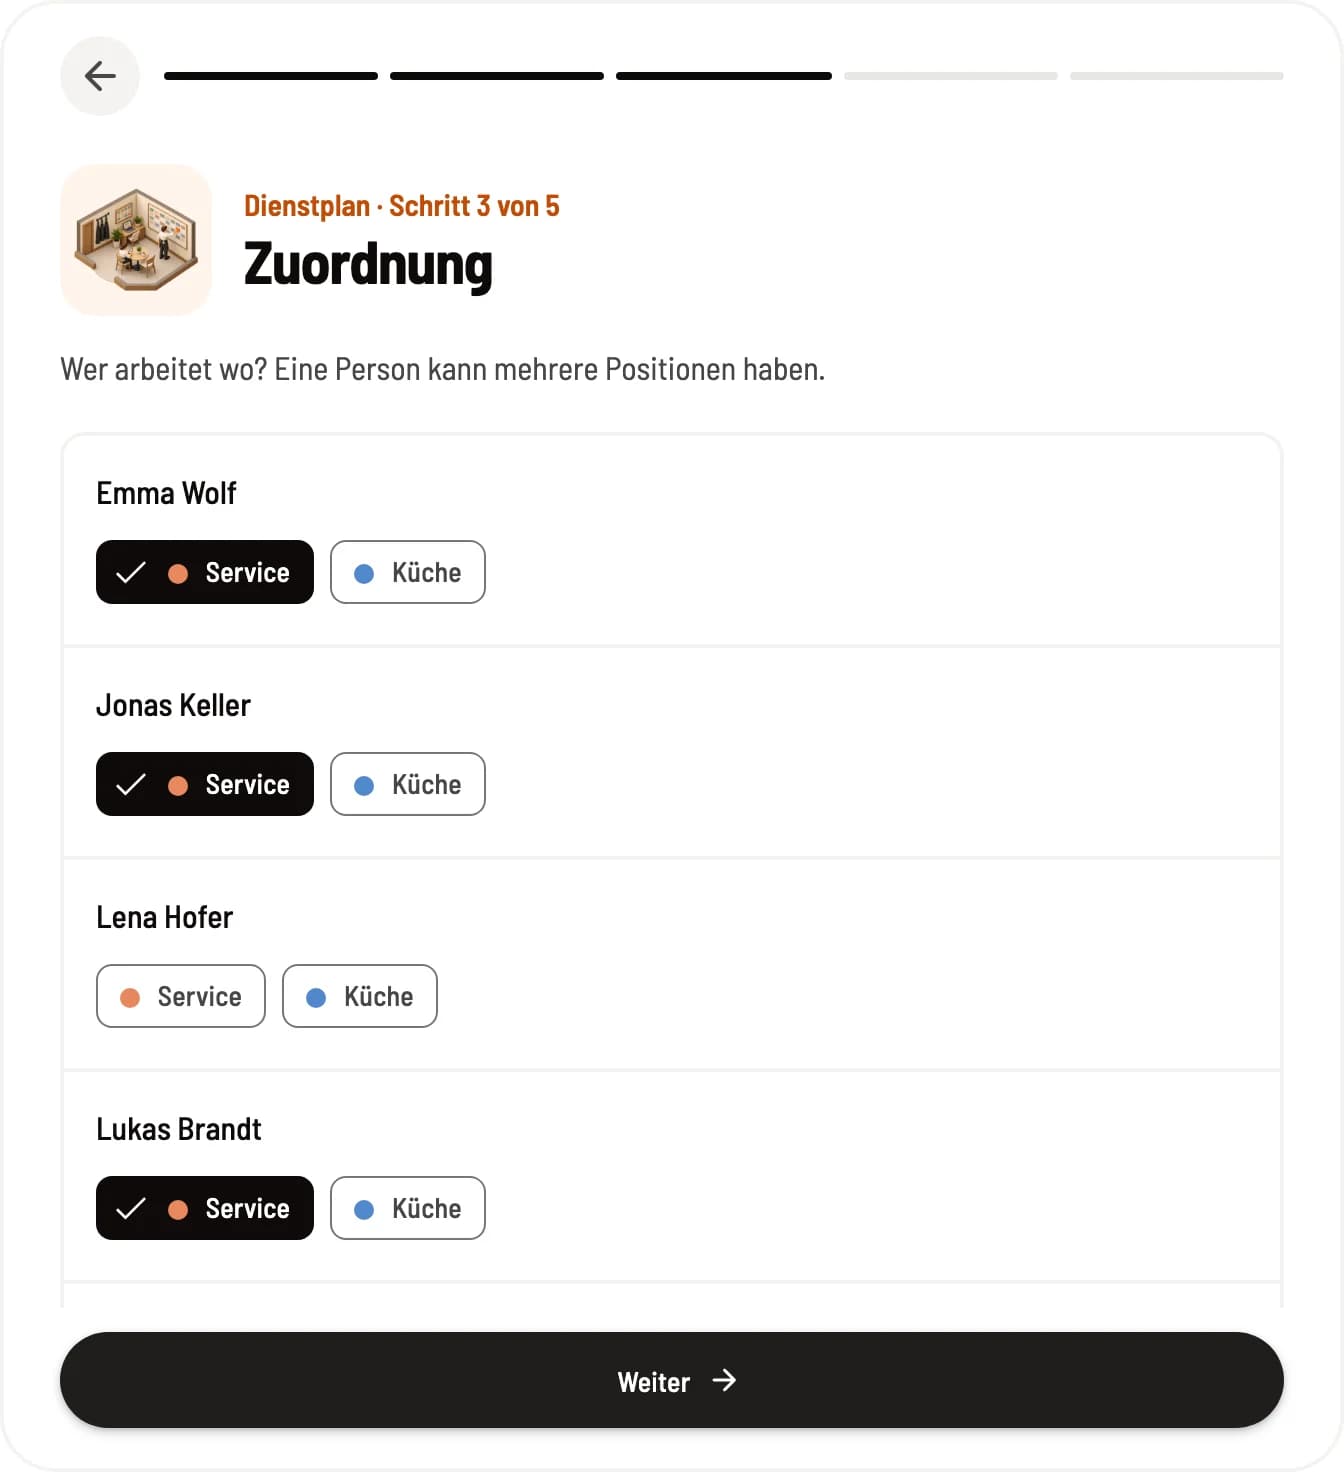
Step 2 of 3
Assignment
Select the positions each person holds. A person can hold multiple positions. Those without a position will not have their own row in the plan. Anyone not yet connected to your company is missing here; you can assign them later in the employee dialog.
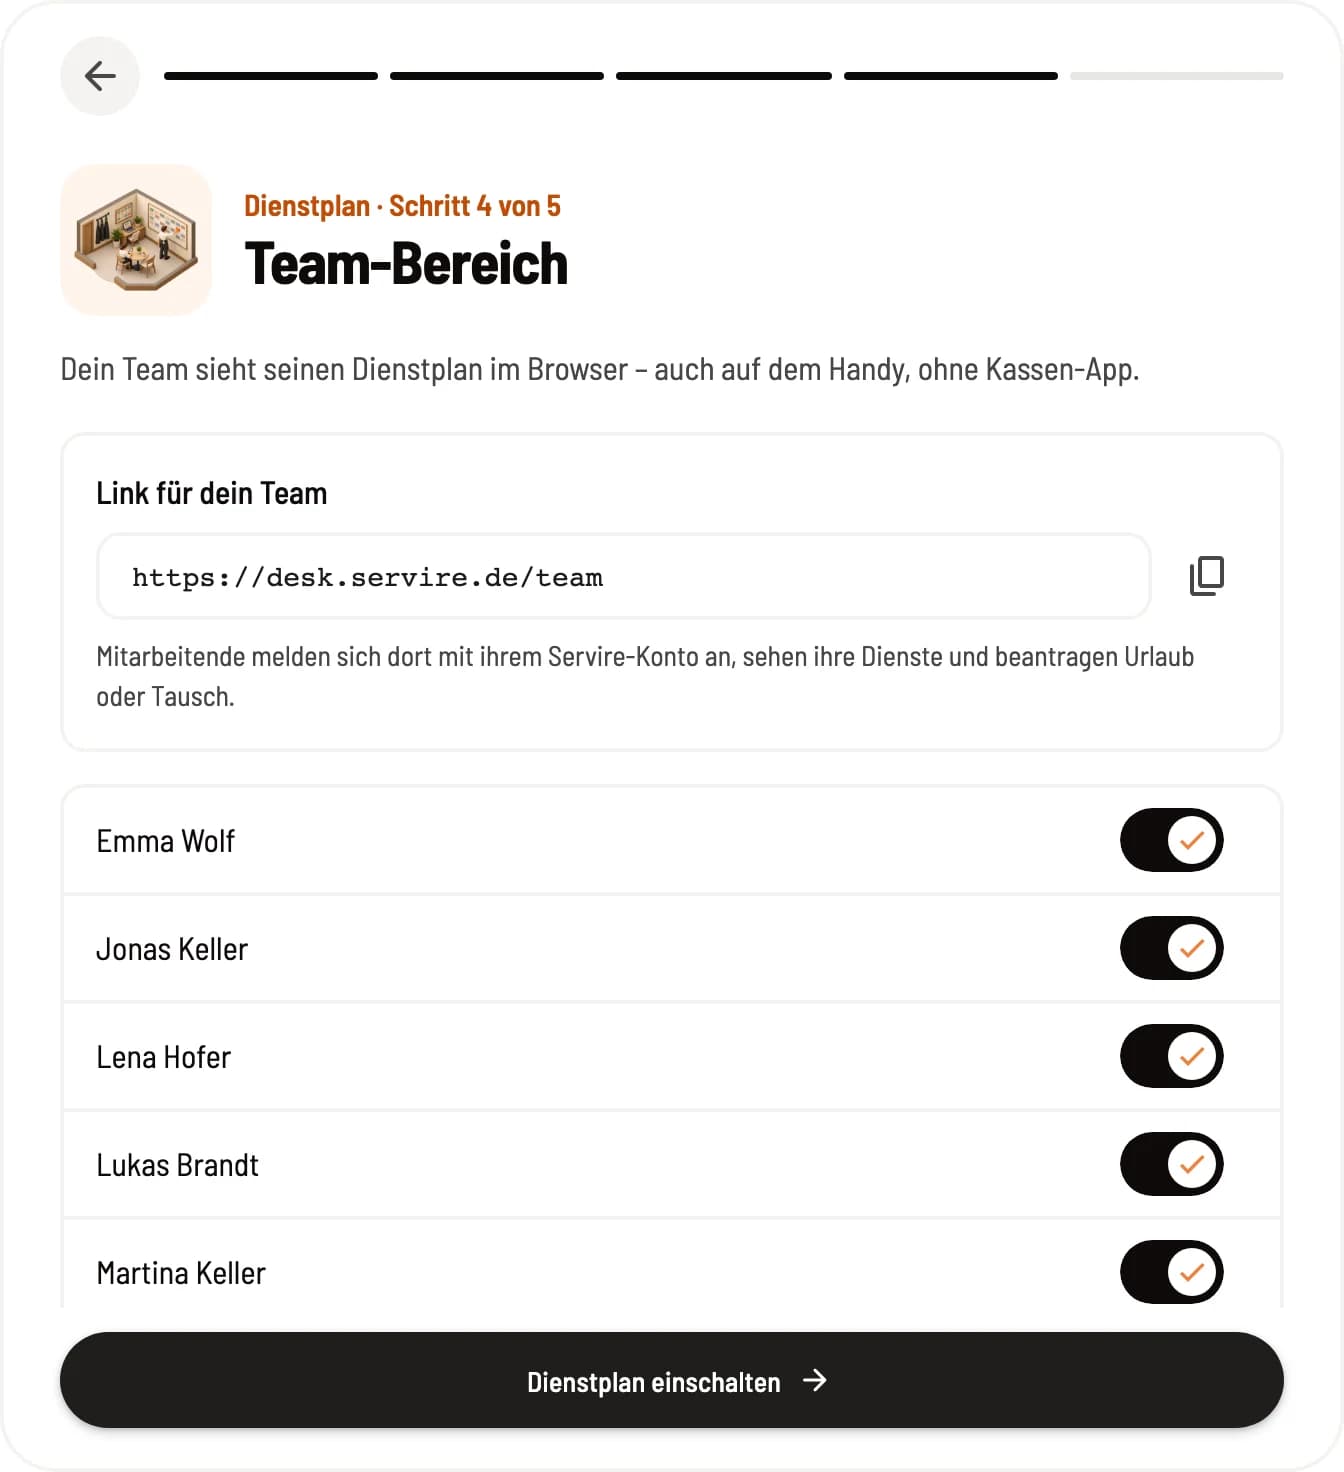
Step 3 of 3
Team area
Under Link for your team, you can copy the address of the team area using Copy link and send it to your team. The Team area for… toggle determines whether each person uses it; only the owner can change it. Turn on schedule saves everything, View schedule opens the current week.
Change positions and details per person
You can manage shifts via the gear icon in the header (on your phone, in the menu …) under Shift Settings → Shifts: rename, change color, sort by handle, or archive. An archived shift is no longer selectable; old shifts retain their color.
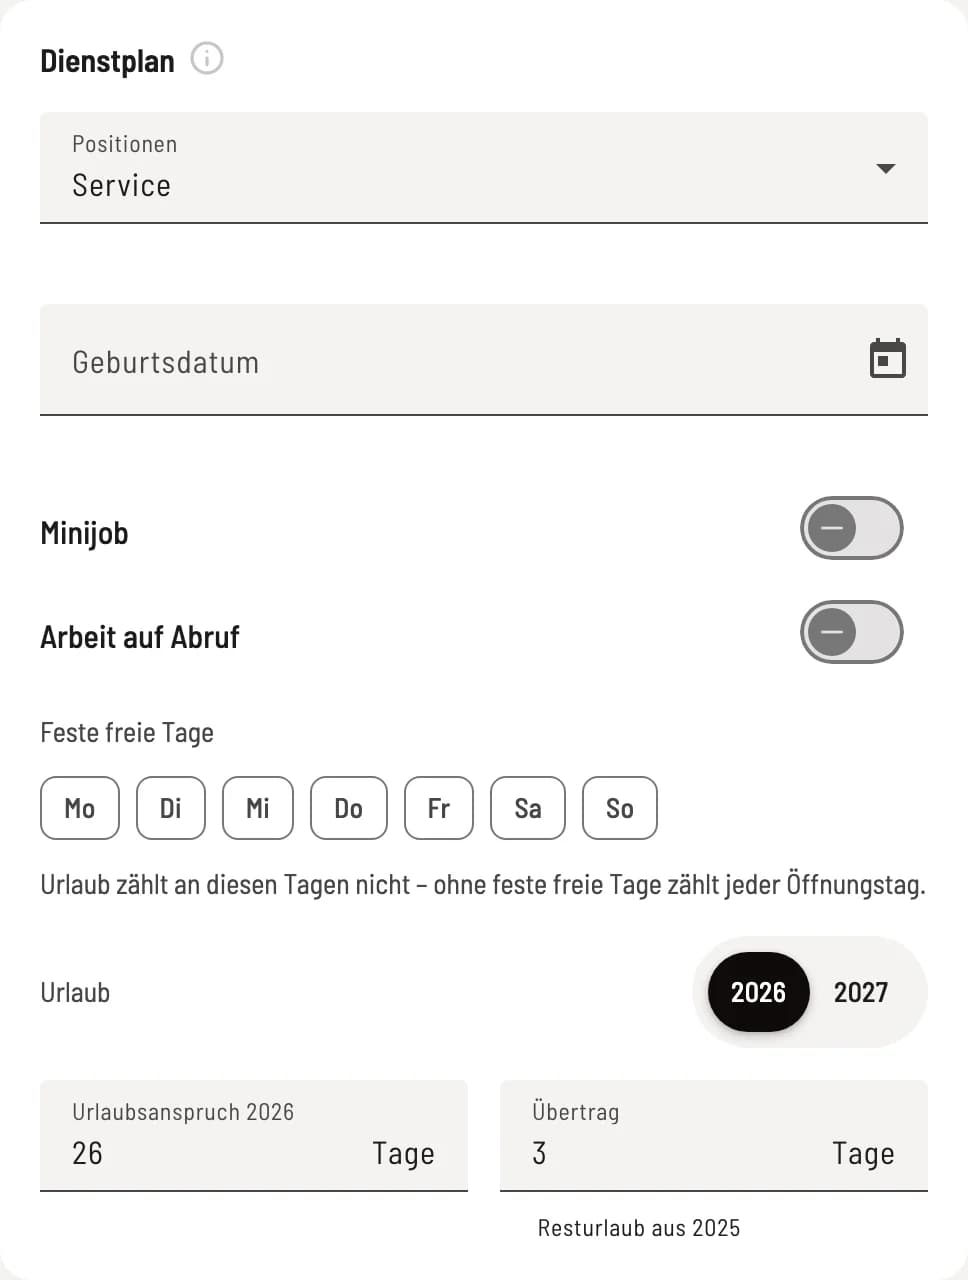
Section on duty roster in the employee dialogue
The information the work schedule needs about a person is found in the Edit Employee dialog, under the Work Schedule section: Positions, Date of Birth, Mini-Job, On-Call Work, Fixed Days Off, and under Vacation, you can select Vacation Entitlement and Carryover for each year; at the top, you select the current or next year. This information is then used to generate the notes in the work schedule. This section is visible to everyone with Permission to Manage the Work Schedule once the work schedule has been set up.
Turn off the duty roster
A click on the green Schedule Active badge and Deactivate turns it off. Requests, notifications, and reminders will then be paused; your team will only see the last published status in read-only mode. Schedules, absences, and vacation balances will remain unchanged; the assistant will not reappear when reactivated.
Before creating your first schedule, go to Schedule Settings → Shift Templates and define your usual shifts, such as "Early 10:00–16:00" or "Evening 17:00 until the end". Then you can create most shifts with a single click.