
Setting up Stripe: Connect your account and pair your card reader.
Step by step: Connect Stripe in the Web desk , answer Stripe's questions and pair the Stripe Reader S700 in the POS app.
With Stripe, you can accept cards at the checkout: either at the Stripe Reader S700 or contactlessly directly on your iPhone or Android device (Tap to Pay). Setup has three parts: You connect Stripe to the Web desk, answer a few questions about your business on Stripe, and pair the card reader in the POS app.
What you need: Employee authorization Permission to set up payment service providers (SumUp, Stripe, PayPal) (as the owner, you have this automatically), your ID and a smartphone for Stripe's identity verification, the IBAN of your business account, and the full address of your restaurant under Settings → Restaurant. A card reader cannot be registered without an address. Card payments at the register are available in all plans.
Connect Stripe to Web desk
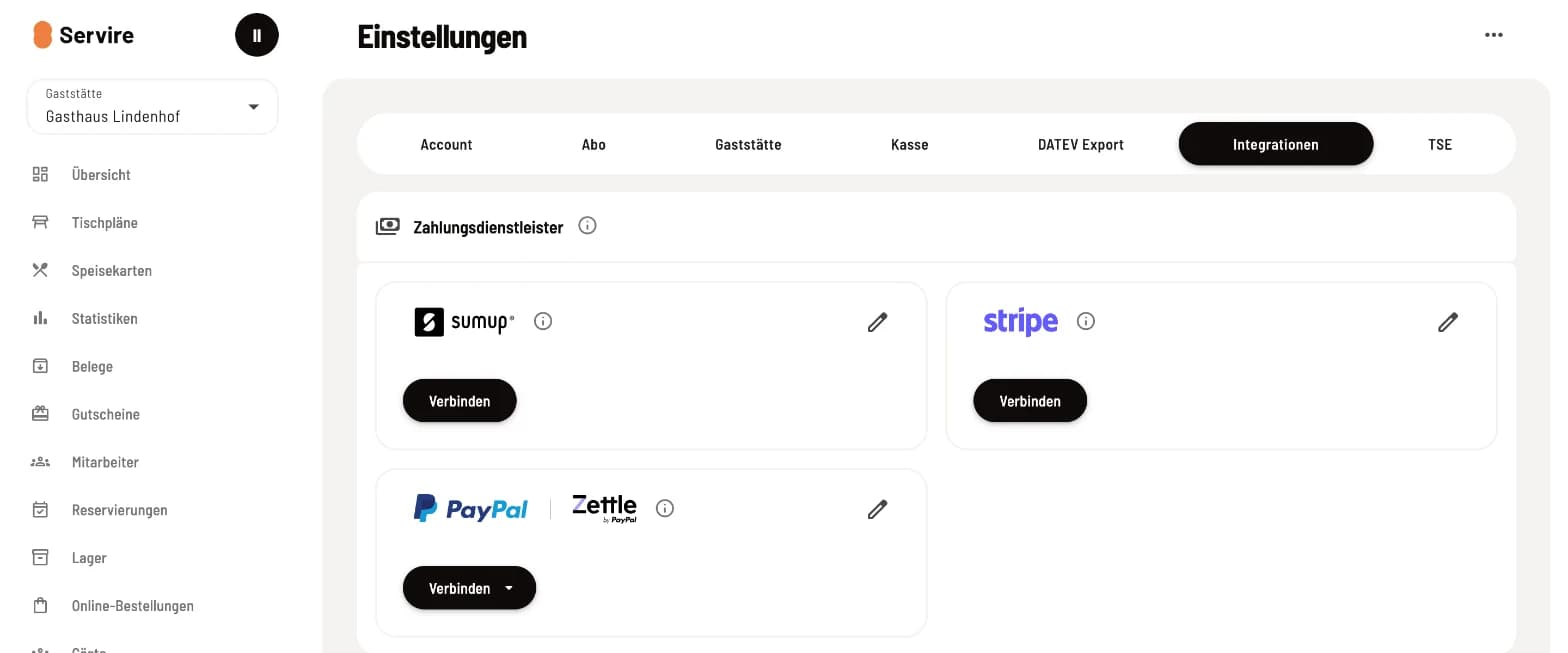
Click Connect
In the Web desk , open Settings in the bottom left corner and select the Integrations tab. Click Connect on the Stripe card. You will be taken to a Stripe page.
Your information at Stripe
Stripe will ask for your details and information about your business once. If you interrupt, you can continue later in the Web desk : via Connect or in the Stripe dialog via Reconnect.
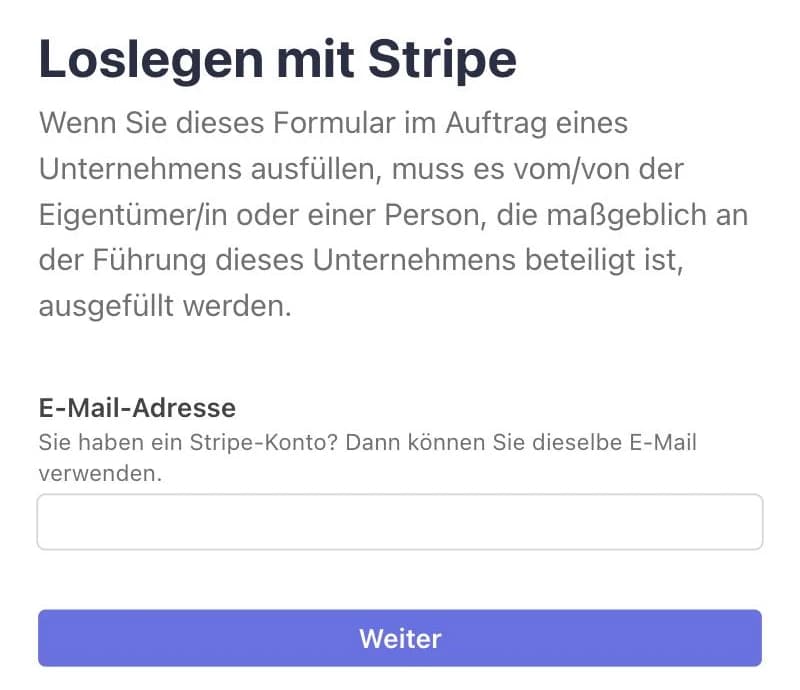
Step 1 of 12
Enter your email address
Enter the email address you will use to log in to Stripe in the future and click Next. If you already have a Stripe account, use the same address.
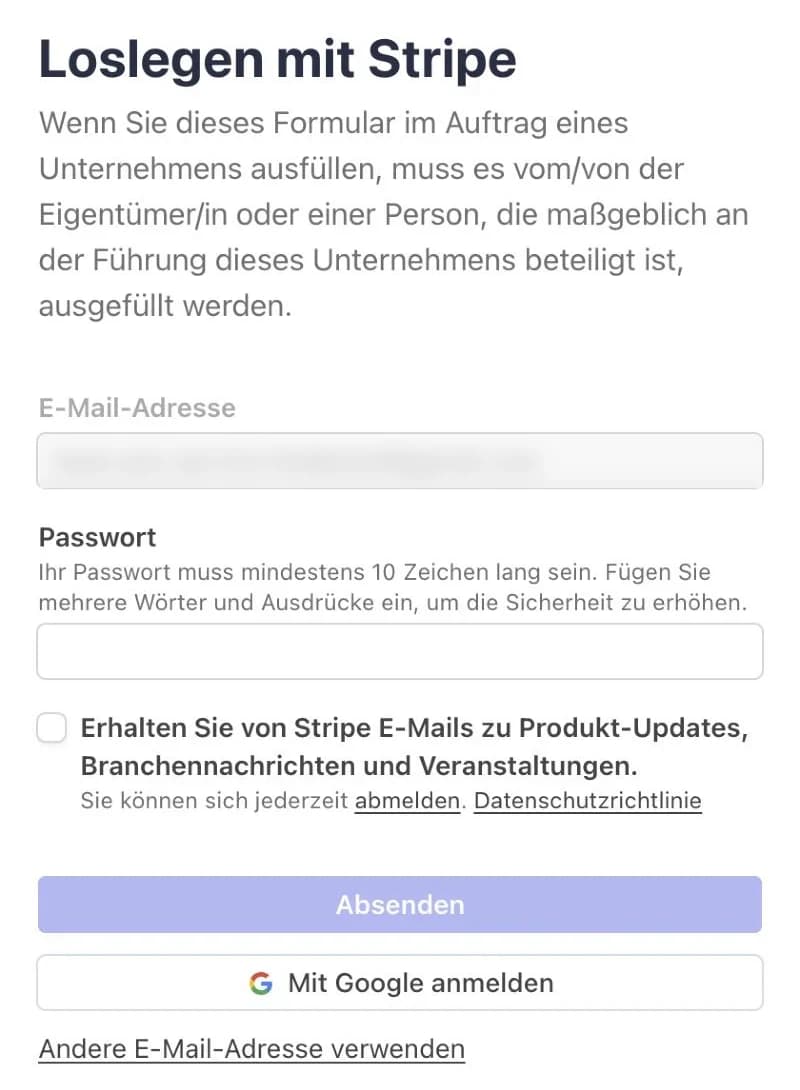
Step 2 of 12
Set password
Choose a password with at least 10 characters and click Submit. This will give you your own Stripe account where you can view payments, fees, and payouts.
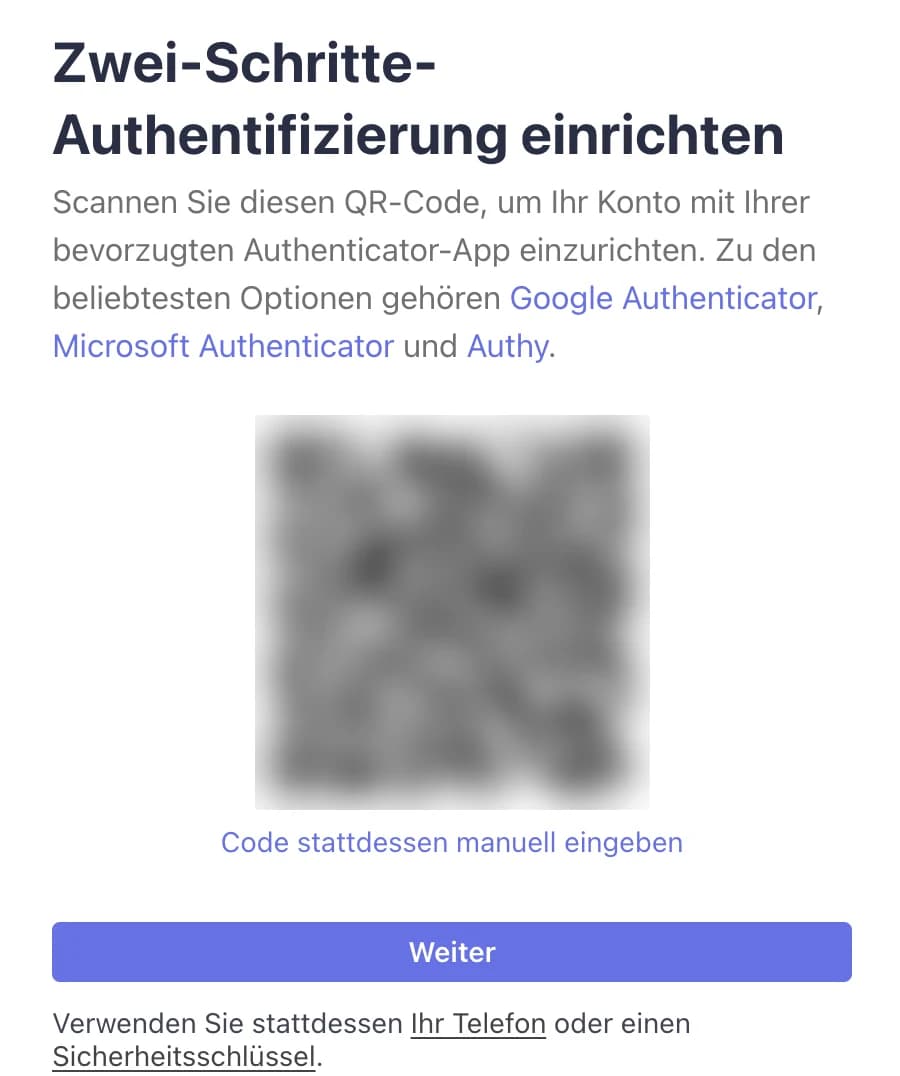
Step 3 of 12
Set up two-step verification
Scan the QR code with an authenticator app or select Your Phone below for a code via SMS. Stripe will then display a security code: Write it down and keep it safe.
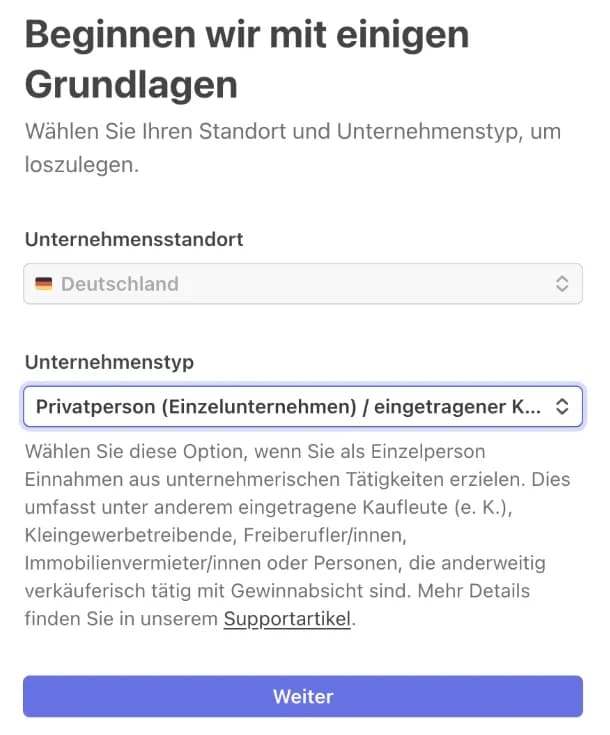
Step 4 of 12
Select company type
Under Company Type, select the legal form of your business, for example Private Individual (Sole Proprietorship) / Registered Merchant, and click on Next.
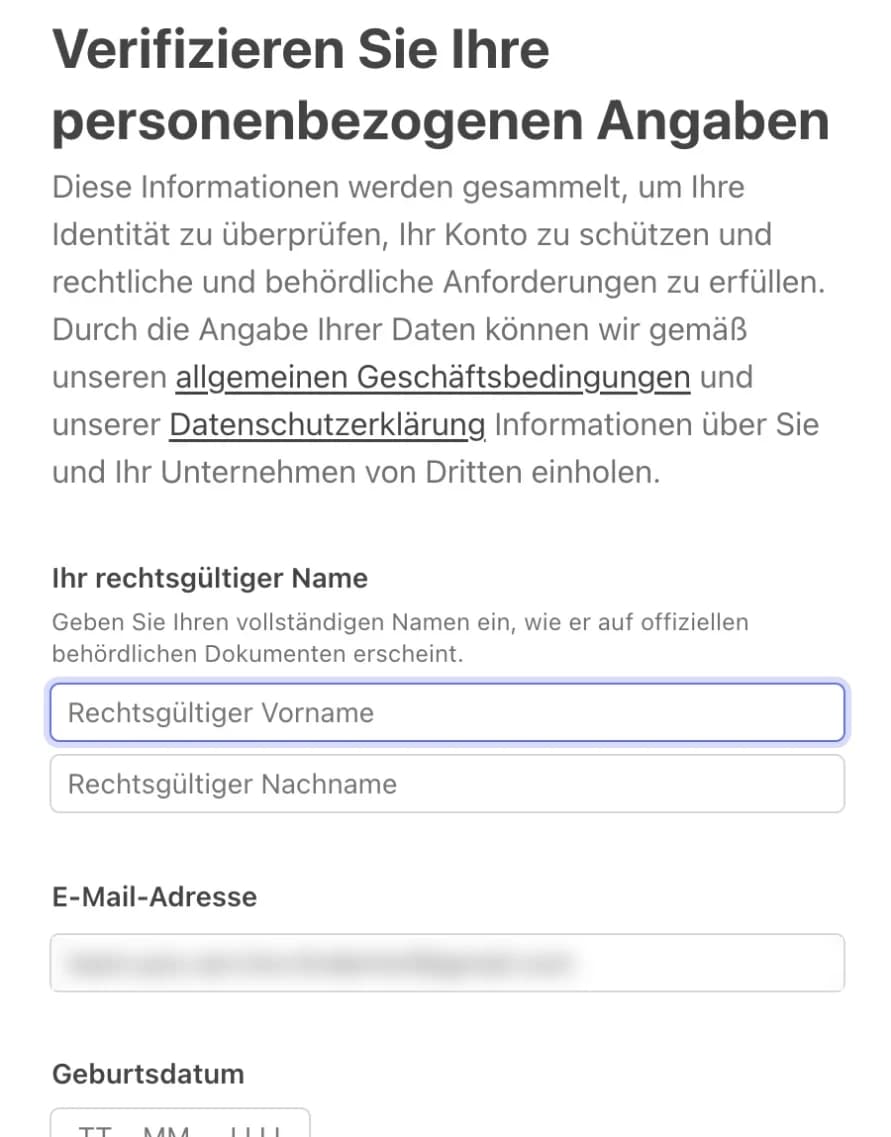
Step 5 of 12
Personal Information
Enter your name and date of birth exactly as they appear on your ID. Also include your home address and phone number.
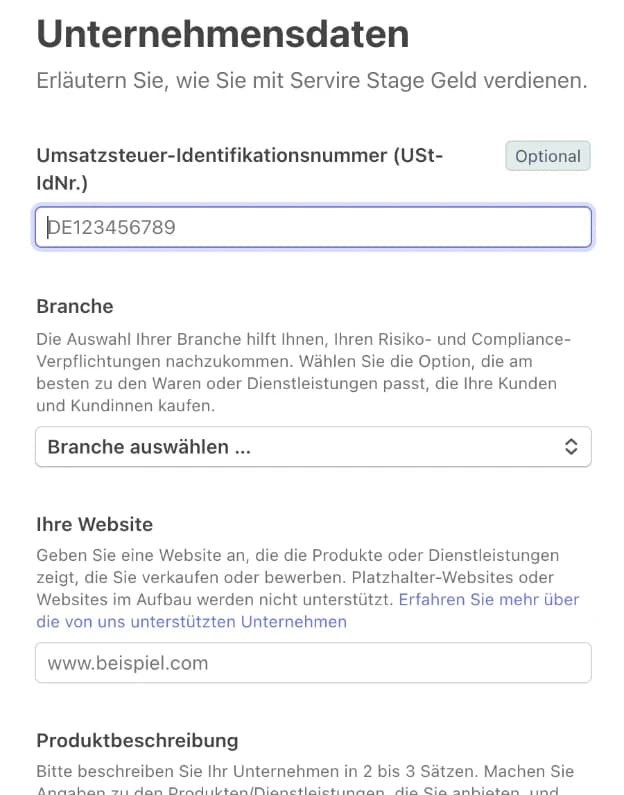
Step 6 of 12
Company data
Under Industry, select Restaurants from the Food and Drink category. Enter your business website and describe what you offer in two or three sentences. Providing a VAT ID number is optional.
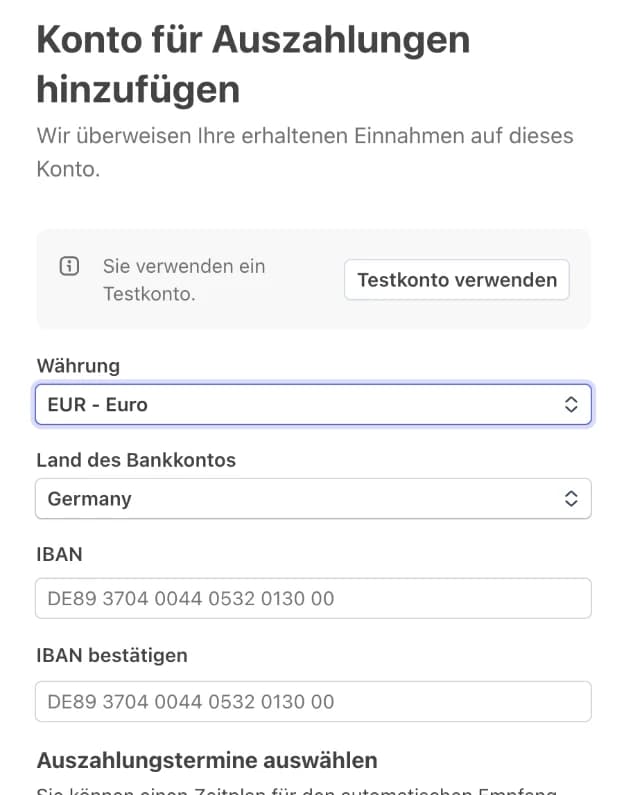
Step 7 of 12
Bank account for withdrawals
Enter your business account IBAN twice. Stripe will transfer your card transactions to this account.
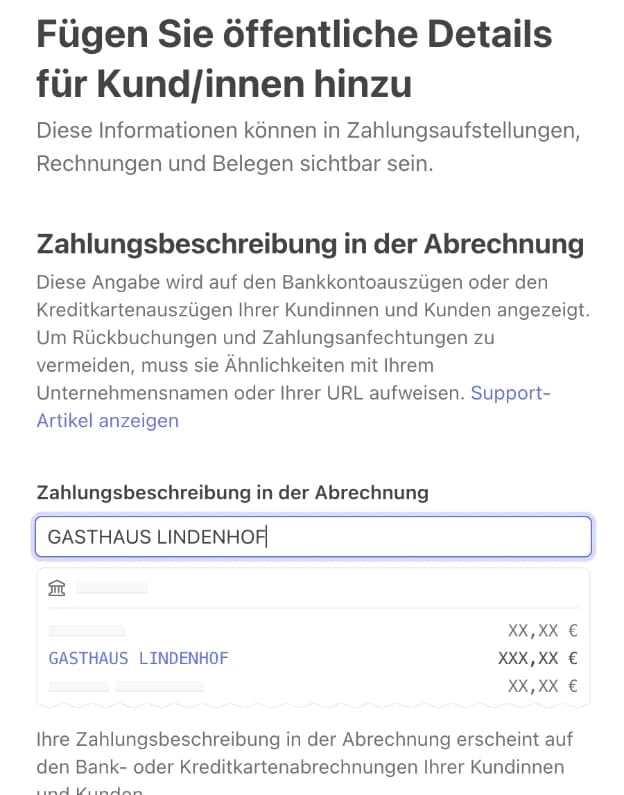
Step 8 of 12
Name on the bank statement
Under Payment Description on the Statement, you'll see what your guests will see on their bank statement. Include your restaurant's name so they can easily identify the payment. Further down, provide a phone number for any questions.
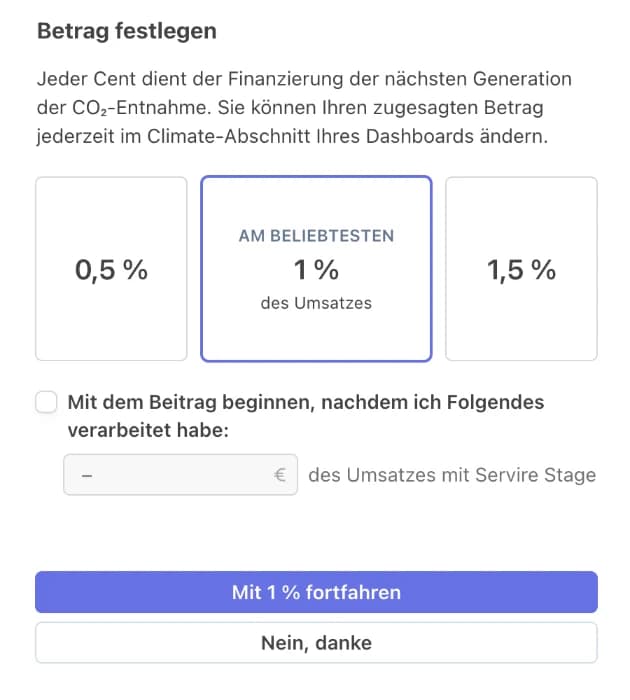
Step 9 of 12
Decline extras
Stripe then offers three extras that you don't need for checkout. Fraud Protection: Click on Use basic protection with Lite (included) below; higher levels cost extra per transaction. Climate Contribution: Click on No, thanks, otherwise you'll be contributing a portion of your revenue. Tax Calculation: Click on Not now.
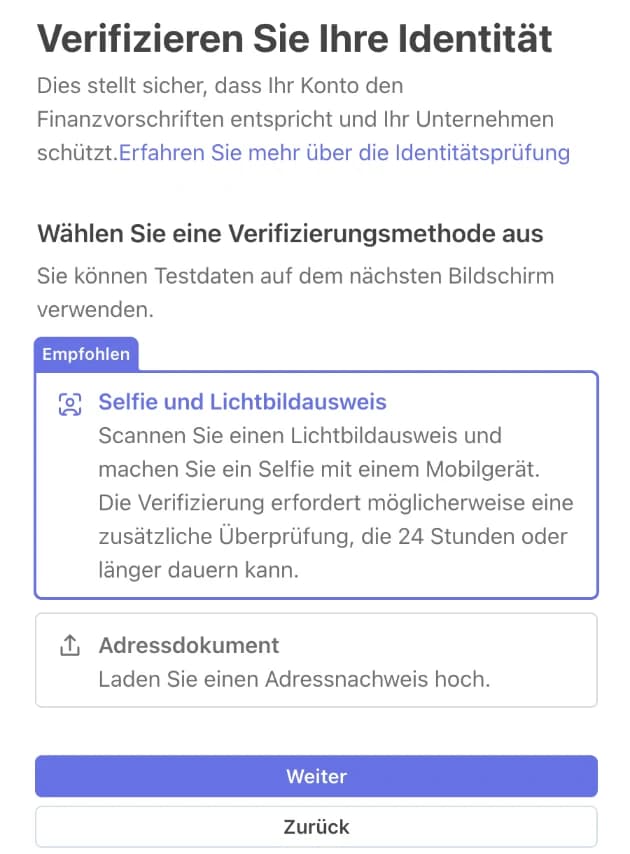
Step 10 of 12
Confirm identity
Select Selfie and photo ID and click Next.
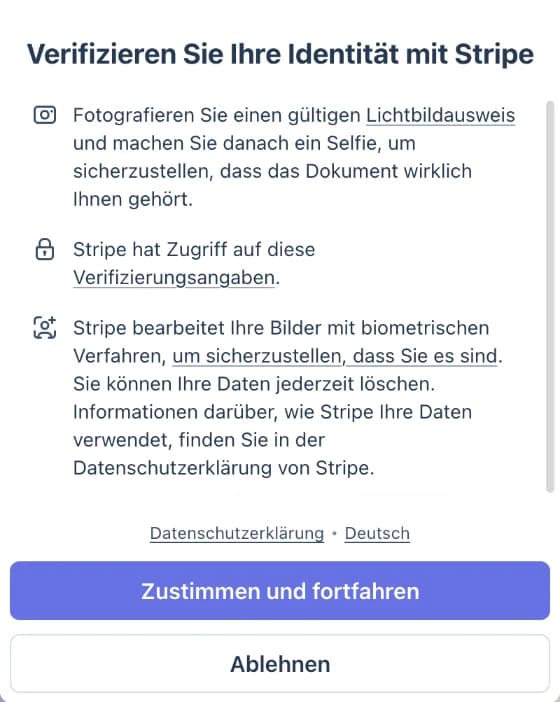
Step 11 of 12
ID and selfie
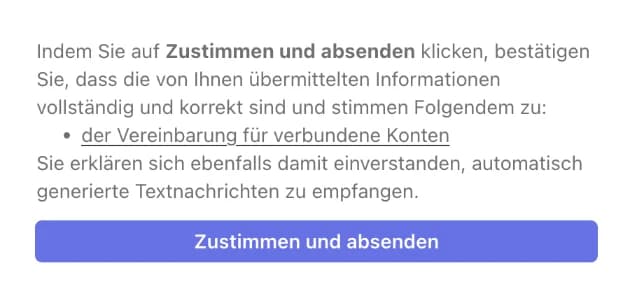
Click on Agree and continue. Use your smartphone to photograph your ID and take a selfie. The verification process can take up to 24 hours.
Step 12 of 12
Submit
Finally, Stripe displays all the information on one page. If anything is missing, you'll see Edit or Verify. Click Agree and submit. You'll automatically be returned to the Web desk .
Back at the Web desk
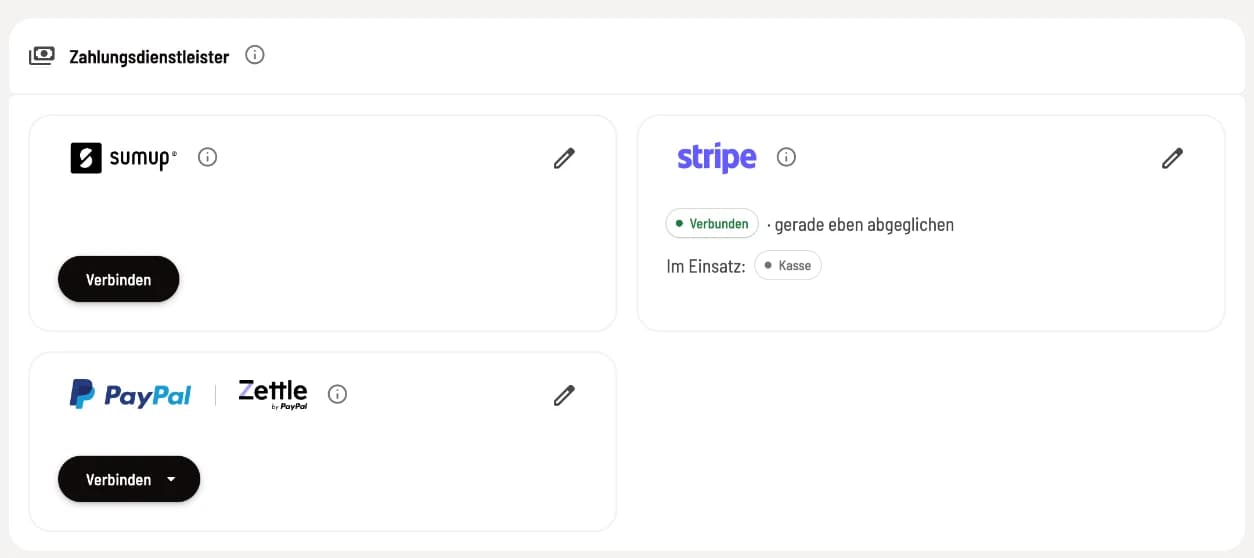
Step 1 of 2
Check connection
The Stripe card shows Connected and In use: POS. If Stripe is still verifying your information, it will say Setup required. You can start accepting payments as soon as Stripe has finished.
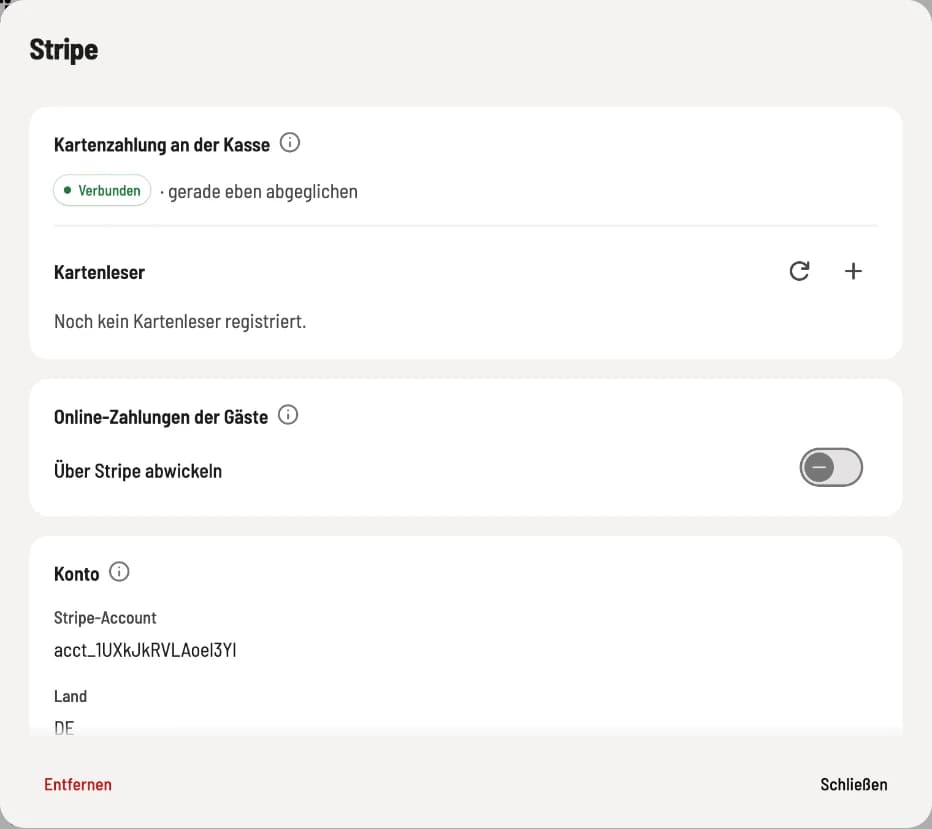
Step 2 of 2
Stripe settings
The pen icon on the card opens the settings. Servire has already configured Stripe as the payment method for the POS system. Your card readers will appear later under Card Readers. If you want guests to also pay online via Stripe (guest orders, voucher shop, Max plan), activate Process via Stripe.
Pair card reader in the POS app
Preparing the reader: Switch on the Stripe Reader S700. Swipe from the left edge of its screen to the right, tap on Settings, and enter the admin PIN 07139. Connect the reader to your Wi-Fi network and display the registration code (pairing code), for example, "puppies-plug-could".
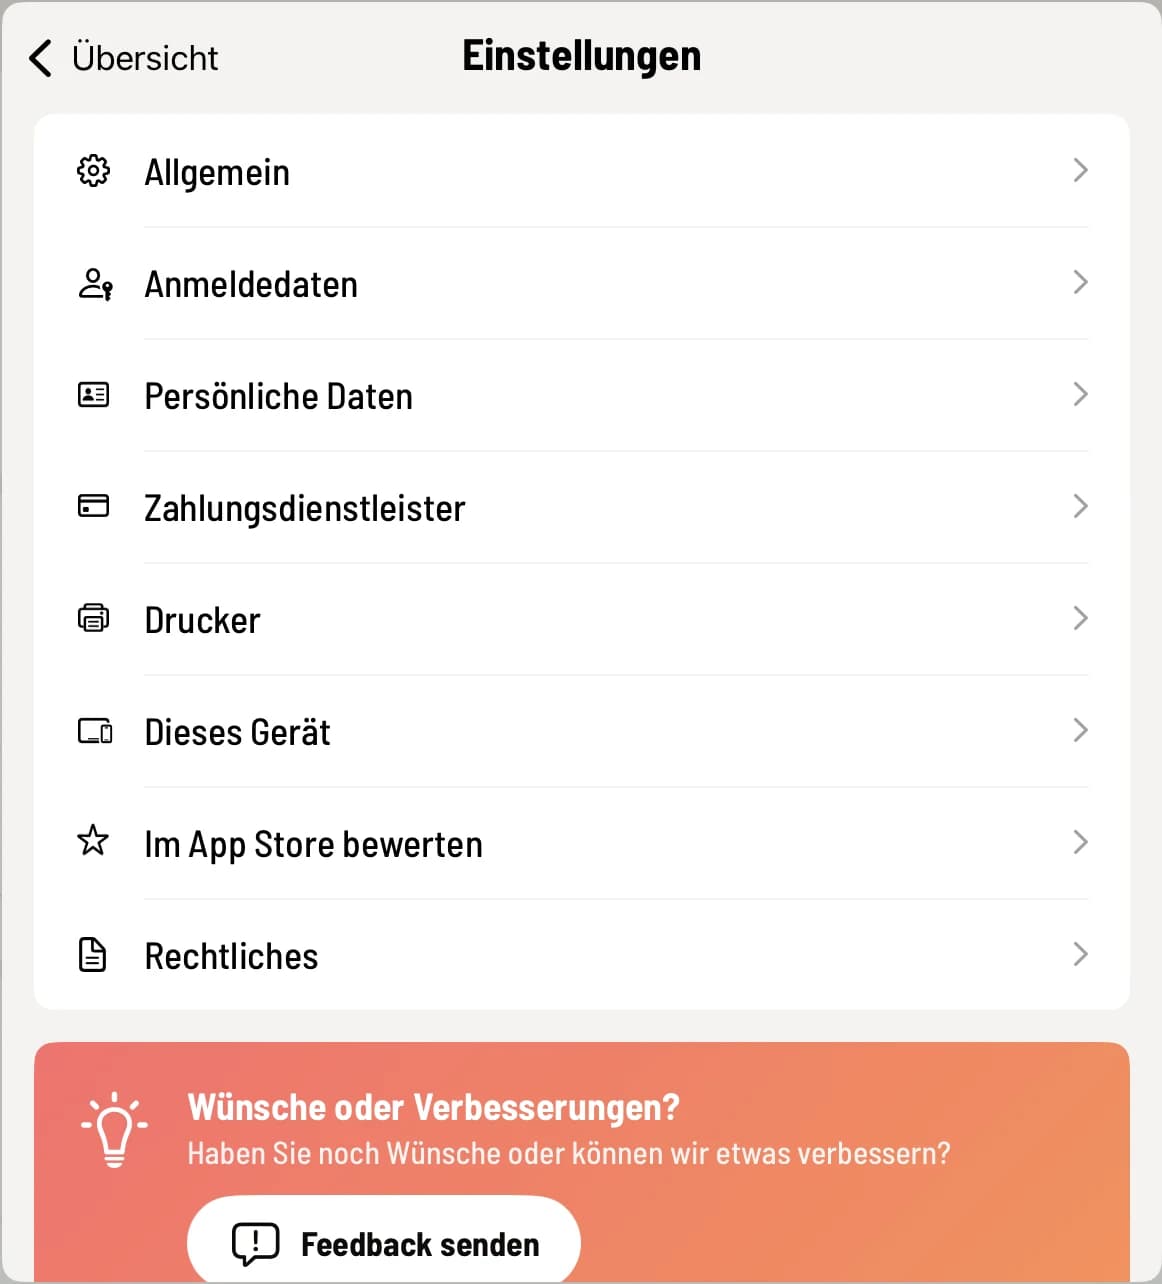
Step 1 of 4
Open payment service providers
In the POS app, tap the house icon to open the overview. Select Settings and then Payment Providers.
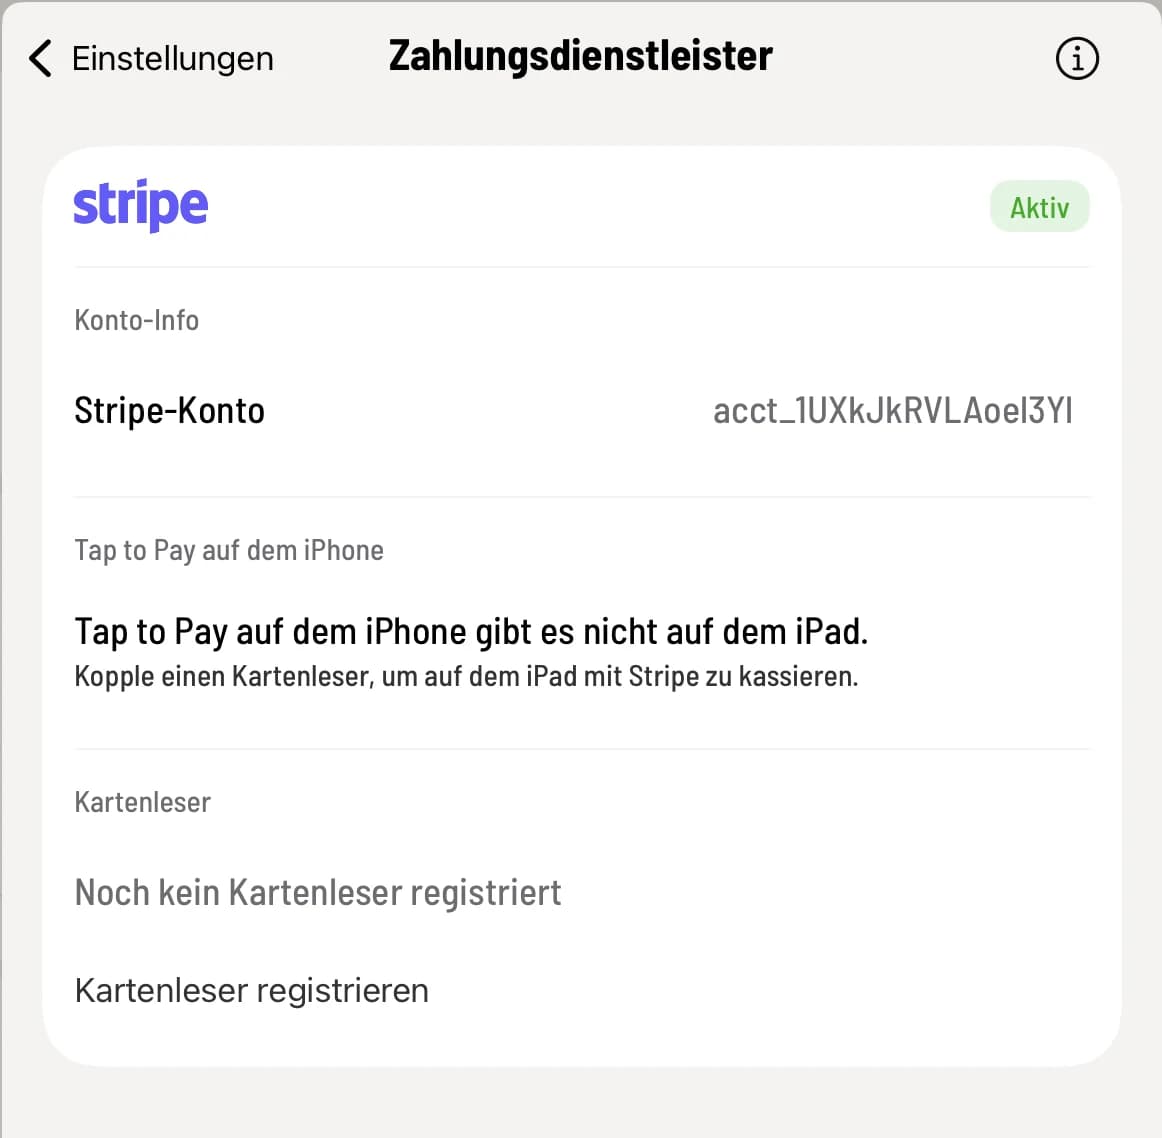
Step 2 of 4
Register card readers
The Stripe card is set to Active. Under Card Reader it still says No card reader registered yet. Tap on Register card reader.
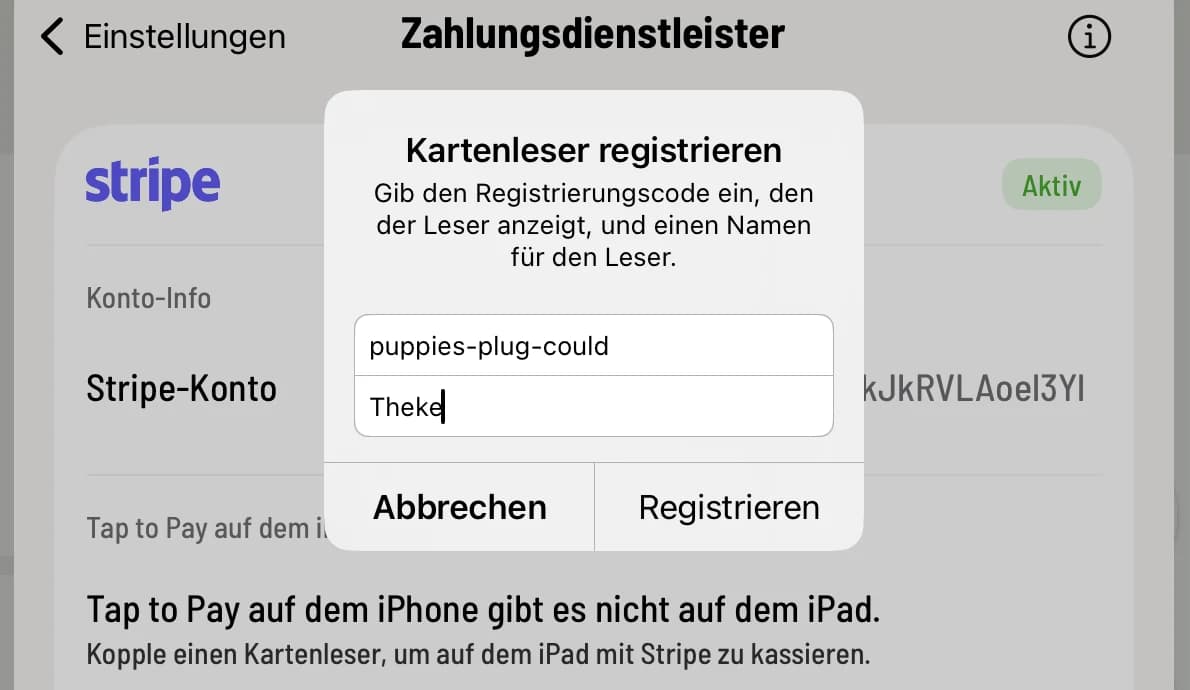
Step 3 of 4
Enter the code
Exactly enter the registration code from the reader's display and give the reader a name, such as "counter". Tap Register.
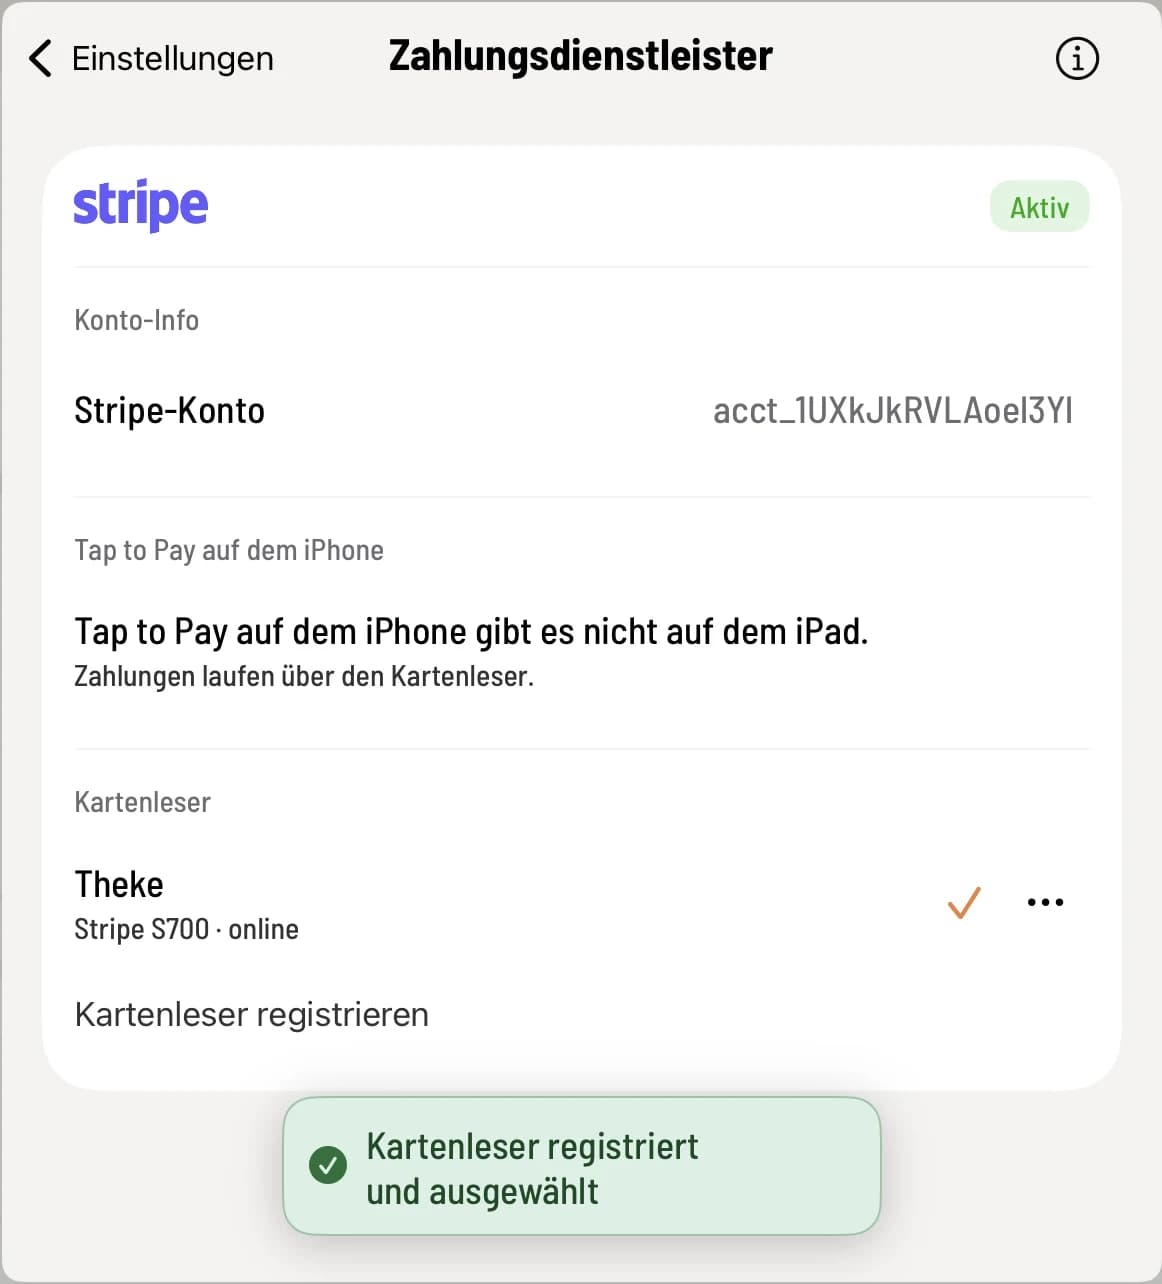
Step 4 of 4
Ready
The app reports card reader registered and selected. The reader is listed by name and online. The checkmark indicates: This device is collecting payments via this reader.
The card reader belongs to the restaurant, not the device. On each additional cash register, simply tap its row in the same list: Register and remove card readers.
Card payment
When settling the payment, select Stripe as the payment method. The amount appears on the reader, and the guest holds their card to it: Pay by card. On iPhones and Android devices with NFC, it also works without a reader: Card payment directly on the device (Tap to Pay). Tap to Pay takes priority there; if such a device is to process payments via the reader, deactivate Tap to Pay.